In this tutorial we are going to create a simple ASP.NET 5 web application on Mac, use SignalR to push events from server to connected clients and then deploy to Azure through a git repository.
What is ASP.NET 5?
ASP.NET 5 is a new open-source and cross-platform framework for building modern cloud-based Web applications using .NET. It consists of modular components with minimal overhead, so you retain flexibility while constructing your solutions.
In short, with ASP.NET 5 you gain the following fundamental improvements:
- New light-weight and modular HTTP request pipeline
- Ability to host on IIS or self-host in your own process
- Built on .NET Core, which supports true side-by-side app versioning
- Ships entirely as NuGet packages
- Integrated support for creating and using NuGet packages
- Single aligned web stack for Web UI and Web APIs
- Cloud-ready environment-based configuration
- Built-in support for dependency injection
- New tooling that simplifies modern web development
- Build and run cross-platform ASP.NET apps on Windows, Mac and Linux
- Open source and community focused
For more details, you can visit this page.
Installing ASP.NET 5
In order to install ASP.NET 5 and start working on Mac you have two options:
- Install ASP.NET 5 with Visual Studio Code
- Install Mono for OS X (required by Visual Studio Code)
- Install Visual Studio Code
- Install ASP.NET 5 for Mac OS X
- Install ASP.NET from the command-line
- Run the following `curl` command, to install .NET Version Manager (DNVM)
curl -sSL https://raw.githubusercontent.com/aspnet/Home/dev/dnvminstall.sh | DNX_BRANCH=dev sh && source ~/.dnx/dnvm/dnvm.sh - Run `dnvm list` to show the DNX versions installed
- Use DNVM to install DNX for .NET Core:
dnvm upgrade -r coreclr
- Run the following `curl` command, to install .NET Version Manager (DNVM)
Yeoman and generator-asp.net
Yeoman helps you kickstart new projects, prescribing best practices and tools to help you stay productive. To do so, it provides a generator ecosystem. A generator is basically a plugin that can be run with the `yo` command to scaffold complete projects or useful parts.
To kickstart a new ASP.NET 5 app, you need to install the generator-aspnet, as per the following steps:
- `npm install -g yo` to install Yeoman
- `npm install -g generator-aspnet` to install a new project generator for ASP.NET apps
- Run: `yo aspnet` to start with a new ASP.NET App
- select Web Application
- `cd` to the new app folder
- `dnu restore` to restore web app’s NuGet packages
Start you application
In order to start the application that has been generated through Yeoman, you need to run the `dnx web` command.
The web command has been defined in the project.json file, the role of which is to:
- define package metadata,
- state project dependencies, and
- declare which frameworks the app will be built for.
If you point your browser to `http://localhost:5000` you will see a simple “Hello World” page.
SignalR
ASP.NET SignalR is a library for ASP.NET developers that simplifies the process of adding real-time web functionality to applications. Real-time web functionality is the ability to have server code push content to connected clients instantly, as it becomes available, rather than having the server wait for a client to request new data. SignalR uses the WebSocket transport where available, and falls back to older transports where necessary.
You can read more details on SignalR here.
To add SignalR in your web application, you need to add the following dependencies in the `project.json` file.
"Microsoft.AspNet.WebSockets.Server": "1.0.0-rc1-final"
"Microsoft.AspNet.SignalR.Server": "3.0.0-rc1-final"
When you run `dnu restore` to restore the packages above you might come to the following error:
`Unable to locate Dependency Microsoft.AspNet.SignalR.Server >= 3.0.0-rc1-final`
To overcome this error you need to manually specify the NuGet package sources in a `NuGet.config` file, which will be stored in your app’s root folder.
<?xml version="1.0" encoding="utf-8"?>
<configuration>
  <packageSources>
    <add key="aspnetmaster" value="https://www.myget.org/F/aspnetmaster/api/v3/index.json" />
    <add key="AspNetVNext" value="https://www.myget.org/F/aspnetvnext/api/v2" />
    <add key="nuget" value="https://api.nuget.org/v3/index.json" />
  </packageSources>
</configuration>
After specifying NuGet package sources, re-run `dnu restore` to restore packages defined in your `project.json` file.
Register SignalR
To make SignalR available in your application, you need to register it in your Startup file.
// This method gets called by the runtime. Use this method to add services to the container.
// For more information on how to configure your application, visit http://go.microsoft.com/fwlink/?LinkID=398940
public void ConfigureServices(IServiceCollection services)
{
    // other configuration

    services.AddSignalR(options =>
    {
        options.Hubs.EnableDetailedErrors = true;
    });
}

// This method gets called by the runtime. Use this method to configure the HTTP request pipeline.
public void Configure(IApplicationBuilder app, ILoggerFactory loggerFactory)
{
    // other configuration

    // Enable WebSockets & SignalR
    app.UseWebSockets();
    app.UseSignalR();
}
Create a SignalR Hub
The SignalR API comprises two models for the communication between clients and servers: Persistent Connections and Hubs.
A Hub is a more high-level pipeline built upon the Connection API that allows your client and server to call methods on each other directly. SignalR handles the dispatching across machine boundaries as if by magic, allowing clients to call methods on the server as easily as local methods and vice versa. Using the Hubs communication model will be familiar to developers who have used remote invocation APIs such as .NET Remoting. Using a Hub also allows you to pass strongly typed parameters to methods, enabling model binding.
using System;
using Microsoft.AspNet.SignalR;
using Microsoft.AspNet.SignalR.Hubs;

namespace WebApplication.Hubs
{
    [HubName("system")]
    public class SystemHub : Hub
    {
        private Random random = new Random();

        public void GenerateMessage()
        {
            Clients.All.notify($"{DateTime.Now.ToString("HH:mm:ss")}: Random Message id: {random.Next(1, 100)}");
        }
    }
}
In this hub, we have created a `GenerateMessage` method that, when called from any connected client, it will send back to all connected clients a message with a random id.
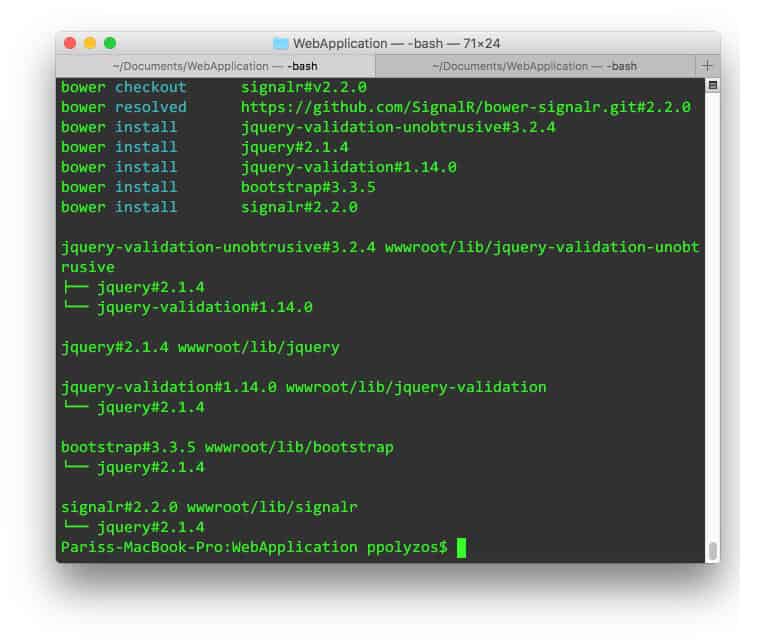
Use Bower to install SignalR client libraries
Bower is a package manager for Javascript libraries that allows you to define, version and retrieve your dependencies.
To install SignalR client libraries you need to run `bower install signalr`
To establish a connection between client and server with the use of SignalR, you need to include the following scripts in your shared `_Layout.cshtml` file:
<script src="https://ajax.aspnetcdn.com/ajax/jquery/jquery-2.1.4.min.js"
                asp-fallback-src="~/lib/jquery/dist/jquery.min.js"
                asp-fallback-test="window.jQuery">
<script src="~/lib/signalr/jquery.signalR.js"></script>
<script src="signalr/hubs"></script>
`signalr/hubs` script is generated dynamically by the runtime on the first request and then cached.
These references must be included in this order: jQuery first, SignalR core after that, and SignalR proxies last.
Connect to SignalR server and request messages
Now, you need to connect to SystemHub and request a server generated message:
In Index.cshtml file you add the following script:
@section scripts
{
    <script type="text/javascript">
        $(function () {
            $.connection.hub.logging = true;
            var systemHub = $.connection.system;

            var messages = $('#messages');
            systemHub.client.notify = function (msg) {
                messages.append(['<span>', msg, '</span><br />'].join(''));
                console.log(msg);
            }

            console.log('Request to connect');
            $.connection.hub.start().done(function() {
                 systemHub.server.generateMessage();
                 systemHub.server.generateMessage();
                 systemHub.server.generateMessage();
                 systemHub.server.generateMessage();
            });
        });
    </script>
}
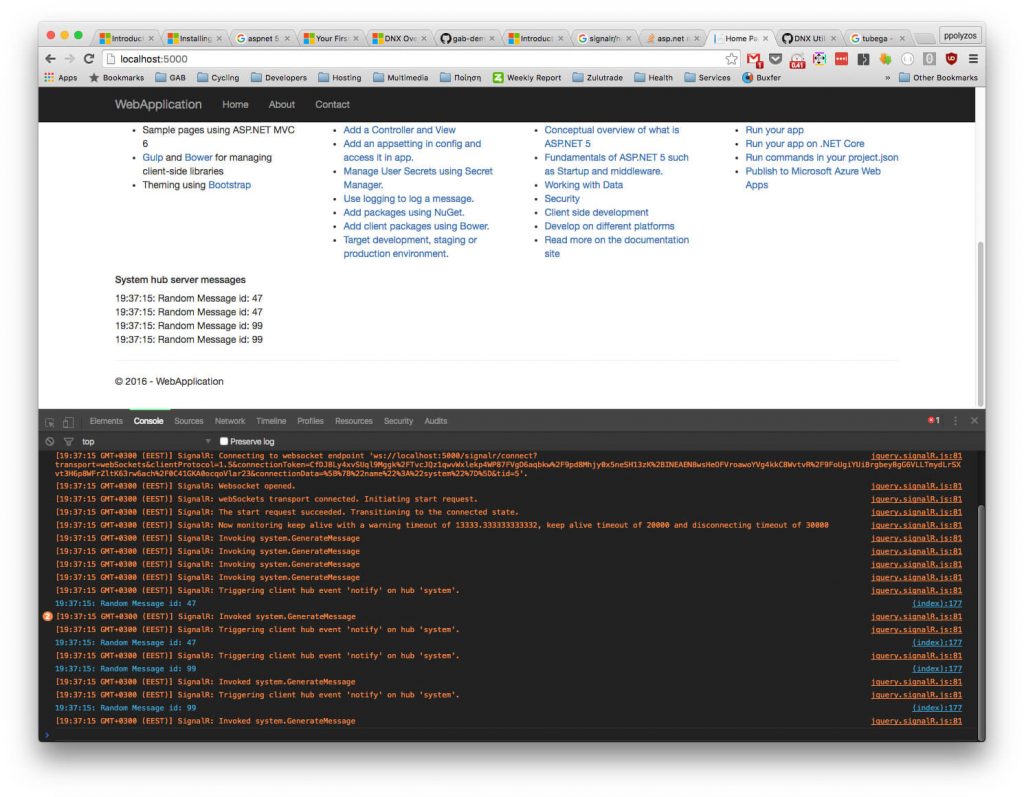
And the result is:
Publish On Azure
In order to publish your project to Azure websites, you have multiple options; however, in this tutorial we will describe how to use DNX Utility (dnu) to publish this app and then upload it to Azure though KUDU service.
Run: `dnu publish –out ~/Documents/published-webapp –no-source –runtime active`
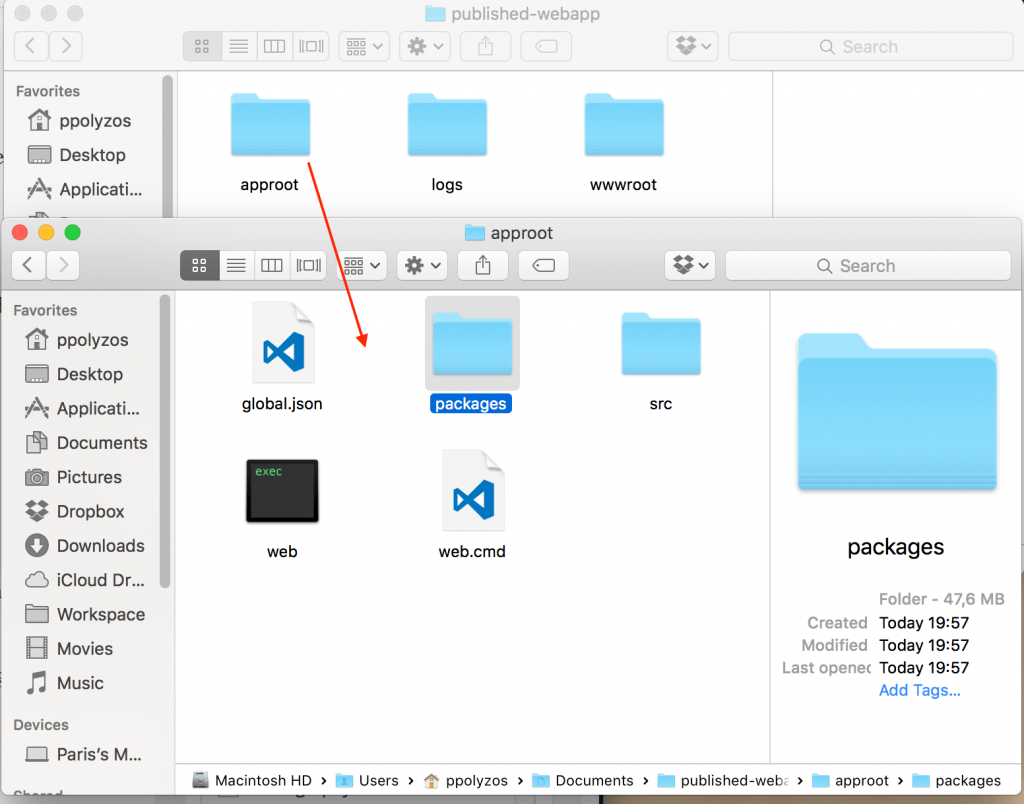
The publish command will package your application into a self-contained directory that can be launched. It will create the following directory structure:
- approot/
- approot/packages
- approot/appName
- approot/web.cmd
The packages directory contains all packages that your application needs to run.
The appName (web) directory will contain all of your application’s code, if you have project references they will appear as their own directory with code at this level as well.
The publish command will also hoist any commands from your project.json file into batch files. Running any of these commands is the same as running dnx <command>.
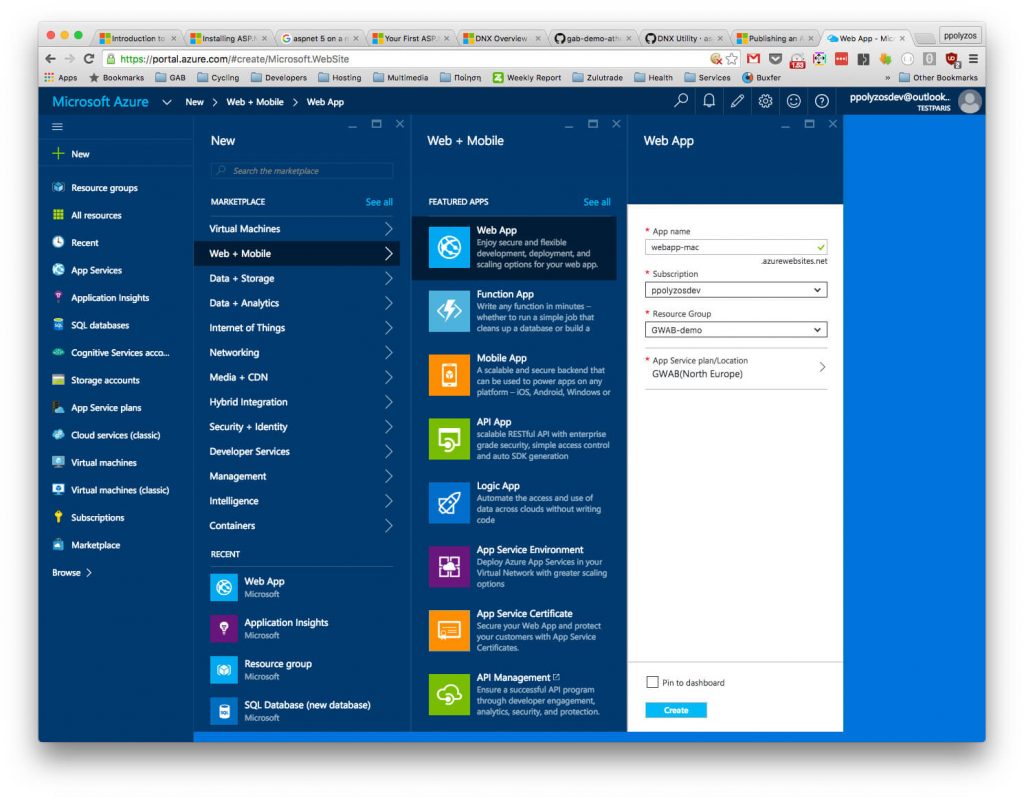
Create an Azure WebApp
From Azure portal create a new WebApp:
Now, head over to `https://webapp-mac.scm.azurewebsites.net/DebugConsole`, click on `site` and then upload a zip file with the contents of `published-webapp` folder by dragging and dropping on kudu site:
Then, from the command line run `unzip published-webapp.zip` and your app is ready.
Note
When in Azure, in order to connect to SignalR server, using WebSockets, please use `https`.
If you need to automatically redirect your app to https when in Production, you can use RequireHttps filter when configuring services in your Startup file:
// This method gets called by the runtime. Use this method to add services to the container.
// For more information on how to configure your application, visit http://go.microsoft.com/fwlink/?LinkID=398940
public void ConfigureServices(IServiceCollection services)
{
    // ... other configuration

    services.AddMvc(options =>
        {
            if (!_env.IsDevelopment()) { options.Filters.Add(new RequireHttpsAttribute()); }
        });

    services.AddSignalR(options =>
    {
        options.Hubs.EnableDetailedErrors = true;
    });
}
The source code for this tutorial, with slight modifications, can be found in my GitHub profile in 01.insights-signalr branch