Visual Studio 2017 is now available to download, and one interesting feature thereof is connected services, which enable connections between your app and any service on-premises or in the cloud. In this post we are going to demonstrate how easy it is to connect your asp.net core web app to Application Insights.
“Connected Services” is the new “Add Connected Service” or “Add Service Reference” feature of Visual Studio 2017. A new node called “Connected Services” is available in the Solution Explorer for Web and Mobile project types. Double-clicking this node will open a new full page tab in Visual Studio where you can discover popular Microsoft services you can connect to.
First things first, a few things about Application Insights.
What is Application Insights?
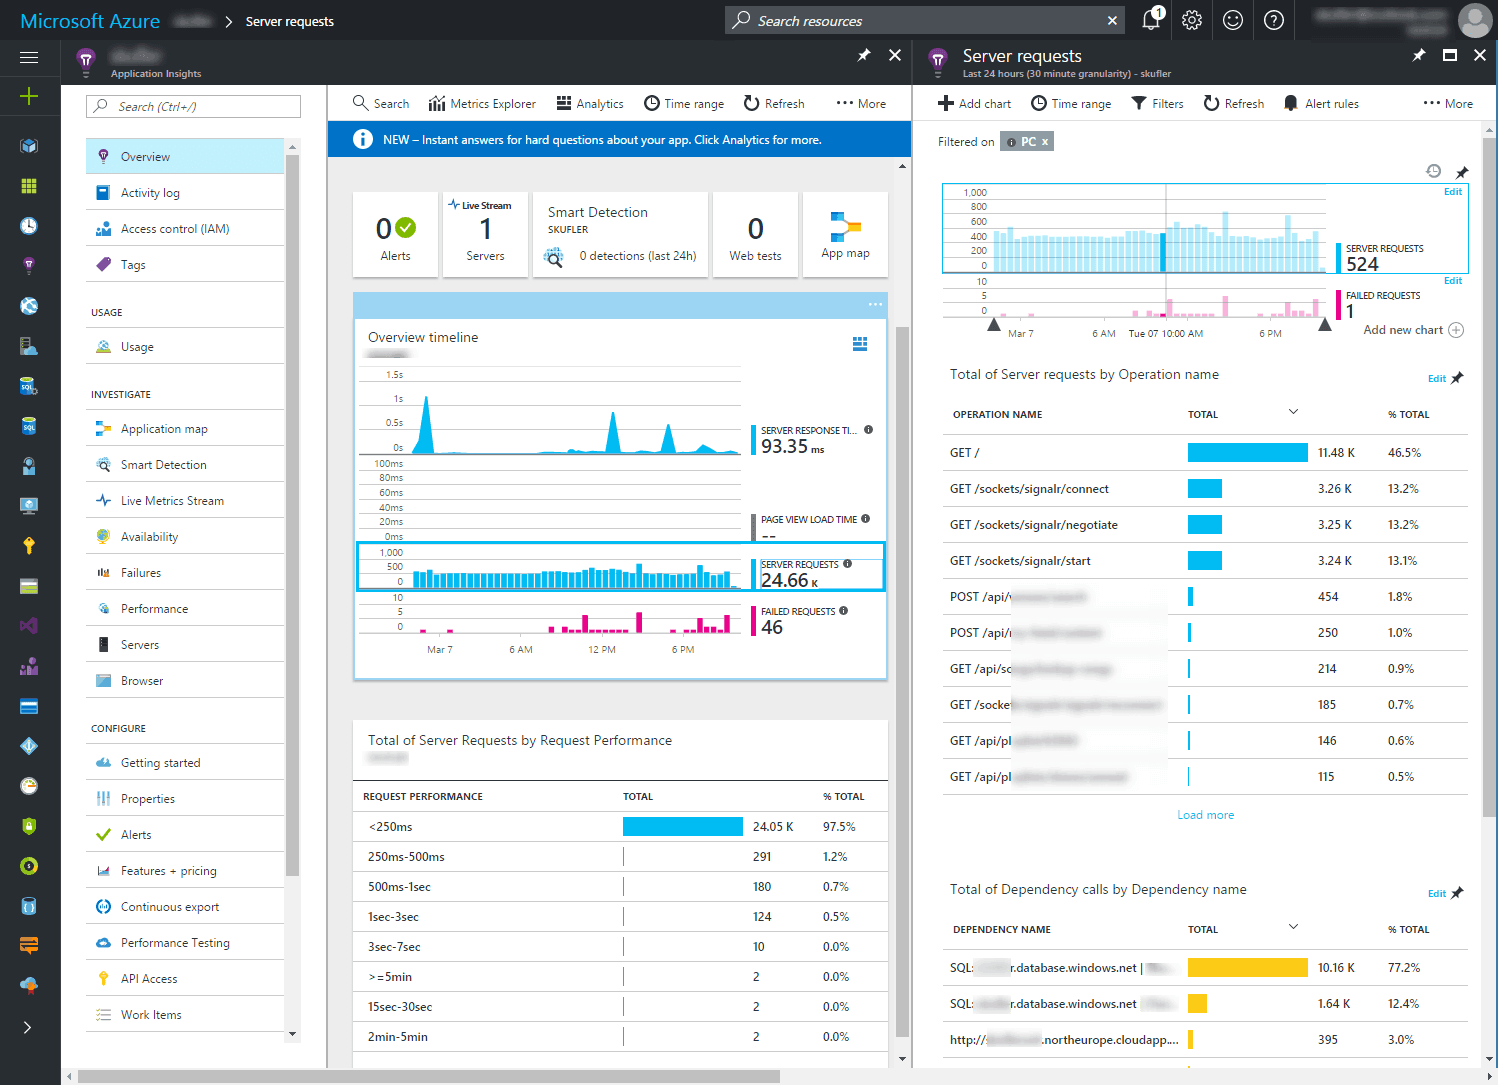
Application Insights is an extensible Application Performance Management (APM) service for web developers on multiple platforms. Use it to monitor your live web application; it will automatically detect performance anomalies, as it includes powerful analytics tools that help you diagnose issues and understand what users actually do with your app. It lets you monitor your web application for availability, performance and usage. With the feedback you get regarding the performance and effectiveness of your app, you can make informed choices about the direction of the design in each development lifecycle.
For more info you can have a look here.
Create an ASP.NET Core App
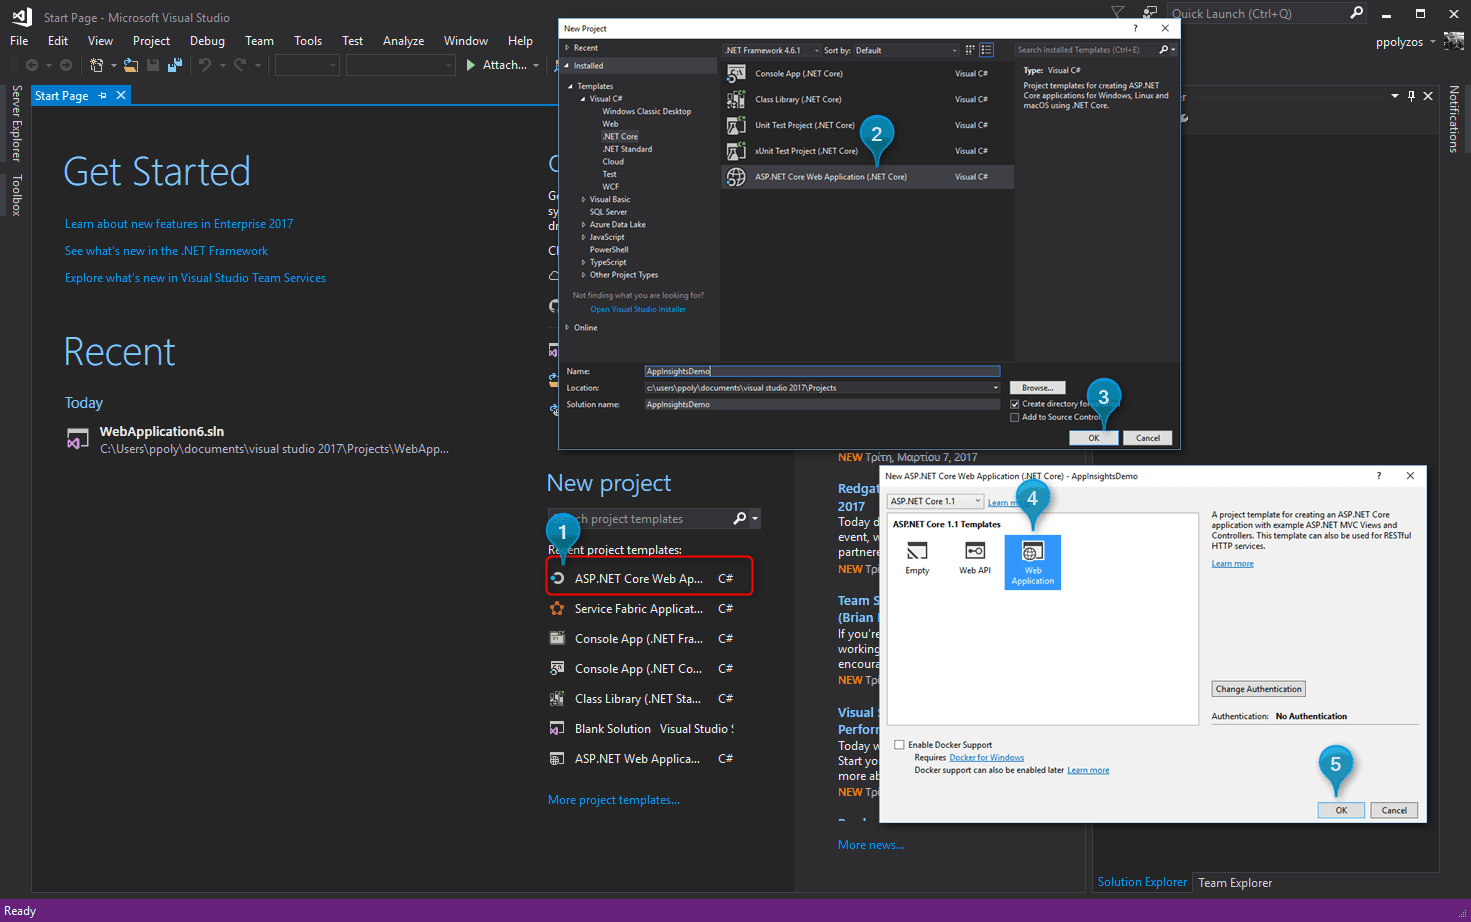
Let’s start by creating an asp.net core web app. To do so, from Start Page, click on ASP.NET Core Web App from recent project templates, select ASP.NET Core Web Application (.NET Core), choose a template for your web app and click OK.
Connected Services and Application Insights
Connected Services, as mentioned above, enable connections between your app and any service on-premises or in the cloud; the list of all available connected services can be found here.
To add one of the supported connected services you can right-click on your Project and select Add Connected Service. Select Application Insights and, from the next dialog, click on the Start Free button to start the registration of Application Insights in your app.

Then, connect your Microsoft Azure account, choose your subscription and resource group and, at the bottom, select whether you want app insights to continue collecting data beyond 1 GB/month or not, and click on Register. A popup will appear displaying the progress of App Insights registration process.
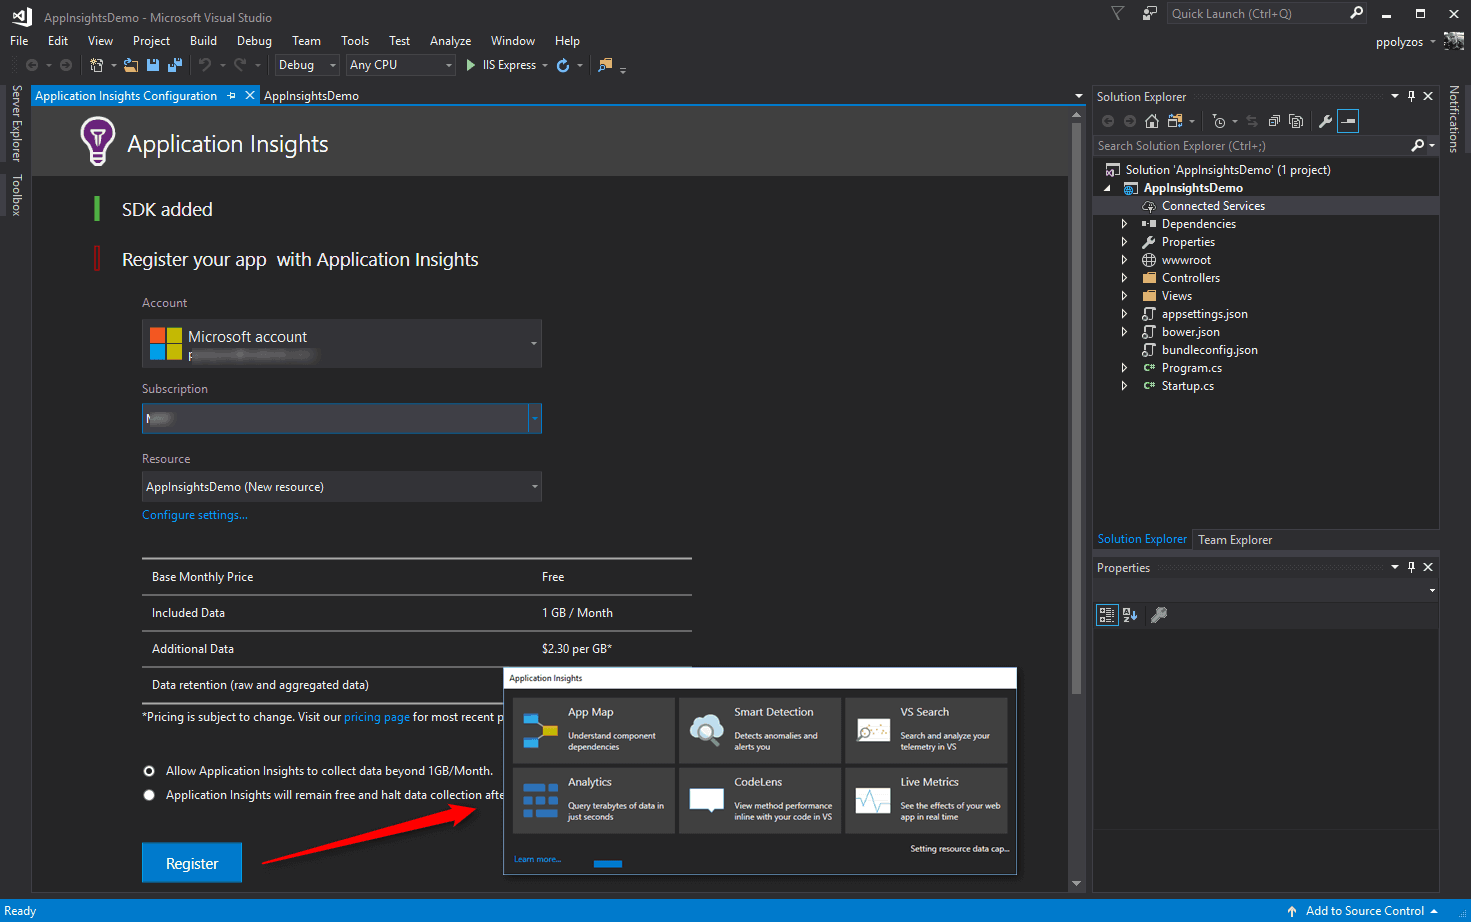
In a few seconds, without having to do anything else, App Insights are setup and ready for use.
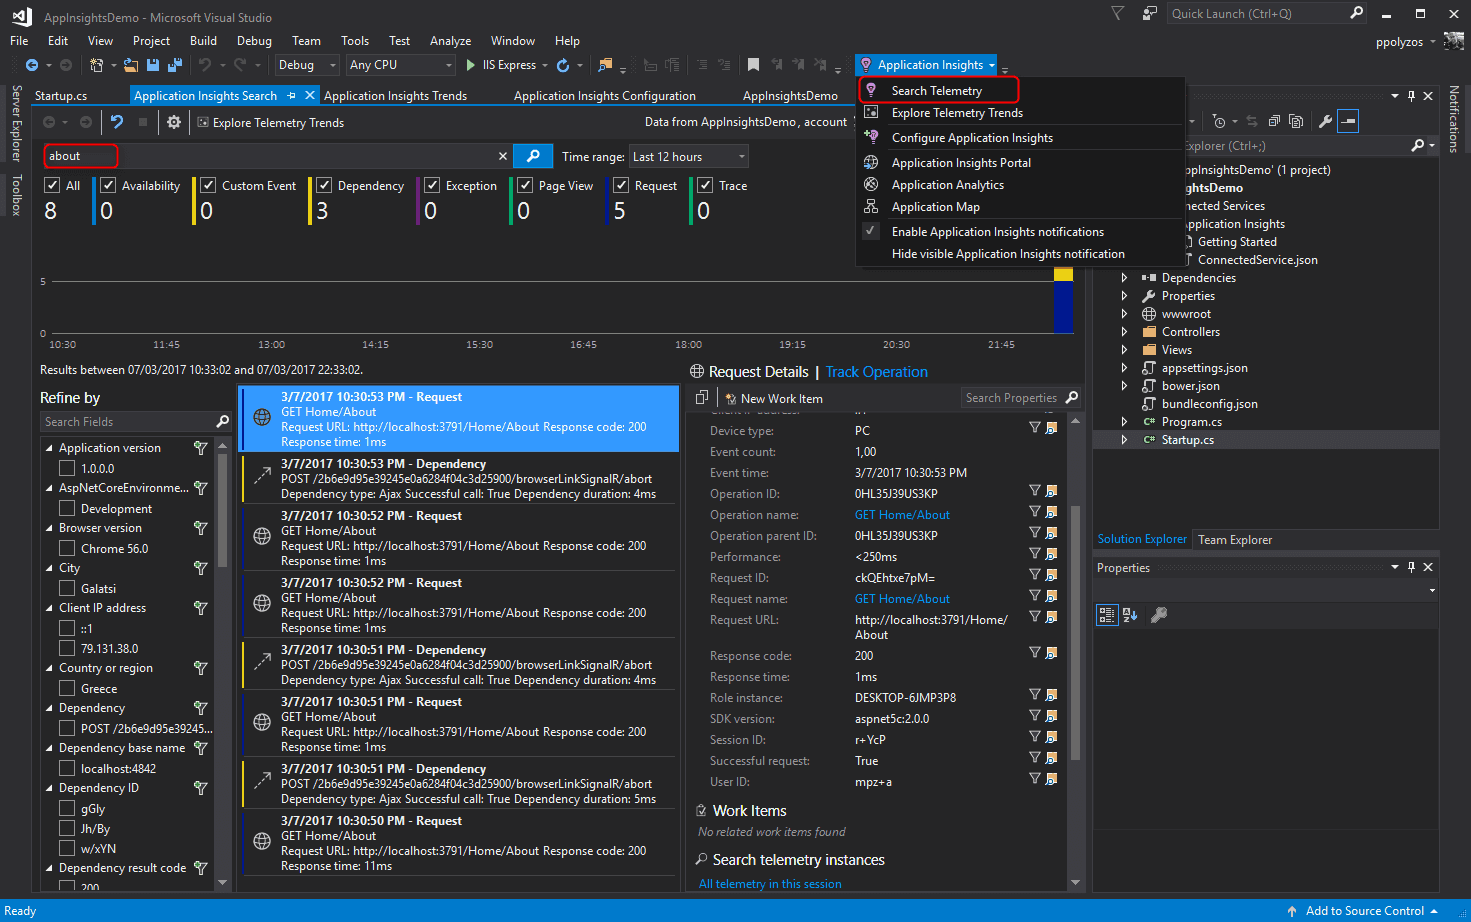
Application Insights Search Telemetry
After launching your application and performing some actions, telemetry data will be available in a couple of seconds from Application Insights Telemetry Search window: