In this tutorial we will use Computer Vision service to analyze an image and determine the accent and dominant color and whether the image is black & white or colored.
Step 1. Create Computer Vision Service
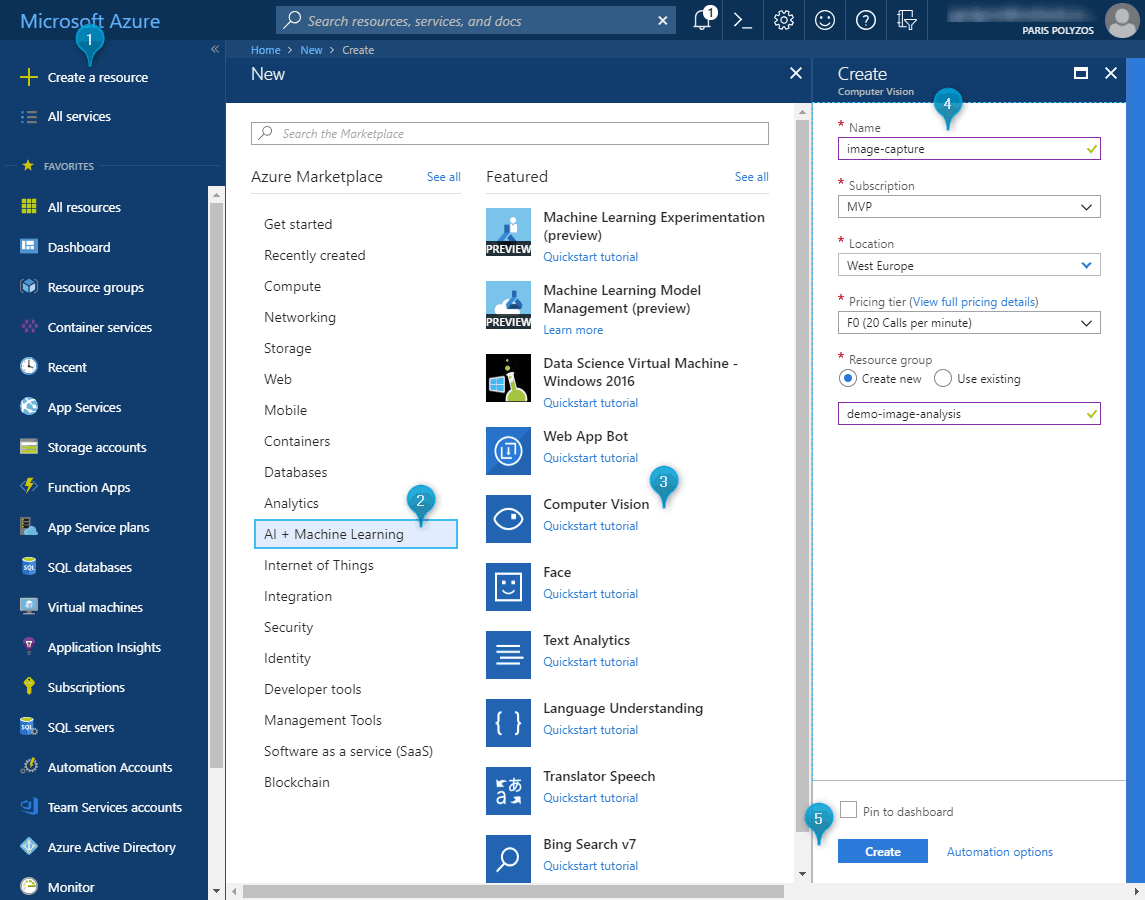
Let’s start by creating the Computer Vision API service. To do so, head over to Azure portal, click on Create Resource link, select AI + Machine Learning, then Computer Vision, fill in the form and click on the Create button.
The Free pricing tier (F0) allows you to send to analyze up to 20 images/minute, so it’s more than enough for our example.
Step 2. Basics (Overview & Keys)
Next in order to use this service we need two things:
- the Endpoint Url which can be found in the overview blade and
- the subscription key in order to access our service


Step 3. Try the service
Now that we have the endpoint url and the subscription key, we can move to the API testing console, based on the location we have selected for our service, e.g. west europe, and now:
- in the query parameters section set the value for the key visualFeatures as Color, which allows you to determine the accent color, dominant color, and whether an image is black&white.
- in the headers section, set the value for Ocp-Apim-Subscription-Key to the subscription key found in the Keys blade of our service.
- in the Request body section specify, in json, the url of an image you want to analyze
{"url":"http://example.com/images/test.jpg"}
and the response of our call would look like this:
{
  "color": {
    "dominantColorForeground": "Grey",
    "dominantColorBackground": "Green",
    "dominantColors": ["Black", "Green"],
    "accentColor": "126F7F",
    "isBwImg": false
  },
  "requestId": "df9cee37-06e8-4208-8926-12cd88809215",
  "metadata": {
    "height": 1080,
    "width": 1920,
    "format": "Jpeg"
  }
}
You can read more about all the things you can do with Computer Vision API following this link