Azure Storage is a cloud storage solution for data storage scenarios and one key service, among others, is Azure Blobs, a scalable object store for text and binary data. A main use is to upload files to it, either as a long term backup solution, or as a way to serve documents, images and videos directly to a browser. To do so, you have many options:
Option 1. Azure Portal (Web)
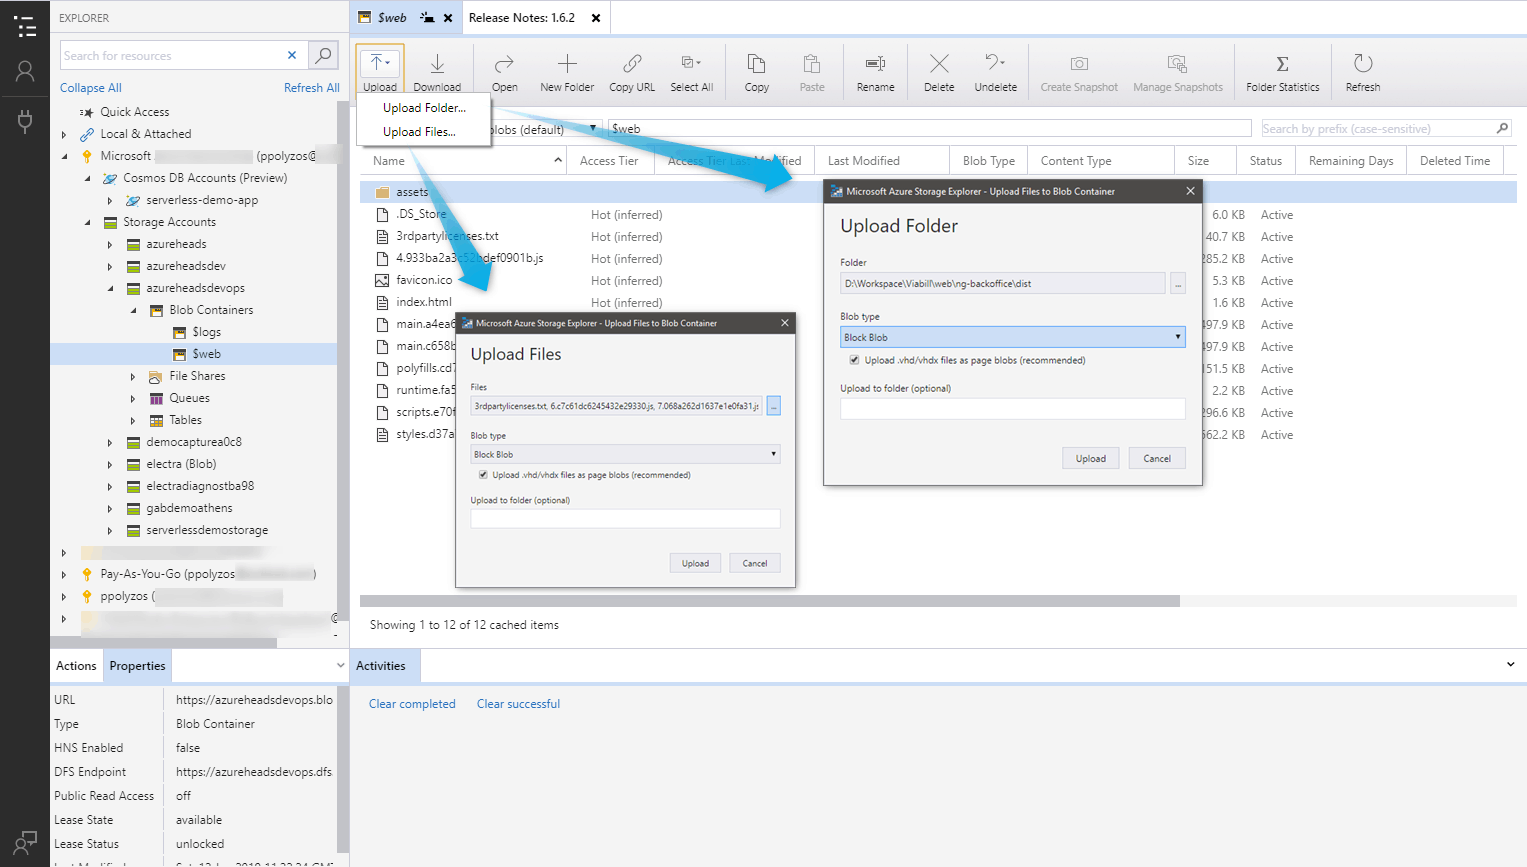
The easiest way is to upload files through the Azure Portal itself. Every storage account offers a tool called Storage Explorer (currently in preview), where you can manage your blob containers. You can easily manage your containers, create, delete, refresh, set access level and permissions to containers or upload single or multiple files to them.

This is a very easy and basic option to manage your blob containers and upload single or multiple files at once, however it has a significant limitation, namely that you can’t upload directories with all the files and subsequent directories in them.
Option 2. Azure Storage Explorer (Cross Platform)
Azure Storage Explorer is a desktop application, built with Javascript, HTML and CSS, that uses the electron framework and offers a great solution to easily manage your storage account regardless of whether you are on Windows, macOS or Linux.
It’s a quite complete and feature-rich solution. The fact that it runs everywhere makes it an ideal tool for a UI-friendly way to manage your Azure Storage services.
Option 3. Azure CLI (Cross Platform)
But most of the times, when you want to automate things, a command-line tool seems more appropriate. Here comes the Azure CLI, an open source command-line tool providing a great experience for managing most of the Azure resources and not only Azure Storage. You can install it almost everywhere and, if you spend some time reading the command reference documentation, you can achieve almost anything you want.
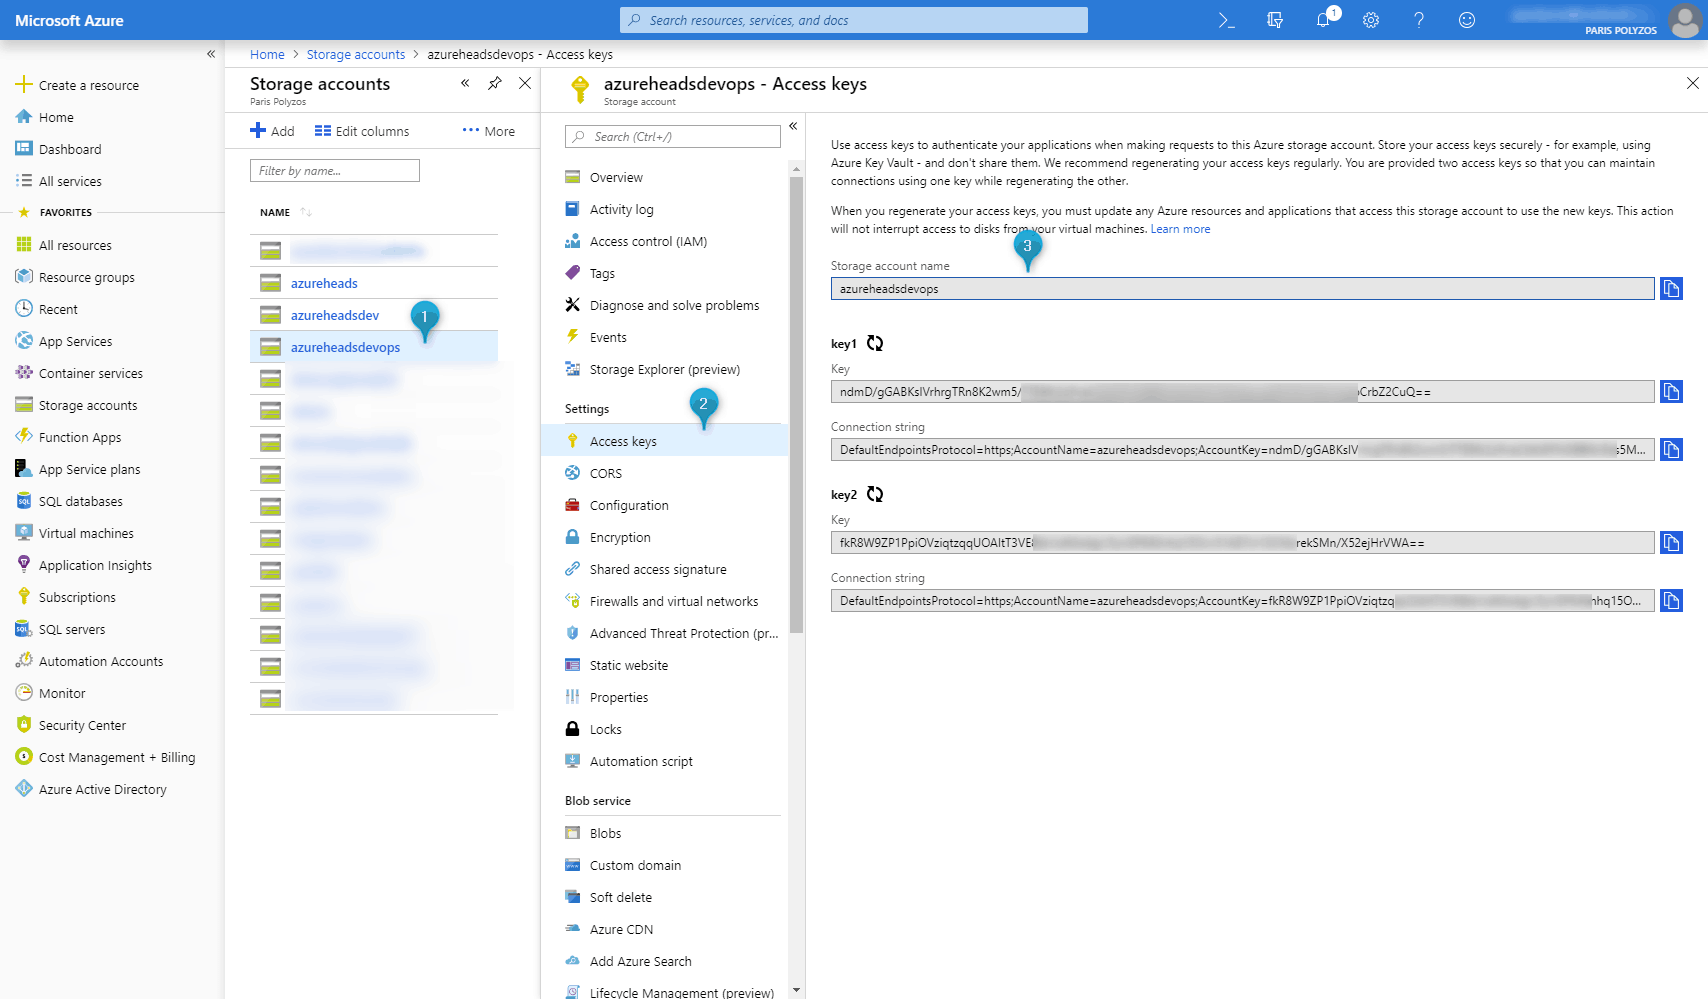
With regard to Azure Storage account management, all you need is az storage and the hundreds of options it provides. However, before showcasing how to upload files or directories of files, it’s important to have the Storage account nameand the storage account key or the Storage Account’s connection string. An easy way to retrieve this info is through the portal from Access keyssection:
Let’s see now some command lines to help you upload single files, multiple files or directories to an Azure Storage account blob container.
Upload single file with az storage blob upload
To upload a single file you need az storage blob upload:
az storage blob upload -c <container_name> -f <path_to_your_file> -n <if_you_want_different_name>
   --account-name <storage_account_name>
   --account-key <storage_account_key>
Upload multiple files or directories with az storage blob upload-batch
az storage blob upload-batch -d <container_name> -s <directory_path> --pattern *.js
  --if-unmodified-since 2018-08-27T12:00Z
  --account-name <account_name>
  --account-key <account_key>
Note
If you want to try your commands without actually uploading your files, you can add the --dry-run option at the end of your command.
Another very helpful command attribute is `–if-modified-since`, where files are uploaded only if they have been modified since the day specified. This can really save a lot of time and bandwidth when, for example, you have to upload generated files from an angular production build task.
Option 4. AzCopy v10 (Cross Platform)
Another option to upload files to Azure Blob, File or Table storage is AzCopy. The new v10 version makes this tool available cross platform, and offers a redesigned command-line interface and new architecture for high-performance reliable data transfers. Very useful, fast and reliable if you have to upload large amount of data.
Firstly, you need to authenticate using azcopy loginand then you can start uploading your files using the azcopy copy or azcopy cp command:
azcopy <command> <arguments> --<flag-name>=<flag-value>

# Examples if you have logged into the Azure Active Directory:
azcopy copy <source path> <destination path> --<flag-name>=<flag-value>

azcopy cp "C:\local\path" "https://account.blob.core.windows.net/container" --recursive=true
azcopy cp "C:\local\path\myfile" "https://account.blob.core.windows.net/container/myfile"
azcopy cp "C:\local\path\*" "https://account.blob.core.windows.net/container"
Note
You should try the new Sync feature, which is really amazing and gives you the option to synchronize contents from source to destination, but be aware that this option includes also DELETION of destination files if these files do not exist in the source.