Windows PowerShell is a task automation and configuration management framework from Microsoft, consisting of a command-line shell and associated scripting language, built on the .NET Framework.
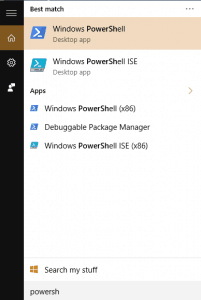
You can search for it, using Windows Search, but probably you already have it installed on your computer.
On top of the standard command-line shell, you can also find the Windows PowerShell ISE, which stands for Integrated Scripting Environment, and is a graphical user interface that allows you to easily create different scripts without having to type all the commands in the command line.
In order to connect your Azure Subscription with Powershell, you need to follow the steps below.
Step 1: Install Latest Azure Tools
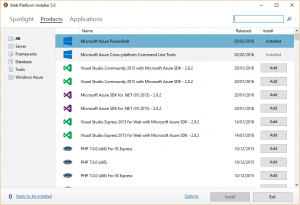
You can install the latest Azure Tools using Web Platform Installer, which provides an easy way to download and install all the latest components of the Microsoft Web Platform.
Step 2: Get Azure Publish Settings File
First of all, you have to configure the connectivity between your computer and Azure. In order to do that, you need to download the Azure Publish Settings File which contains secure credentials and additional information on your subscription.
To obtain this file, type at the Windows Powershell command prompt
Get-AzurePublishSettingsFile
After hitting enter, a web browser will open at https://manage.windowsazure.com/publishsettings for signing into Azure. Then, your subscription file will be generated and the download will begin shortly after.
Step 3: Import publish settings file
Assuming that the file has been saved to “C:\Azure\mysettings.publishsettings” path, you can import it
Import-AzurePublishSettingsFile -PublishSettingsFile "C:\Azure\mysettings.publishsettings"
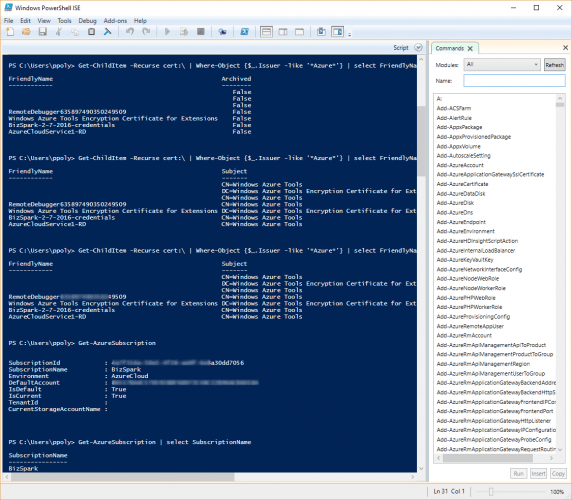
You can check that it is now included in your machine certificates
Get-ChildItem -Recurse cert:\ | Where-Object {$_.Issuer -like '*Azure*'} | select FriendlyName, Subject
Step 4: Set default Azure Subscription
Afterwards, in case you have multiple subscriptions linked to your machine, you can list them using
Get-AzureSubscription | Select SubscriptionName
and select the one you want, as default
Select-AzureSubscription -SubscriptionName "BizSpark"
To validate your current subscription, simply type
Get-AzureSubscription -Current
where you will get all available details about your current subscription.
Simple Commands
Now that you have a secure link to your subscription, you can use the command below to get your available storage accounts
Get-AzureStorageAccount | Select StorageAccountName, AccountType, Endpoints
or
Get-AzureVM
to return Virtual Machines available in your subscription.
Certificate Management
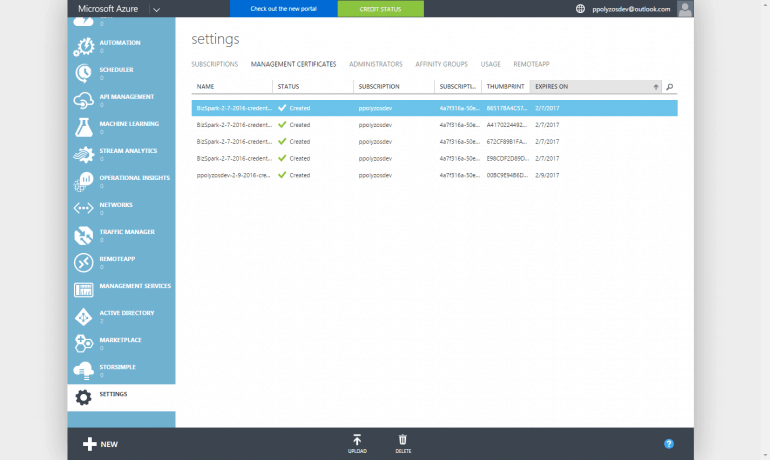
Every certificate that was generated is now listed under Settings > Management Certificates at the old windows azure portal, where you have the option to upload a new one or delete any of the existing ones.
This does not appear to list the virtual machines that are created in the new Azure portal…only the “classic” vms.
To retrieve VMs created under new portal use the following:
1) Login-AzureRMAccount
2) Login with user account
3) Get-AzureRMVM | ft
After entering -Get-AzurePublishSettingsFile command I got this- https://manage.windowsazure.com/Error/NoSubscriptions
with error message – No subscriptions found.
I have Owner subscription.
Can you please check if the initial url that is opened in your browser is the following?
http://go.microsoft.com/fwlink/?LinkID=301775
Otherwise, using this url it will automatically download your azure publish settings file.
I just try to open this url-http://go.microsoft.com/fwlink/?LinkID=301775
but this url opened instead- https://manage.windowsazure.com/Error/NoSubscriptions
Your subscription is “Pay as You Go” or some other kind like “Dreamspark” or “Bizspark”. Is it a newly created account?
No. I have active subscription Since October, 2016.
Could you please use `Login-AzureRmAccount`, enter your credentials and see in the output if your subscription is fetched?
Yes. I got my subscription details.
After loging in using `Login-AzureRmAccount`, you are able to use your subscription for your Resource Manager cmdlet requests.
You can try it using for example: `Get-AzureRmWebApp` to retrieve your available web apps.
As far as the publish settings now, I would suggest you to clean up your cookies (or open a new Incognito window), and use again the url http://go.microsoft.com/fwlink/?LinkID=301775.
If this still doesn’t work, check if you can access the old portal manage.windowsazure.com.
In addition, in “No Subscriptions” page it usually displays some error details that might be found useful.
Thank you for this. Got me up and running.
Thanks!