Azure Service Fabric is a distributed systems platform that makes it easy to package, deploy and manage scalable and reliable microservices. Service Fabric also addresses the significant challenges in developing and managing cloud applications.
In this post, we will explore how to host an ASP.NET Core web application, alongside a stateless and a stateful service on an Azure Service Fabric cluster, and show:
- how you can deploy it on Azure
- how you can access it using Azure Service Fabric cluster’s client connection endpoint, and then
- how you can access it using a custom domain
Setup Service Fabric Cluster
First of all, you need to setup an Azure Service Fabric cluster. For the purposes of this demo, we will demonstrate how you can deploy such a cluster quickly, thus skipping some steps that are necessary for production environments.
To do so from the Azure Portal, click first on the New button and then, from the Compute blade, scroll down to Service Fabric Cluster and click on it; a new blade will appear for you to configure the cluster in four easy steps.
Step 1. Configure the basics
In the Basics blade you will be asked to give a name to the cluster, select the operating system, set VM credentials, and finally select the subscription, resource group and location for your cluster.

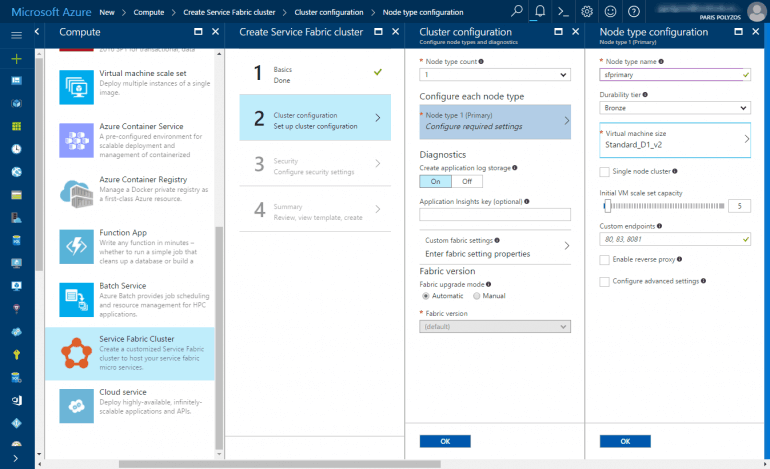
Steps 2. Cluster Configuration
In the second blade:
- select the number of node types, where in each node type you can define the VM sizes, the number of VMs, and their properties
- configure your node type by configuring the durability tier, Bronze for Standard_A/D/DS SKUs and Gold for G5
- select the Virtual Machine size based on your needs and the initial VM scale capacity
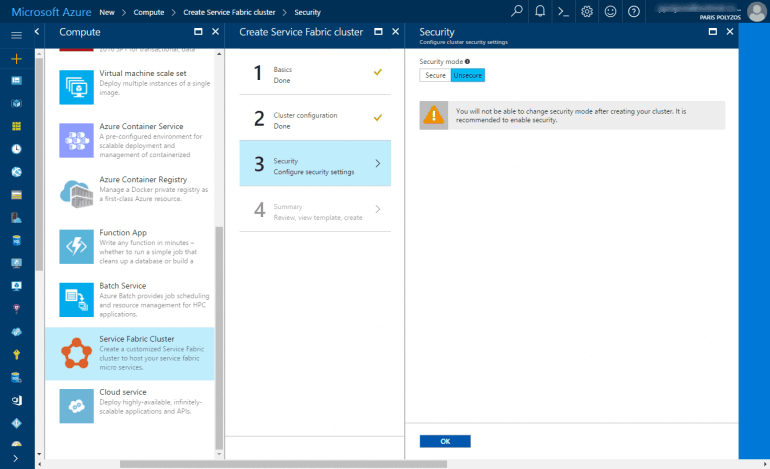
Step 3. Security
In this step you can secure cluster access with an X509 certificate, but for this demo we will use the Unsecure mode (not recommended for production systems)
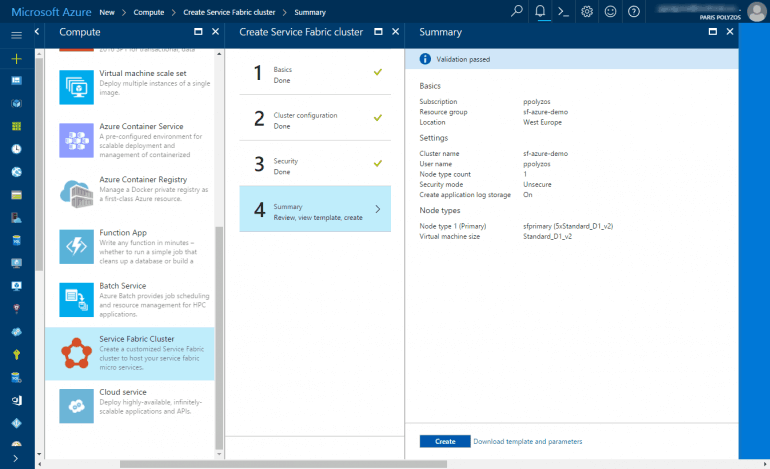
Step 4. Summary
In the last step, validate your options and click the Create button.
Then the deployment process will begin and in about 20 minutes your cluster will be ready for use.
Service Fabric Application
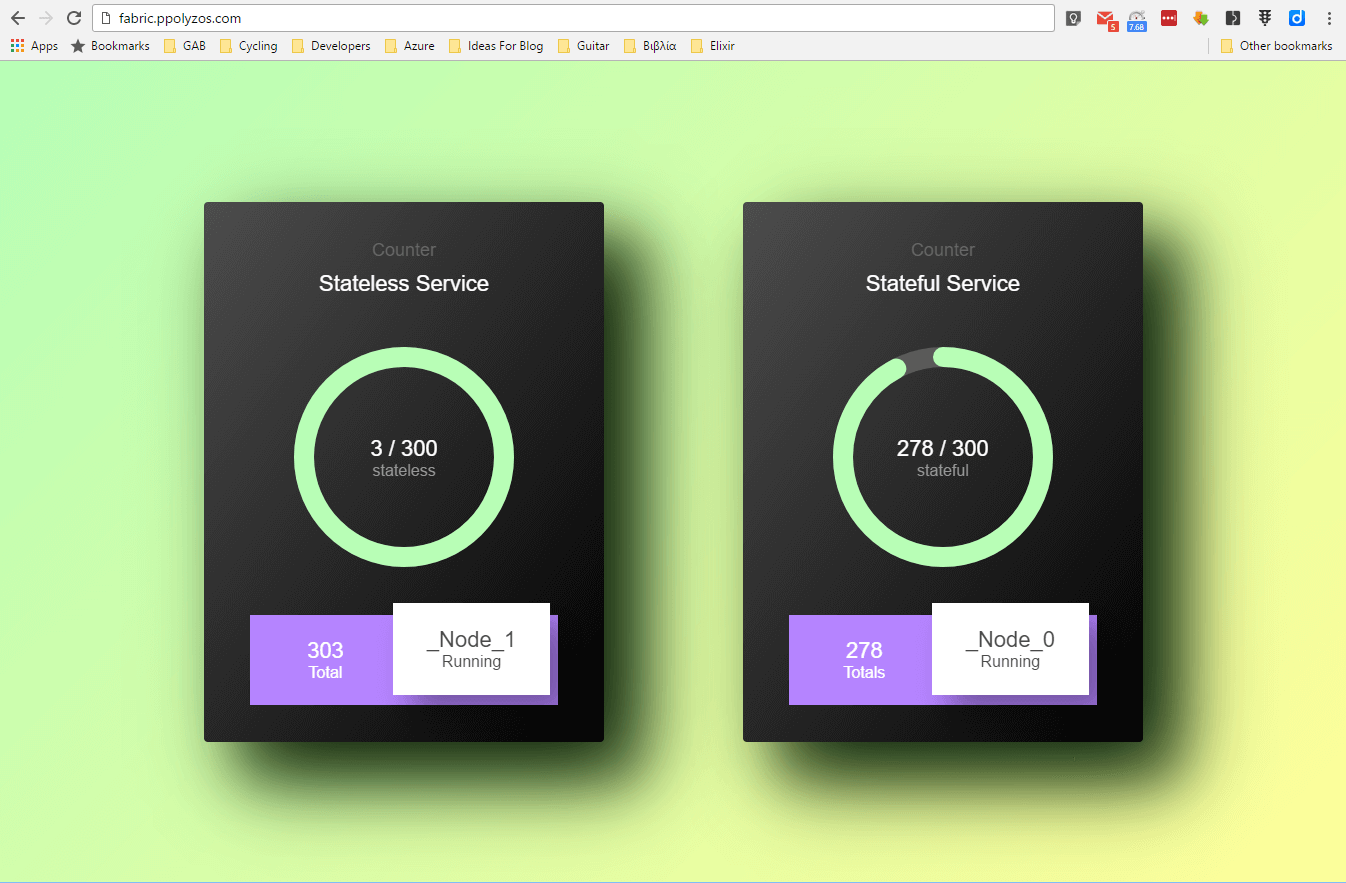
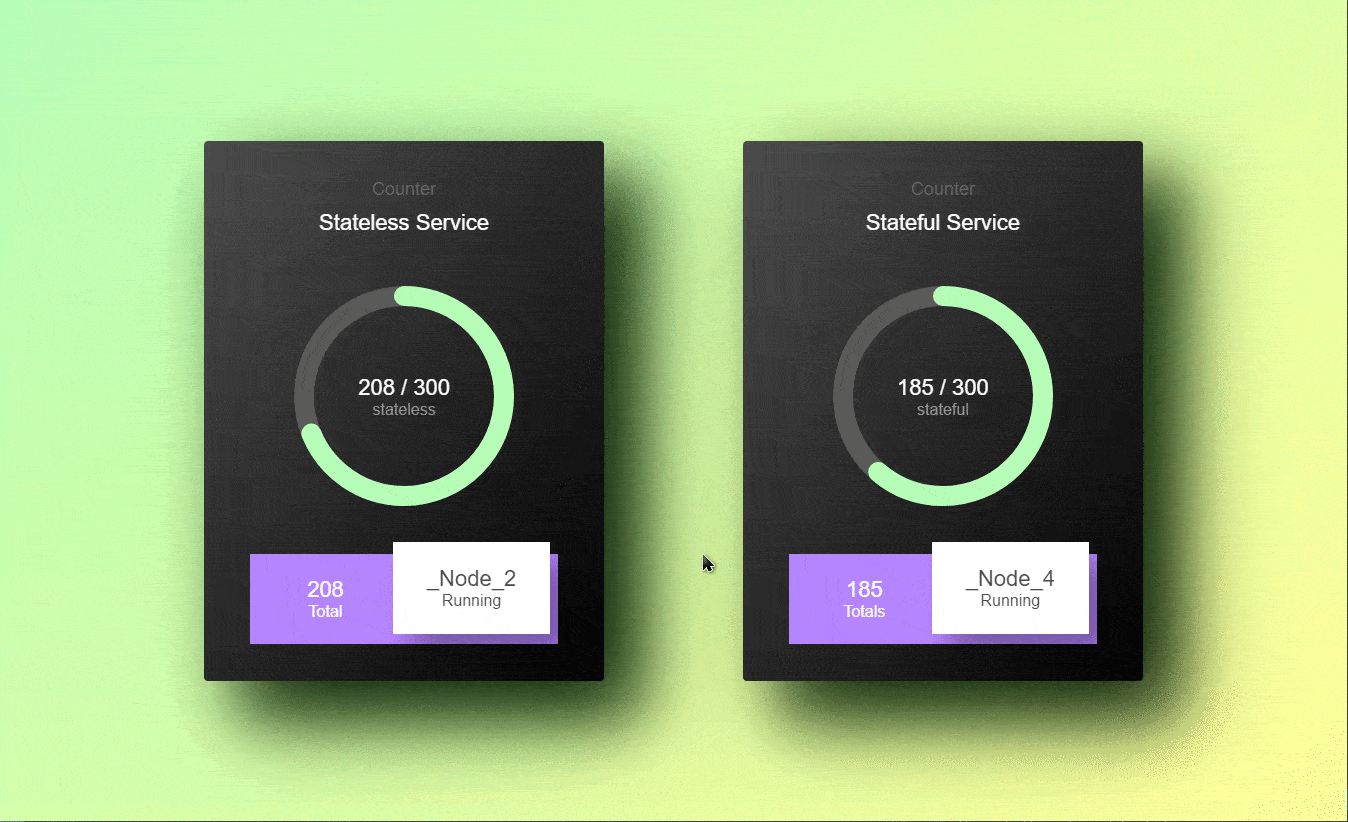
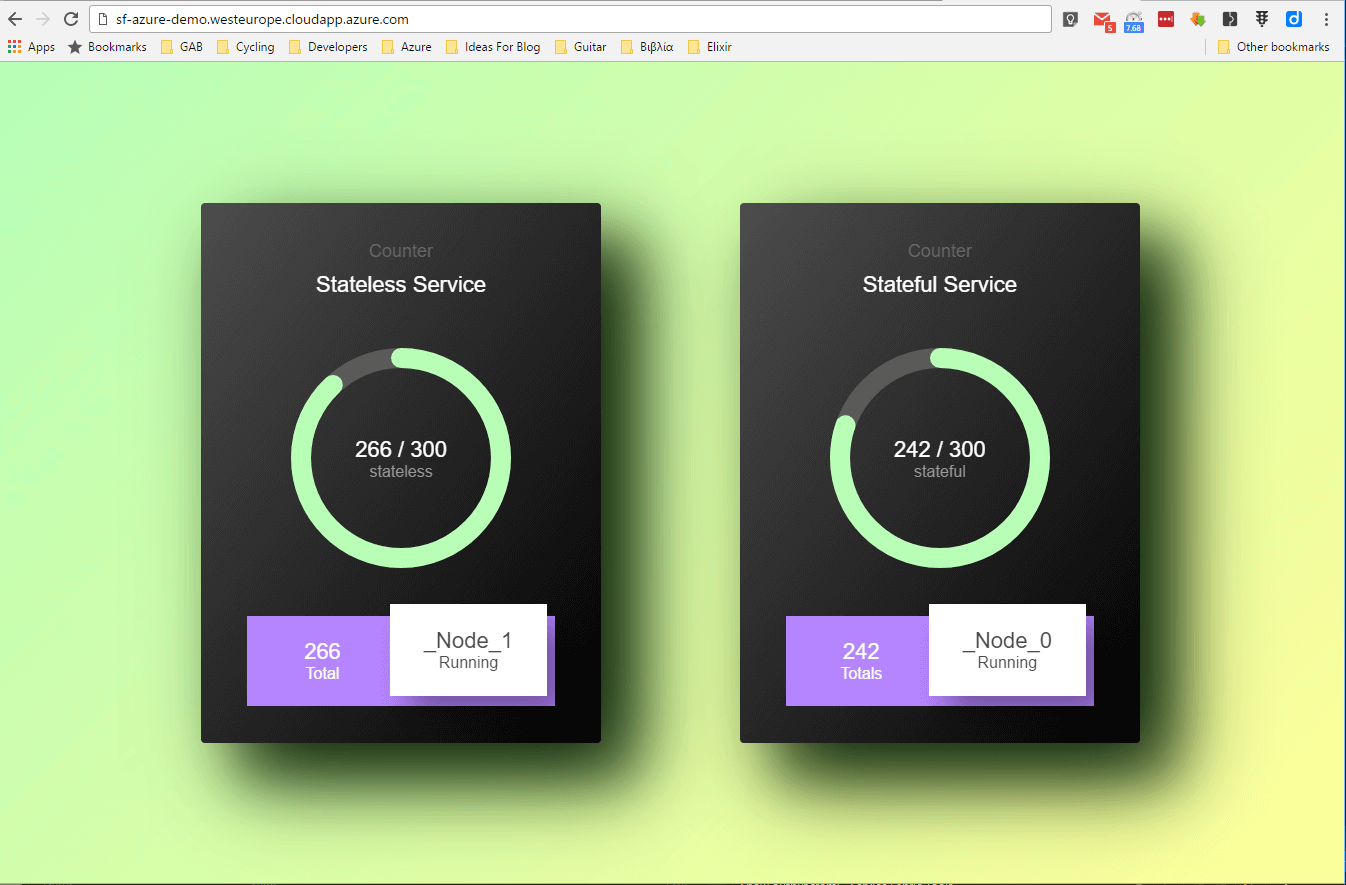
In this section, a simple application is deployed that consists of a stateless and a stateful counter service, along with an ASP.NET Core front end that displays the values of each counter.
Here is a preview of the front end which communicates with both the stateless and the stateful counter service to get the current value and the node on which each service is running.
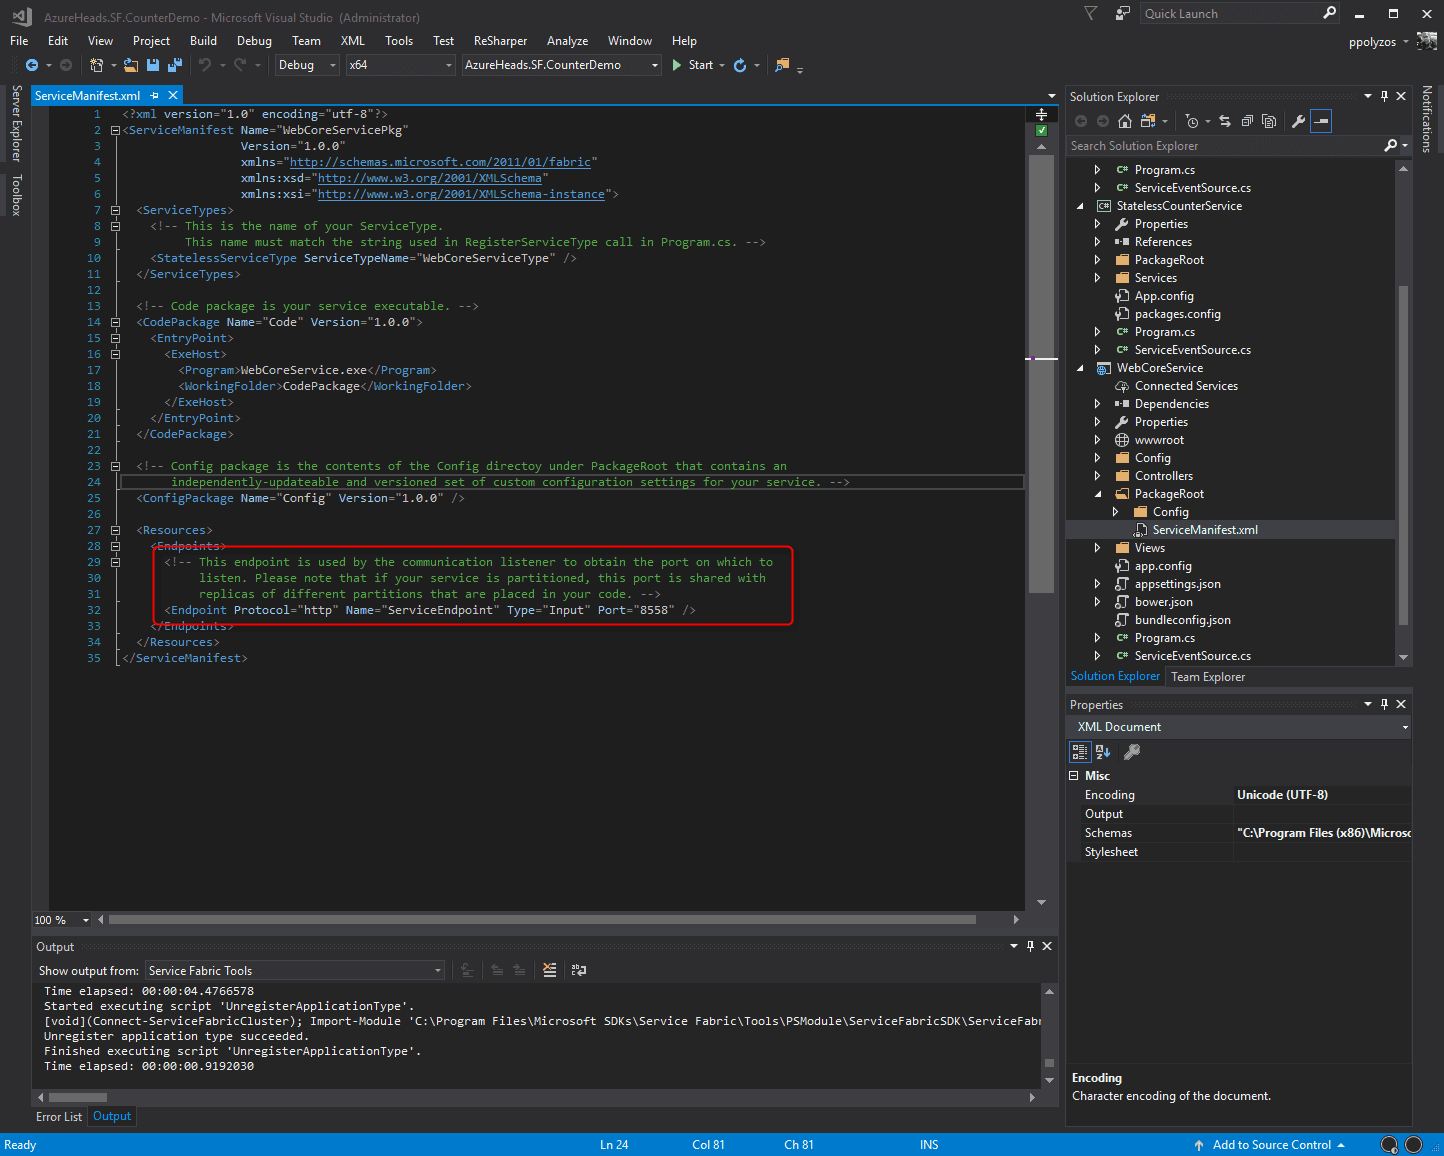
In the ServiceManifest.xml file of the web front end, you have to specify the port (8558) where the web front end will run.
You may find the source code for this demo in my github account.
Application Deployment
To deploy the application you can use Visual Studio. First, right-click on your Service Fabric application and, then, click on the Publish… option. A popup dialog appears, from which you need to authenticate your Azure account and choose the Service Fabric’s connection endpoint where the application is going to be published.

In a few seconds the application will be deployed in the Service Fabric cluster.
Accessing the web front end
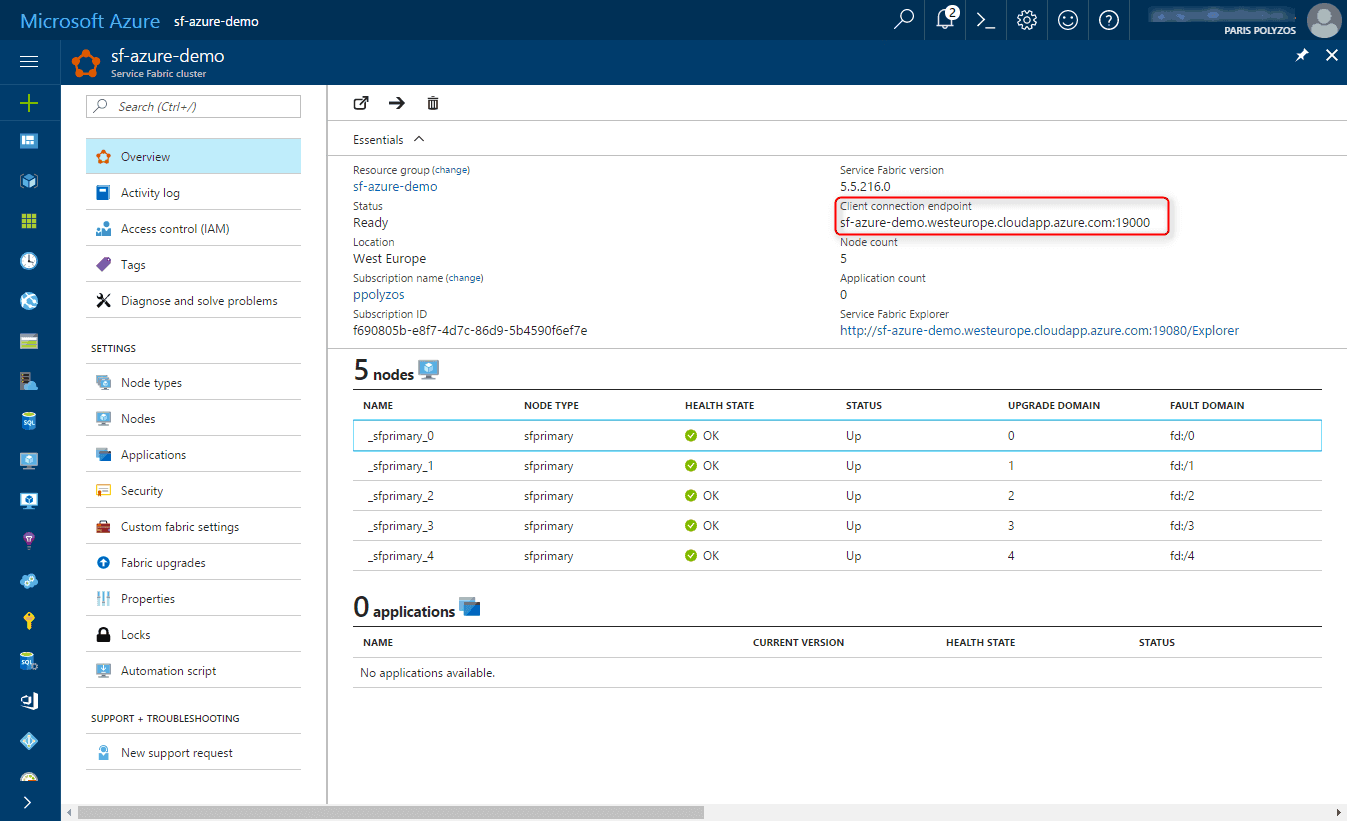
To access the application you need the client connection endpoint URL, which can be found in the Service Fabric Overview page.
However, the URL on its own is not enough to access the app.
The reason is that, in the ServiceManifest.xml file, it has been specified that the app will be listening to port 8558. Adding the port to the URL address will not solve the problem, as a load balancing rule, enabling external traffic to be directed to the Service Fabric’s internal endpoint, is missing.
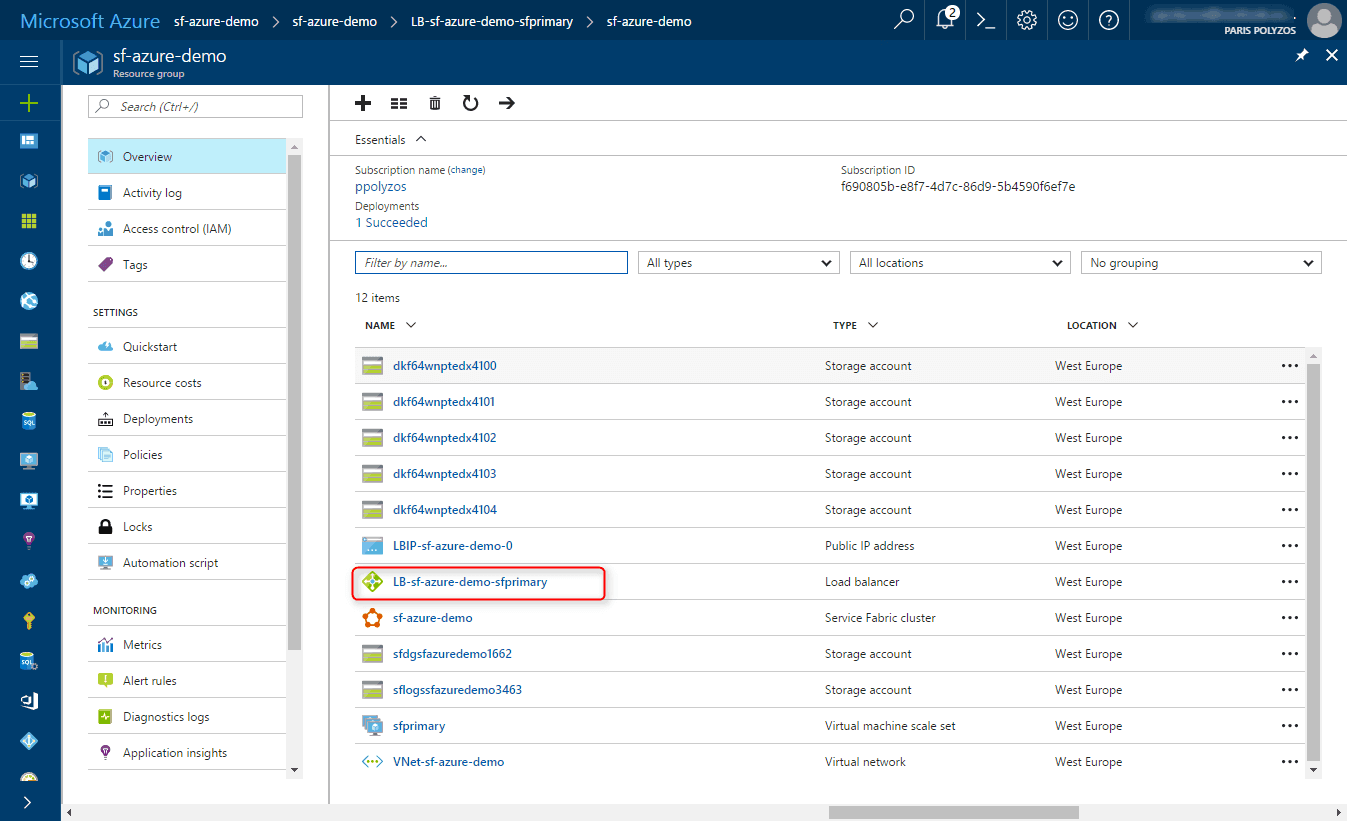
To solve this problem, you need to add a Load Balancing Rule to the Load Balancer that has been created along with the Azure Service Fabric cluster deployment.
To create this rule, simply click on Load Balancing Rules, click on the plus sign at the top, and then give a name to your rule, set the external port to 80 to access your app without specifying ports in the URL, and the backend port to 8558.

After that, in about a minute, the Load Balancing Rule will become available and you will be able to access your site using the client endpoint URL http://sf-azure-demo.westeurope.cloudapp.azure.com.
Service Fabric Cluster and Custom Domain
In the previous step we saw how to access the web app without specifying the port in the URL address, using a simple Load Balancing Rule. Now, let’s see how this app can be accessed using a custom domain name.
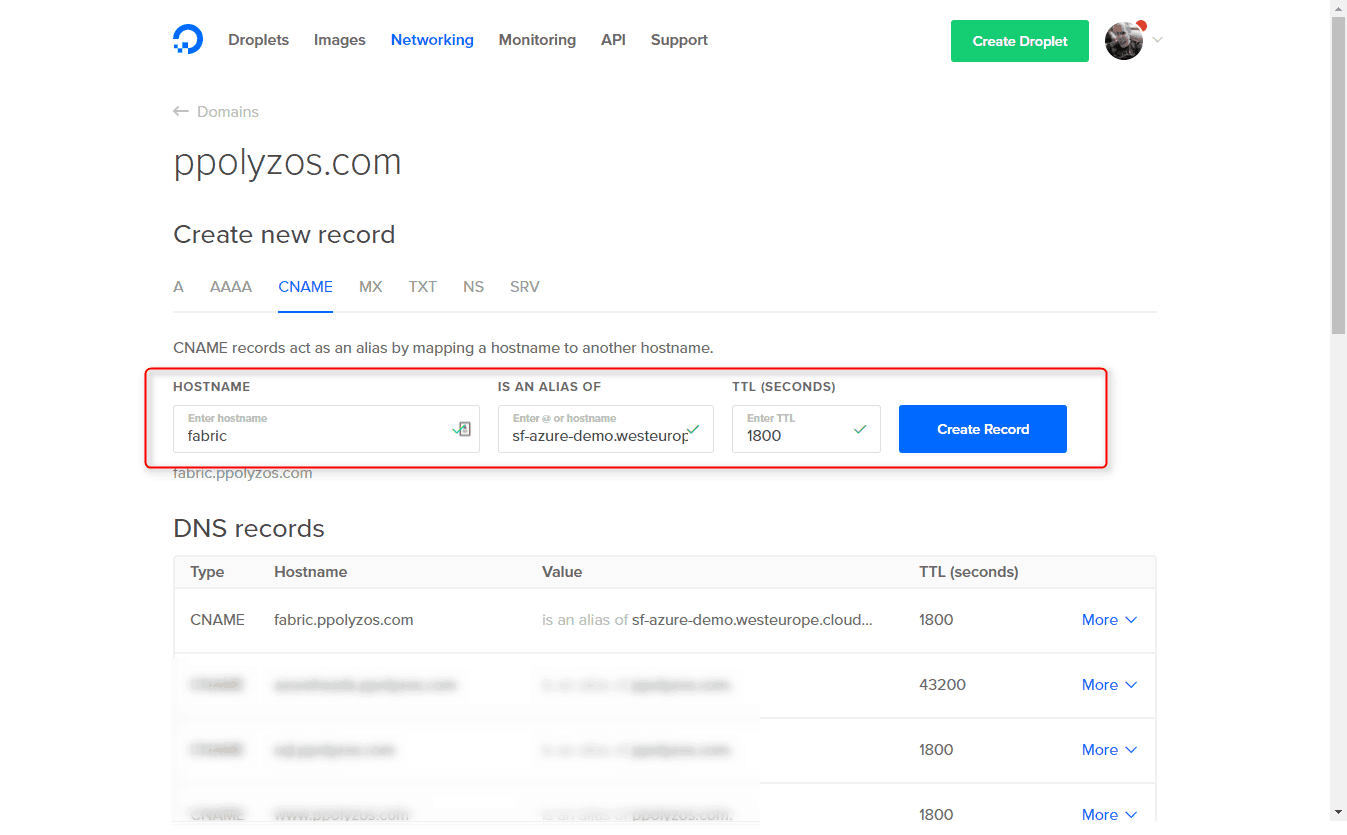
The only thing necessary is a CNAME record, to map a hostname to another hostname.
e.g. if you want to map from `fabric.ppolyzos.com` to `http://sf-azure-demo.westeurope.cloudapp.azure.com` you simply add the following record to the service that manages your DNS records.
and then the app will also be accessible from the custom domain you have specified