In this post we will talk about all the necessary steps to build and deploy an Angular web application to a static website hosting container in Azure Storage using Azure DevOps.
Step 1. Setup a GitHub Repository & commit a sample Angular App
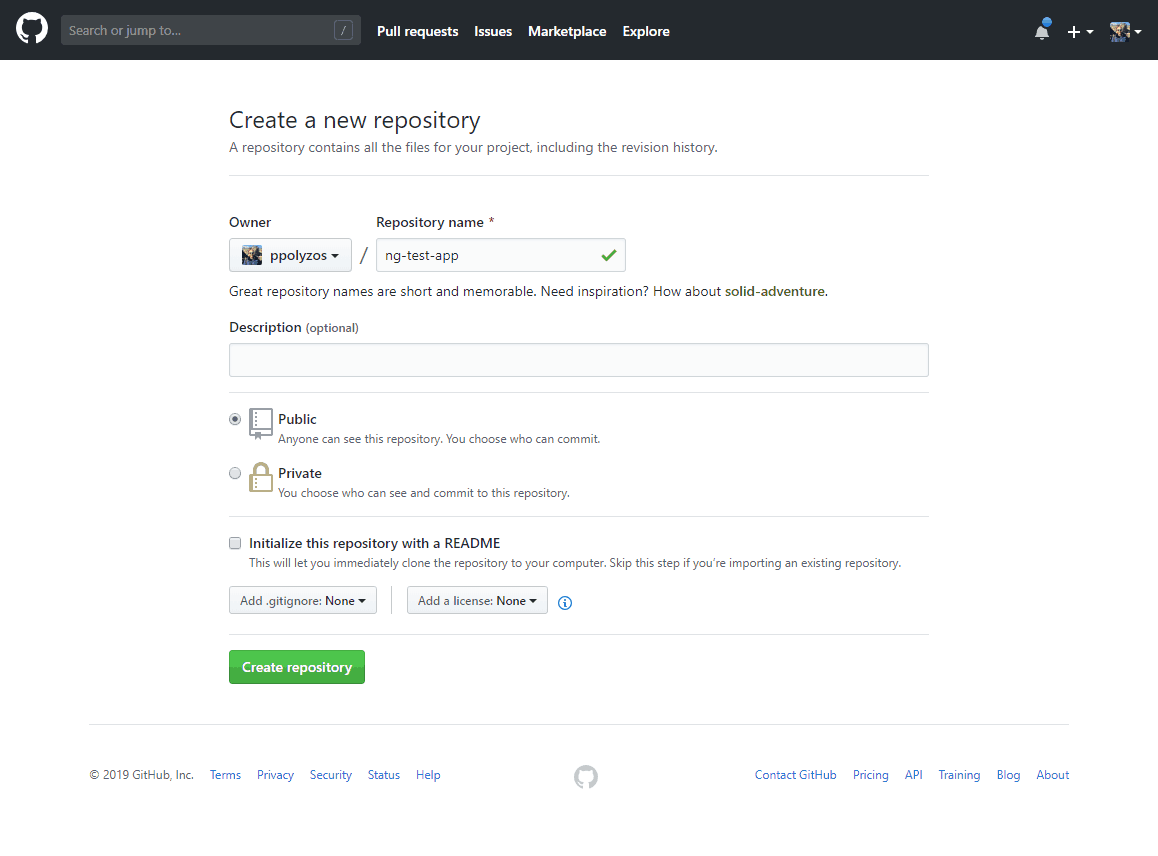
To start with, you need to create a new repository in GitHub and push an Angular application that you can generate using angular cli tool.
So, go to github.com/new, fill in the necessary details and click the Create repository button to have your repository ready:
Time for your Angular application; using ng new ng-test-app you can create a new workspace and an initial Angular app to work with:

After some questions and module installations, your application is ready and you can check it locally using ng serve and opening http://localhost:4200 in your browser.
To push the new angular application to GitHub, get inside your app’s folder, ng-test-app, and with the following commands:
> cd ng-test-app
> git remote add origin https://github.com/<your_github_account>/ng-test-app.git
> git push -u origin master
your application will be pushed to your GitHub repository.
Step 2. Azure DevOps integration with GitHub and Build Pipeline Setup
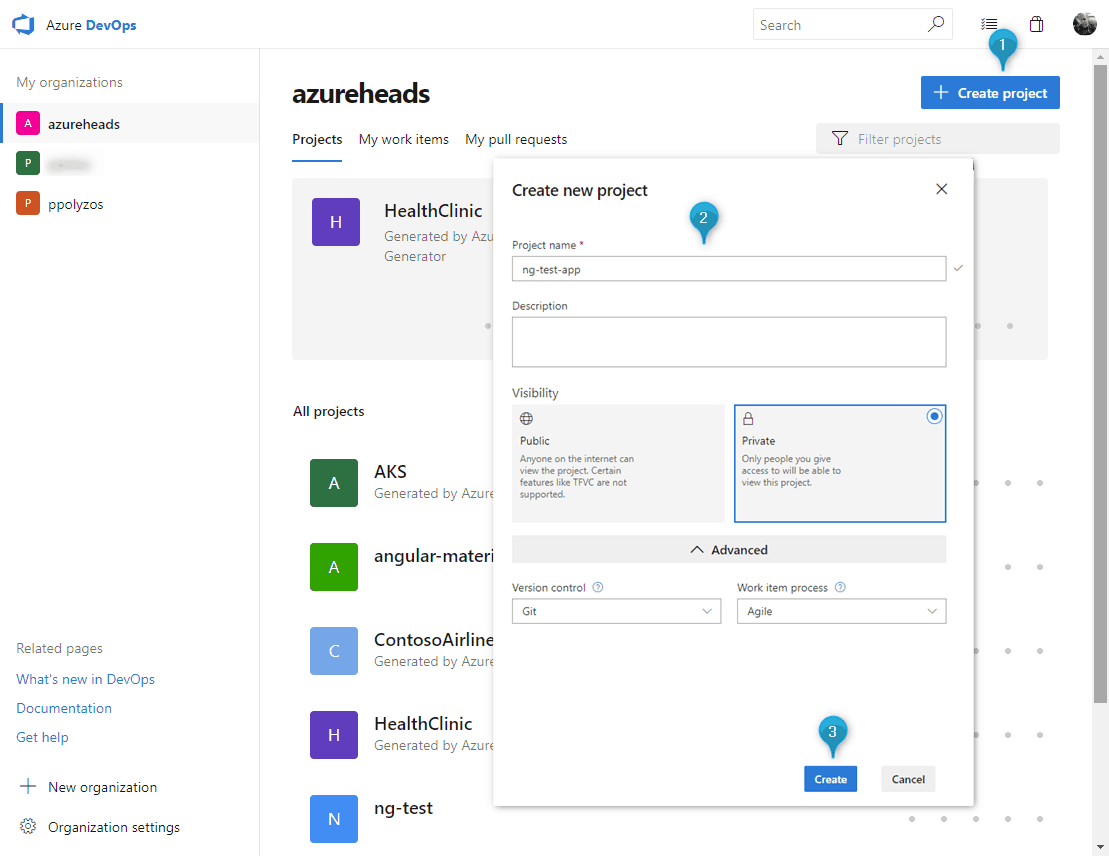
Time to integrate Azure DevOps with your GitHub repository and start with your build pipeline. To do so, you need to open dev.azure.com, create an account if you don’t have one already, and create a new project that will run the pipelines for the new Angular application:
Once your Azure DevOps project has been created, click on Pipelines and then on New Pipeline to start building your pipeline
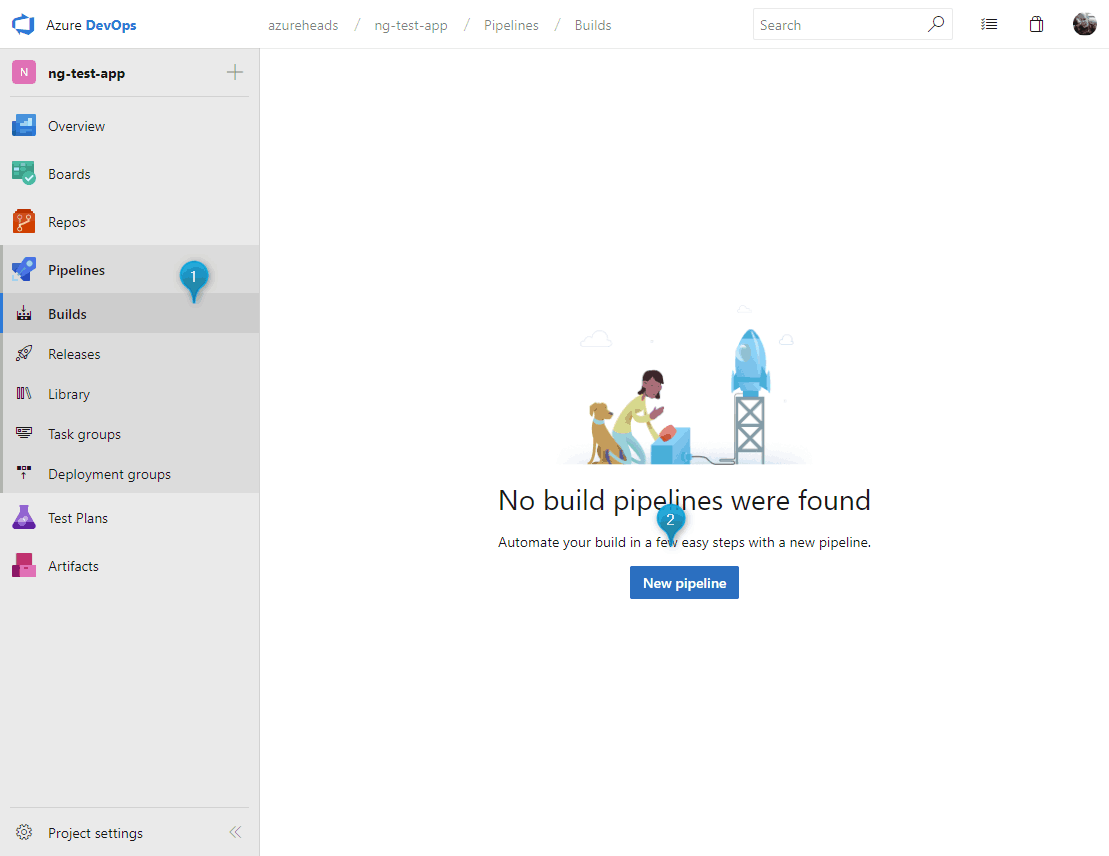
and after that follow these steps:
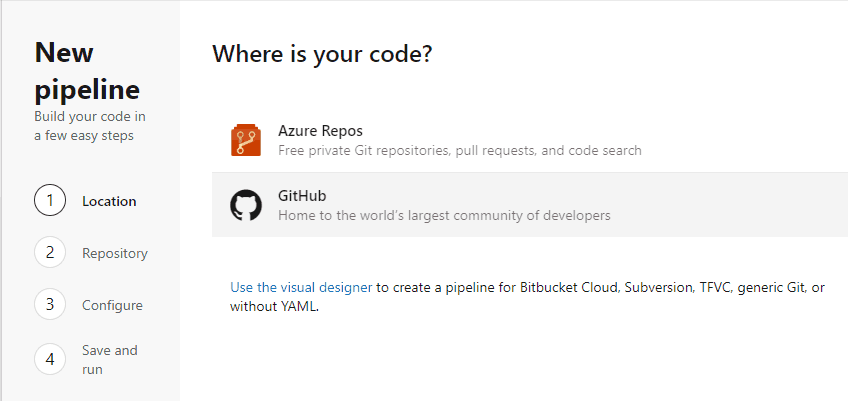
Step 2.1: Select the location of your code
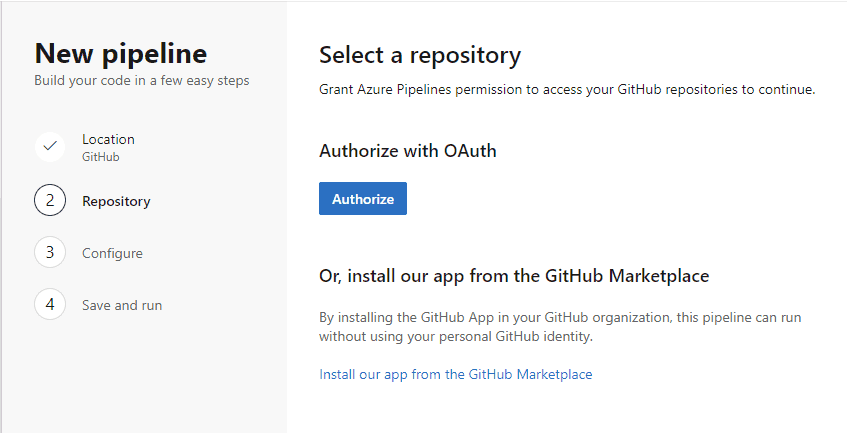
Step 2.2: Authorize Azure Pipelines to access your GitHub repository
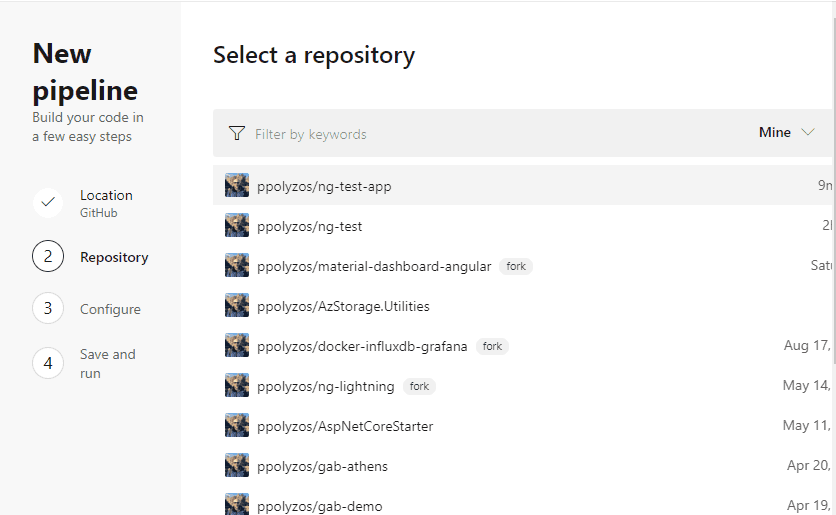
Step 2.3: Select the repository that you want to integrate with Azure DevOps
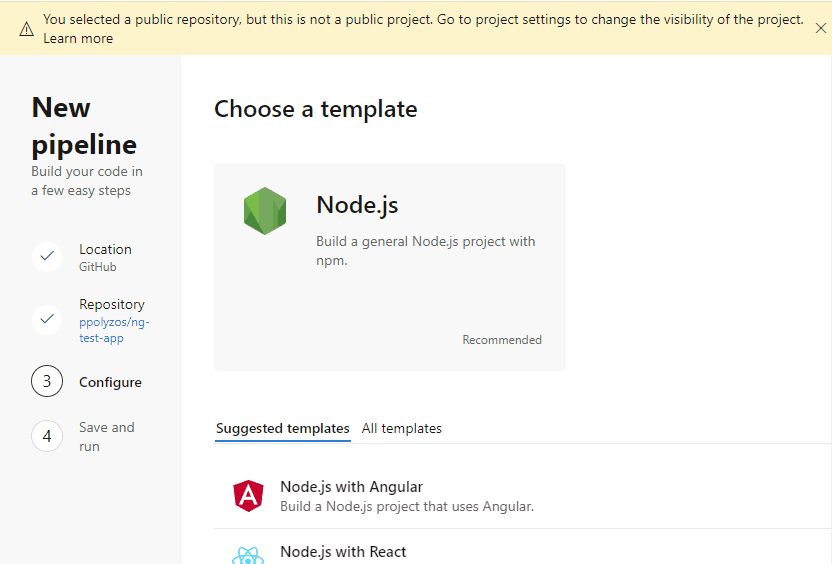
Step 2.4: Choose from the available templates; Node.js does the work to setup your build pipeline
and after that, a new file, azure-pipelines.yml, is generated with some basic tasks.
However, one important task is missing, the Publish Artifact, and you need to add it to your build script by adding the following code at the end of the file:
# Publish Artifacts
- task: PublishBuildArtifacts@1
  inputs:
    artifactName: dist
    pathtoPublish: 'dist'
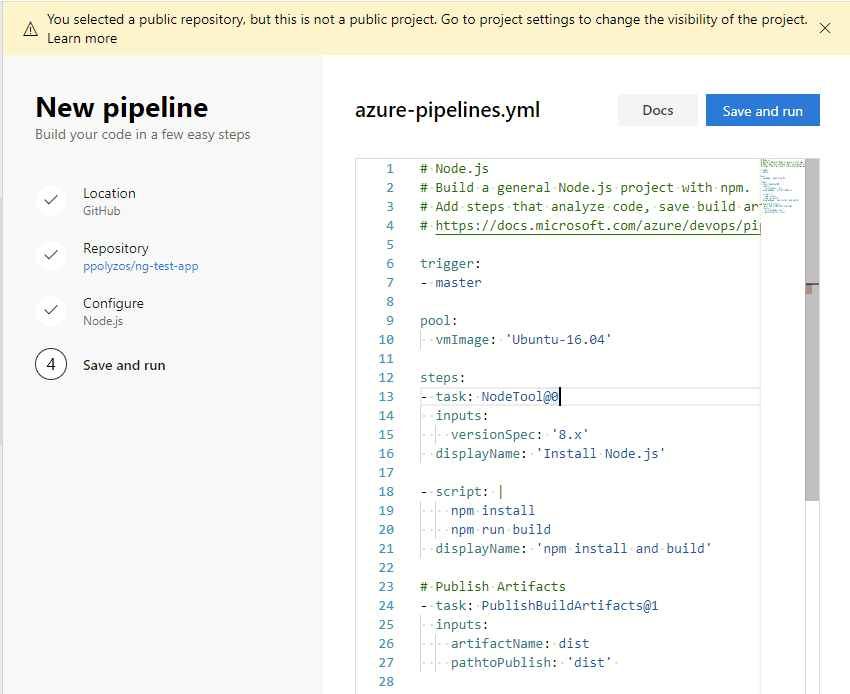
The whole azure-pipelines.yml file that we used can be found below:
# Node.js
# Build a general Node.js project with npm.
# Add steps that analyze code, save build artifacts, deploy, and more:
# https://docs.microsoft.com/azure/devops/pipelines/languages/javascript

trigger:
- master

pool:
  vmImage: 'Ubuntu-16.04'

steps:
- task: NodeTool@0
  inputs:
    versionSpec: '8.x'
  displayName: 'Install Node.js'

- script: |
    npm install
    npm run build
  displayName: 'npm install and build'

# Publish Artifacts
- task: PublishBuildArtifacts@1
  inputs:
    artifactName: dist
    pathtoPublish: 'dist'
Step 2.5: Save and Run your Build Pipeline
Once you click on the Save and Run button at the top right of the page, two things will happen:
- the azure-pipelines.yml file will be committed to your GitHub repository and…
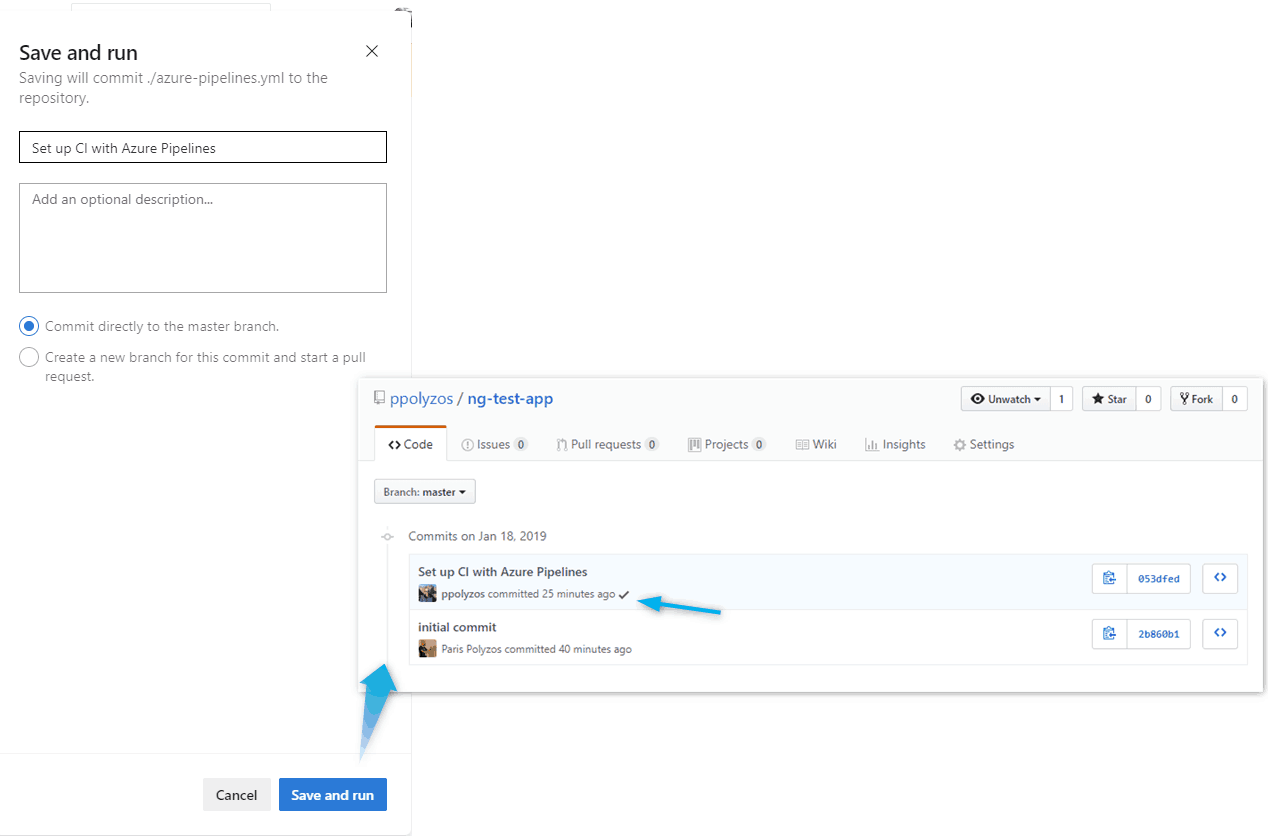
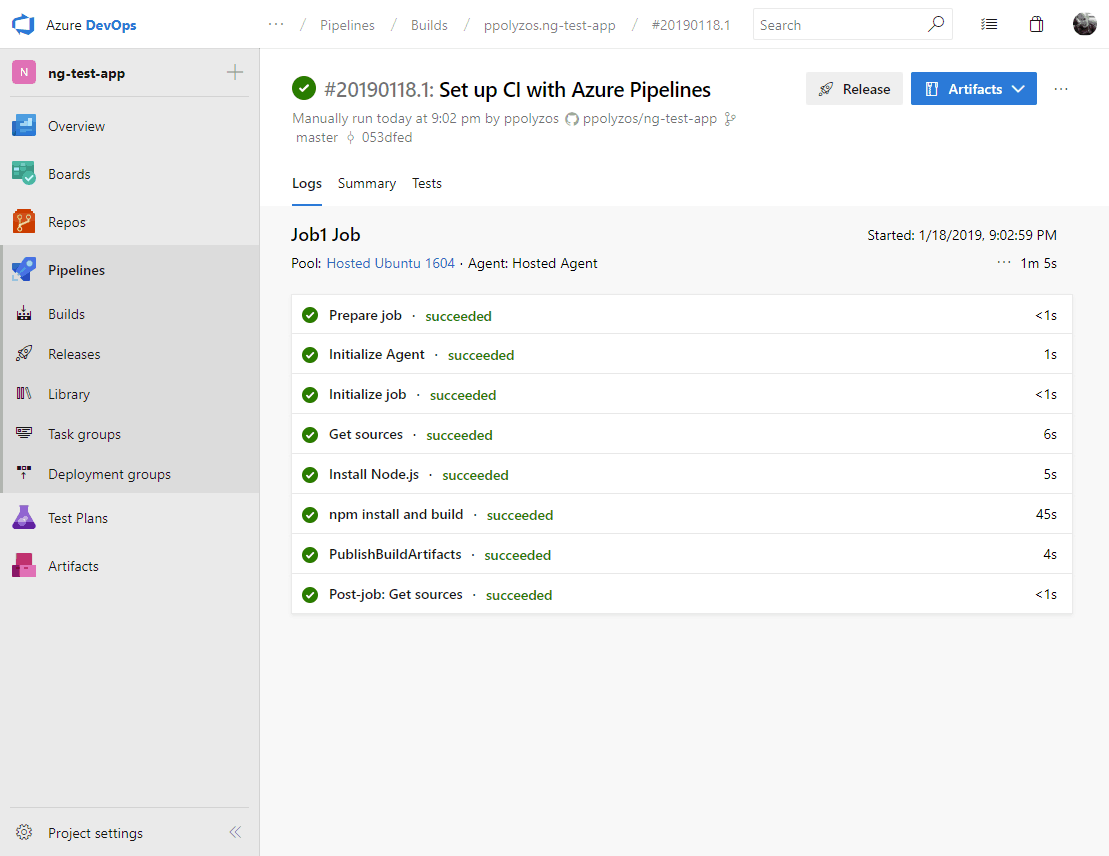
…your build pipeline will be started, and after a few minutes all the build tasks will be executed.
The output result of ng build task will be pushed to an Azure Pipeline Artifact, so that you can use it in the Release pipeline that you will see how is set up in a subsequent step:
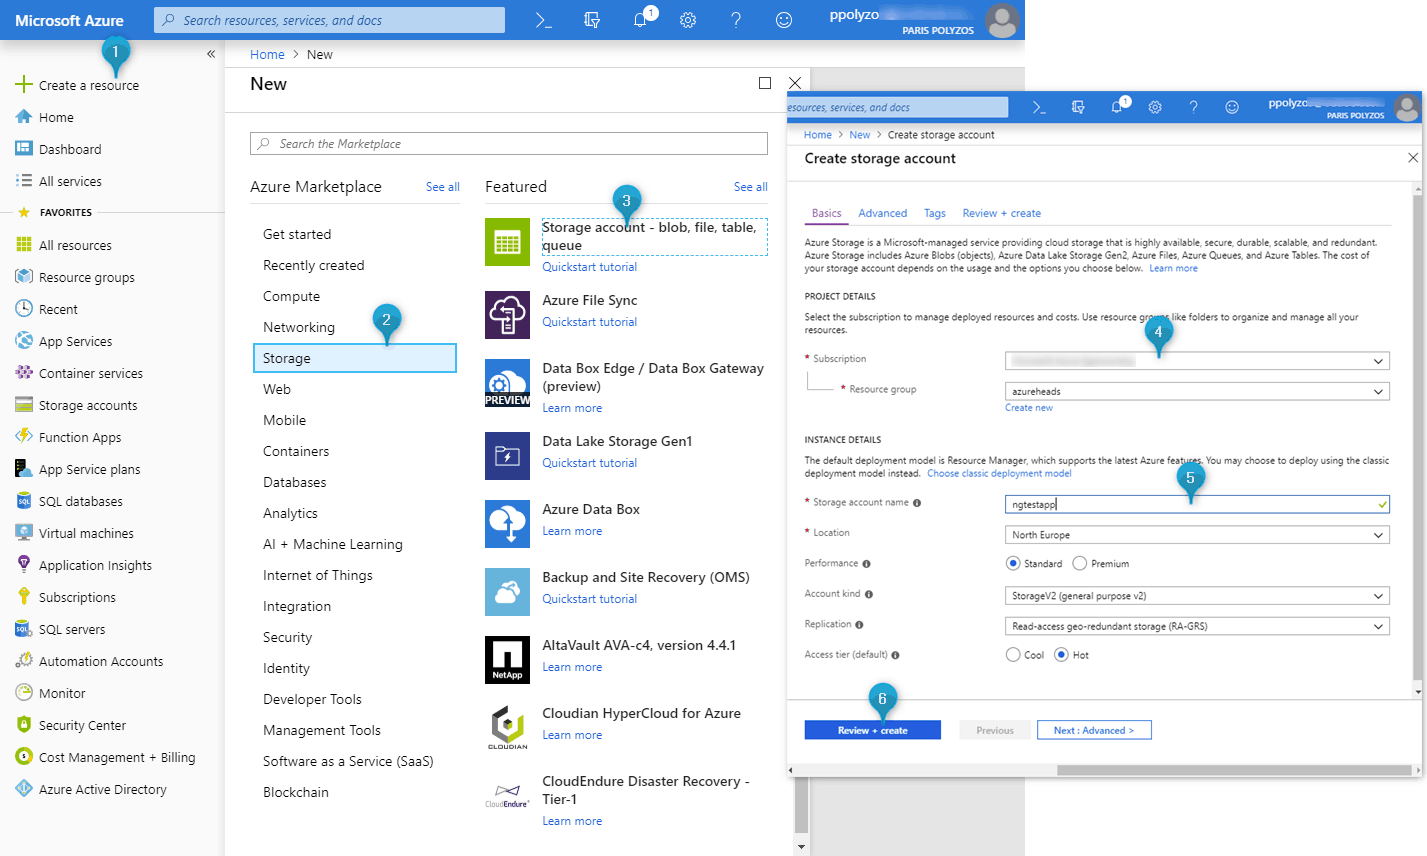
Step 3. Create Storage Account and enable Static Website Hosting
To do so, you need to go to portal.azure.com and create a new storage account
and enable static website hosting from the options at the left sidebar:
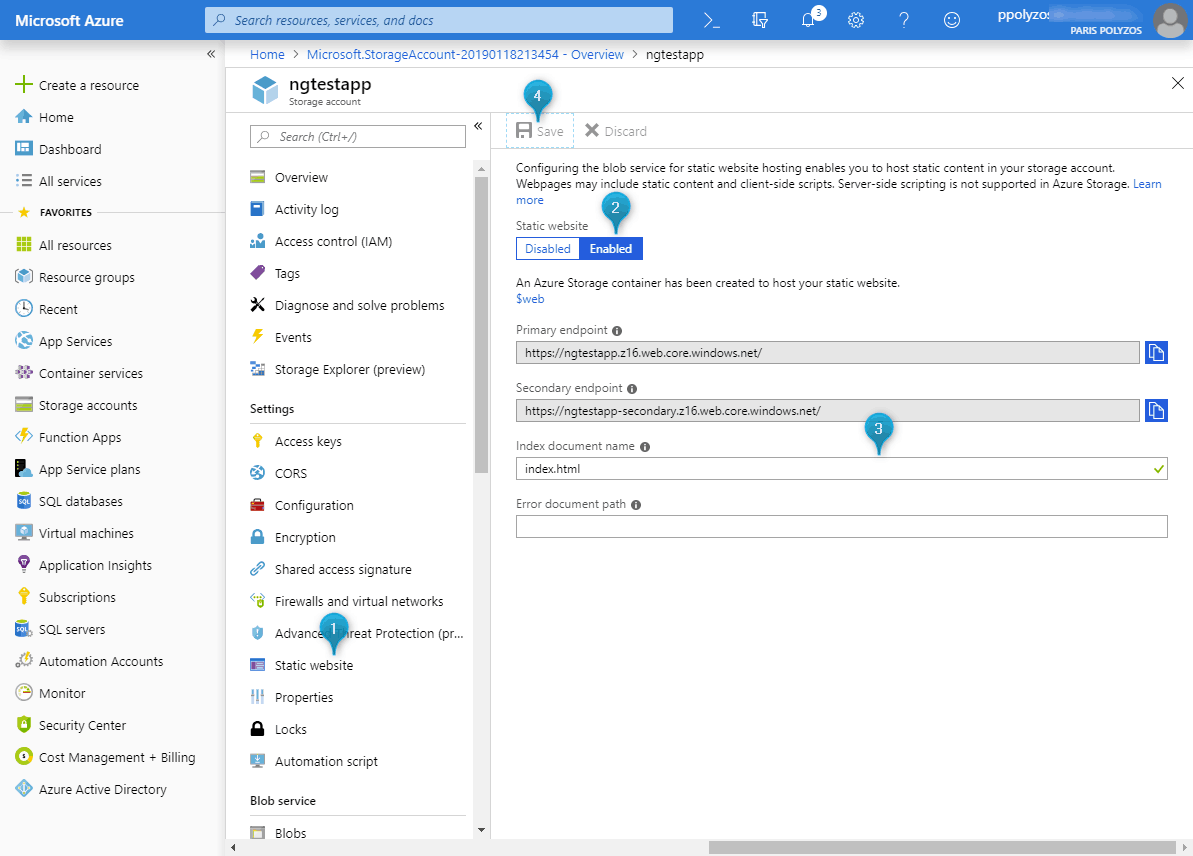
Now that you have your storage account ready and the static website hosting enabled, it’s time for the last step to set up a release pipeline, so that every time you push a change to the GitHub repository, this change is built and deployed to your storage account available online in the primary endpoint url, as shown in the previous screenshot.
Step 3. Set up Release Pipeline
The last step is about creating a release pipeline to automate the deployment of your application to the Azure Storage account. To do so, you need to go again to your Azure DevOps project and follow the steps below:
Step 3.1: Create a new release pipeline
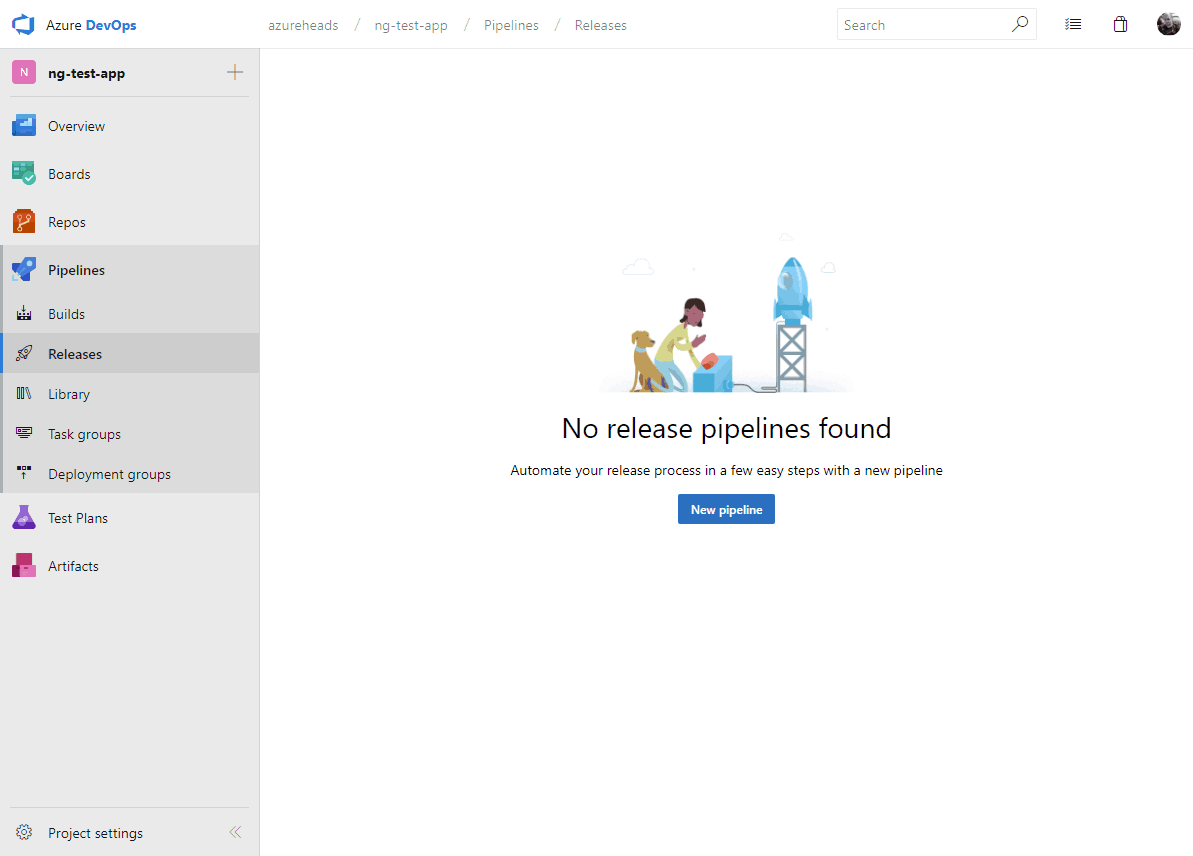
Step 3.2: From templates, choose “Empty job”
![]()
Step 3.3: Give whatever name you like to your stage environment

Step 3.4: Specify the artifact you want to deploy
In the build pipeline, your code has been built and published to an artifact.
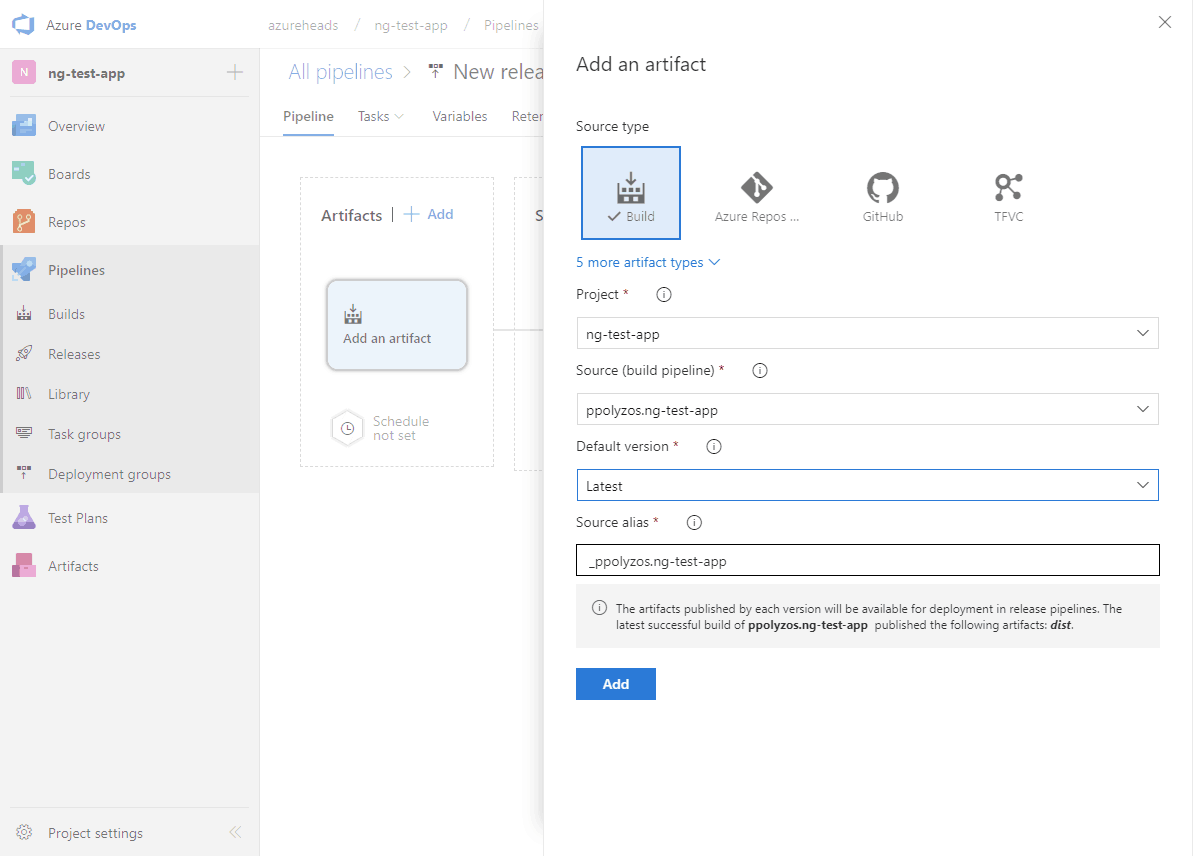
Note: Choose Latest as Default version, so as to always get the latest artifact to release.
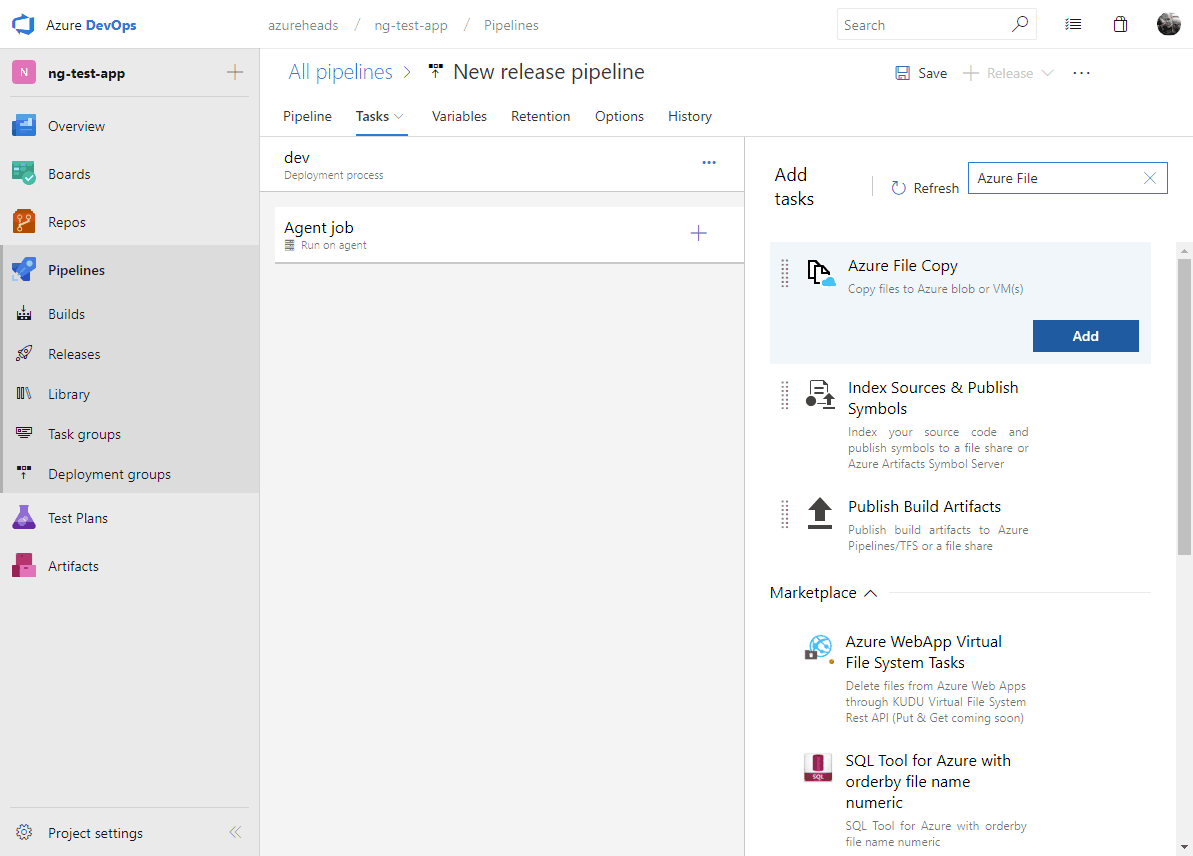
Step 3.5: Set up an Agent to copy the generated files to the Azure Storage Account
To do so, you need a task called Azure File Copy, which will copy the files that have been generated from the build pipeline to a container in Azure Storage.
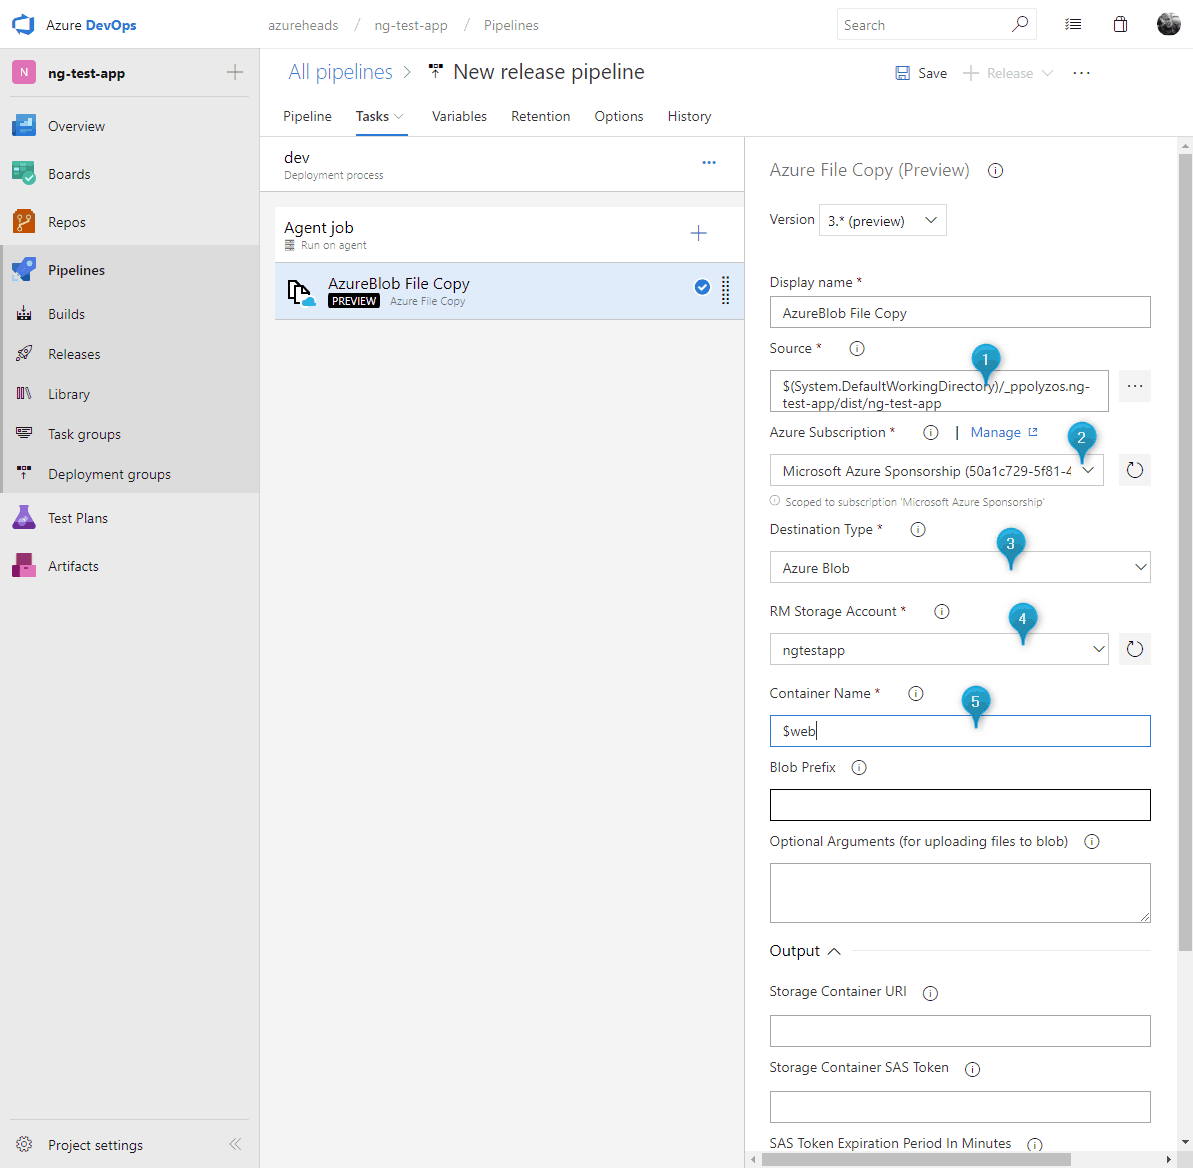
Step 3.6: Specify the source directory to copy files from
It’s important to specify the source directory to copy files from; to do so, click on the … button and from the popup dialog choose the proper path to copy files from:

Step 3.7: Authorize your Azure Storage account
Next step is to authorize the subscription to be used in this task and specify the details of your storage account.
In Container Name specify $web as your static website hosting container.
Step 3.8. Run manually your release pipeline
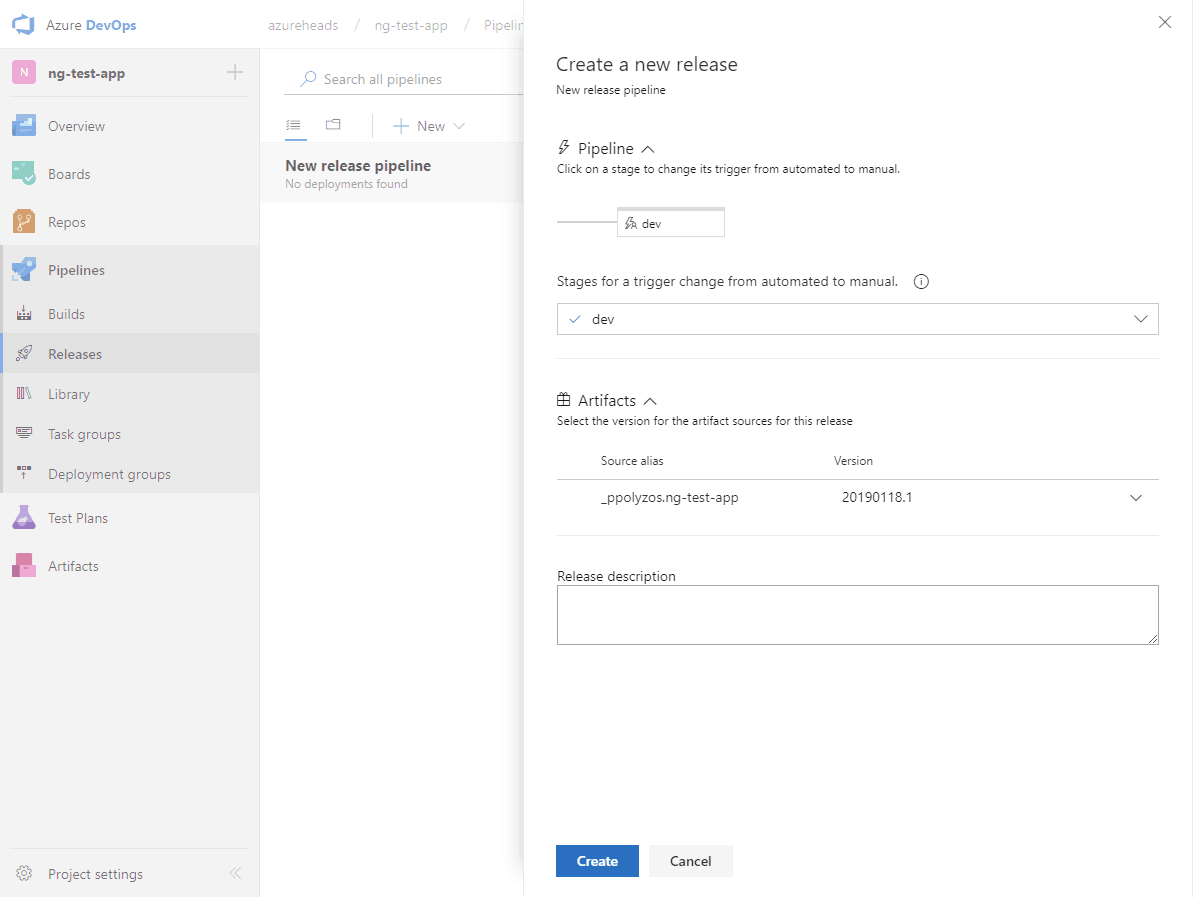
Now that you have created your release pipeline, you can run it manually by clicking on Create a release, choose the stage to which you want to deploy and, finally, click on the Create button.
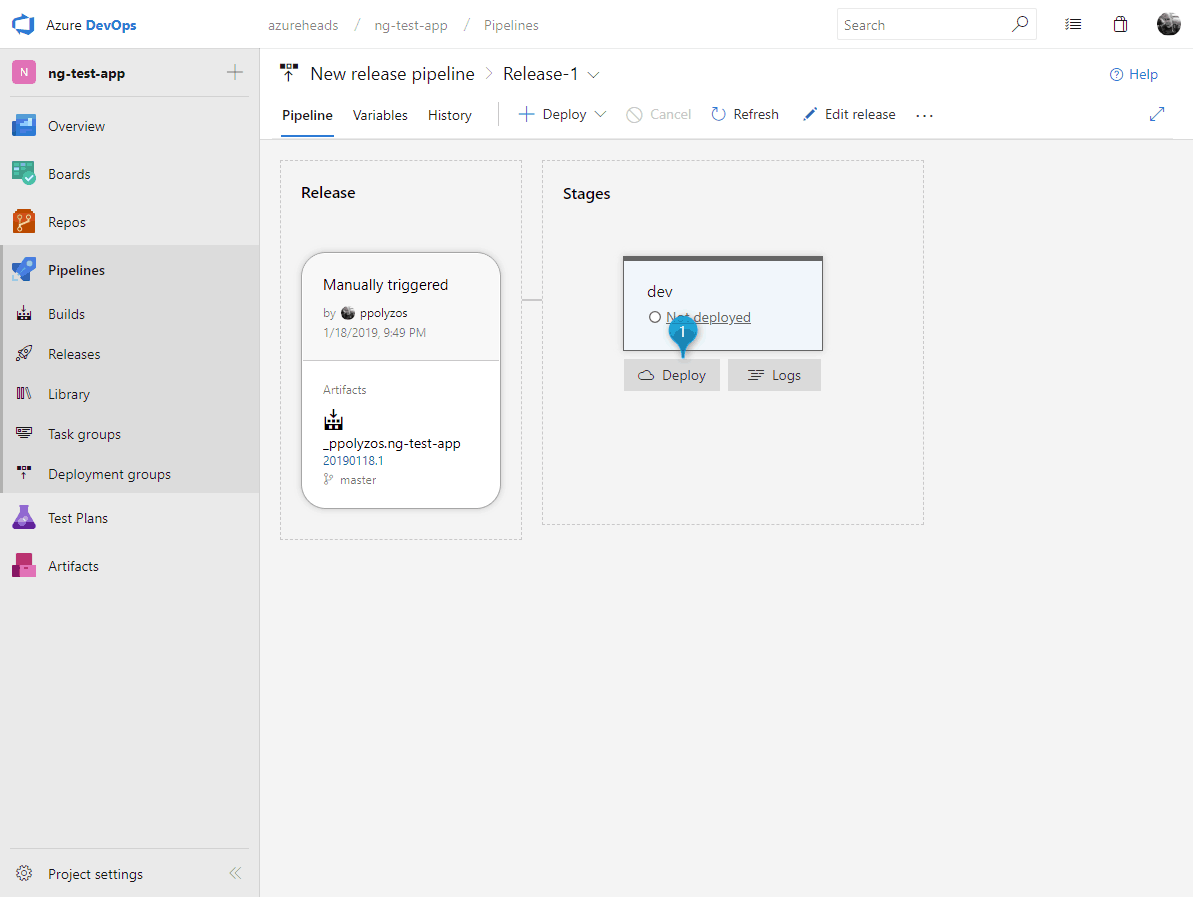
A new screen will appear with your pipeline; once you click on the Deploy button, your release pipeline will start…
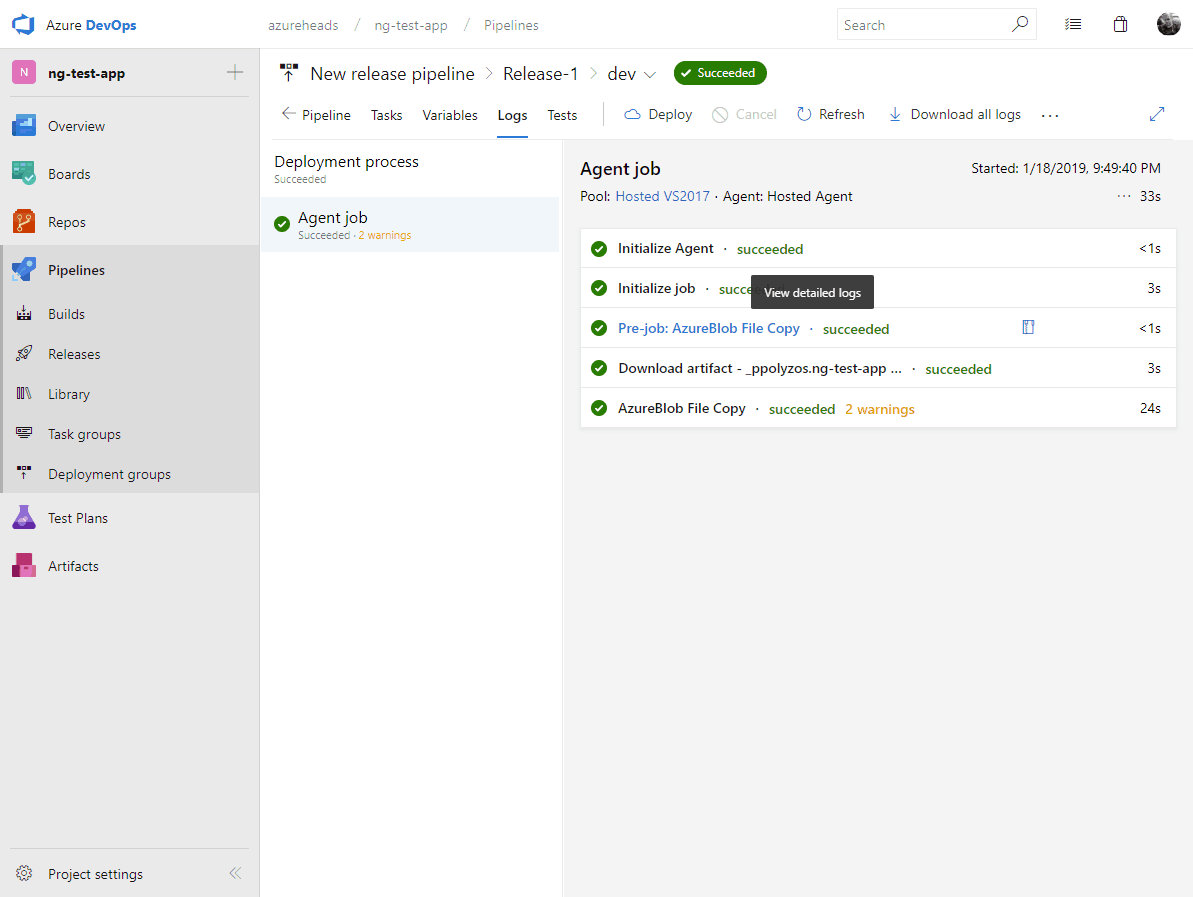
…and in a few minutes your files will be copied to the static website hosting container in your Azure Storage account
Step 3.9. Cheers, your app is live!
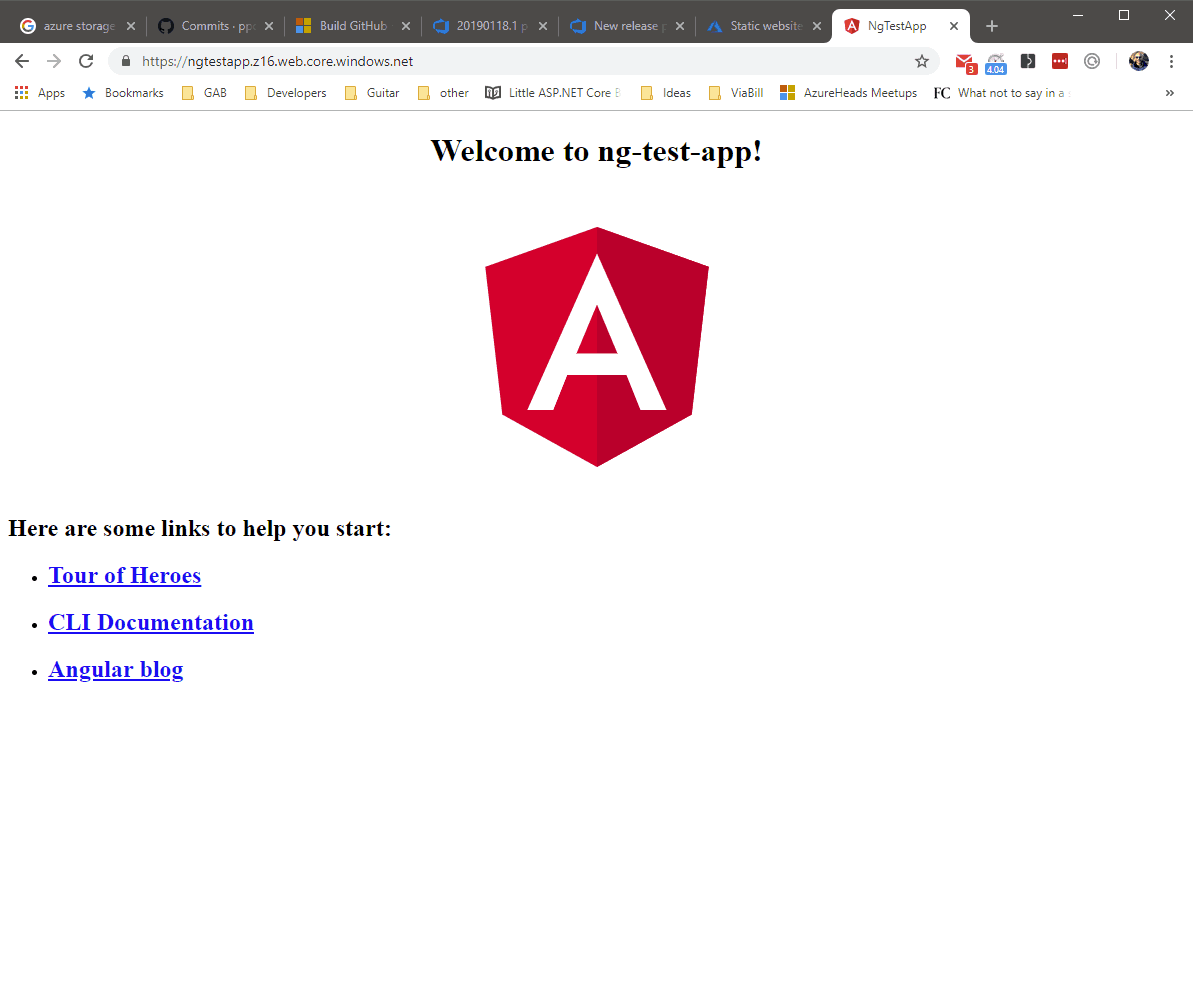
Now, you can manually release your latest code to a stage environment.
What about continuous deployment though?
Step 4. Continuous Deployment
In the previous step, we run the release pipeline manually, however to automate this process and continuously deploy your code whenever you push a change to your GitHub repository, you need to edit your previous release pipeline by clicking on the trigger event icon and enabling continuous delivery.
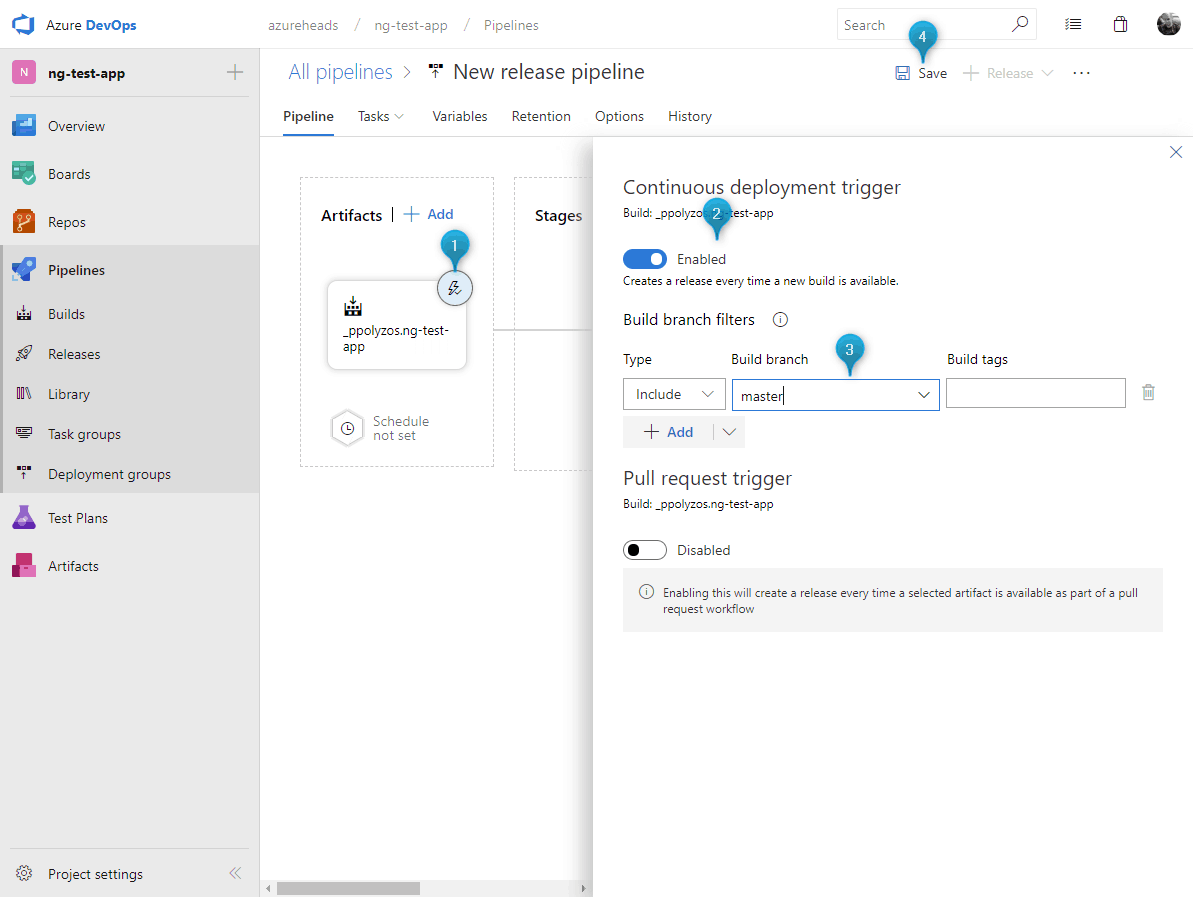
Setting master as the build branch you avoid triggering the release pipeline by code commits in other branches, and, thus, only changes that are merged to the master branch go to your stage environment.
Thanks for the useful article!