In a previous post we talked about how you can create a simple powershell runbook to automate tasks in your Azure account, such as starting up or shutting down a virtual machine based on a user-defined schedule.
In this post, we are going to demonstrate how easy it is to create a webhook, in order to call your Runbook through an HTTP Post request.
Create a Webhook
From within your Azure automation account, head over to the runbook you want to create a webhook for, and click on the square icon at the top bar:
Basic Details
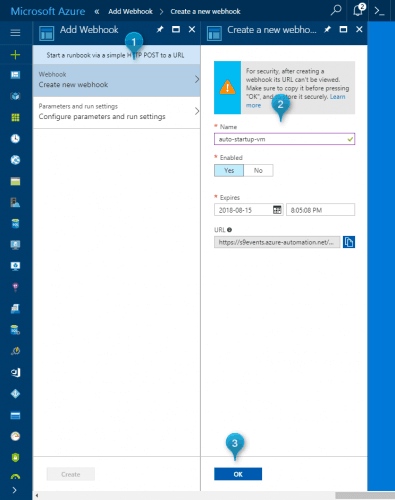
Fill in the details about your webhook, such as the name of your webhook, if it is enabled or not and when it will expire.
[box type=”warning” width=”100%” ] Remember to copy the URL provided in this blade, as it won’t be available after the creation of the webhook, for security reasons.[/box]Parameter and Run Settings
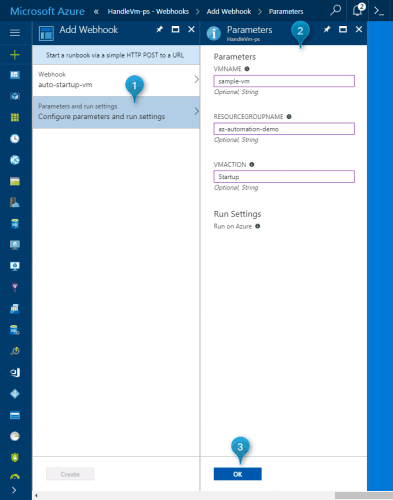
In the second section, define the input parameters that your runbook will use whenever you call this webhook.
Call your Webhook
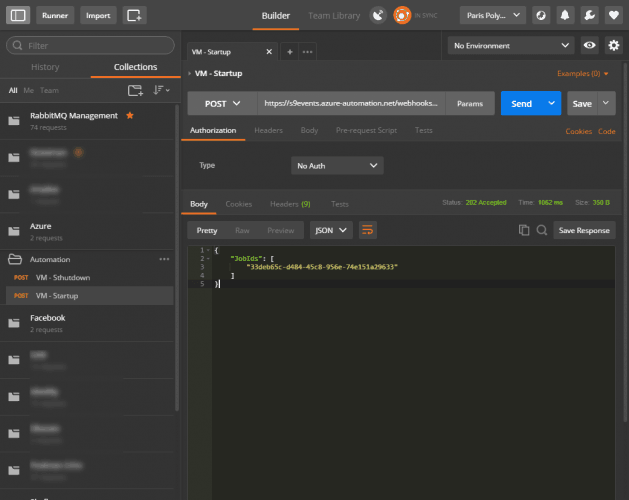
In order to call your webhook you simply have to create an HTTP Post request with the URL provided upon your webhook’s creation.
If you are using cURL, you can use the following piece of code:
curl -X POST \
  'https://s9events.azure-automation.net/webhooks?token=<webhook_token>' \
  -H 'cache-control: no-cache' \
or with postman


Nice blog. I’ve used a webhook within a powershell script, and compiled the ps1 as an exe.