In our previous article we explored the option of creating, deploying and managing the Parse Server using a pre-configured VM image on Microsoft Azure. In this post we are going to describe an easy way for Parse developers to continue their work on Microsoft Azure by leveraging the following mobile services; Azure App Service and Notification Hubs.
In Azure MarketPlace, when searching for Parse Server, you may come across Parse Server on managed Azure Services template, which deploys the Parse Server backed by fully-managed and supported Azure services.
This template deploys the following Azure Services:
- Parse Server powered by Azure App Service
- File adapter powered by Azure Storage
- NoSQL data adapter powered by Azure DocumentDB
- Push notifications powered by Azure Notification Hubs
- UI-based management using the Parse Dashboard
When deploying this template, the deployment option with the lowest cost within each Azure service will be used. You may start Free and scale up to higher performance options, by adjusting the scaling options after deployment.
Let’s start.
Parse Server on managed Azure Services
In Azure Markeplace search for “Parse Server” and select Parse Server on managed Azure Services.
Create Web App
From Microsoft Azure MarketPlace select Parse Server on managed Azure Services and click on the Create Web App button. This will lead you to your Azure account portal, to fill in some details for the deployment.
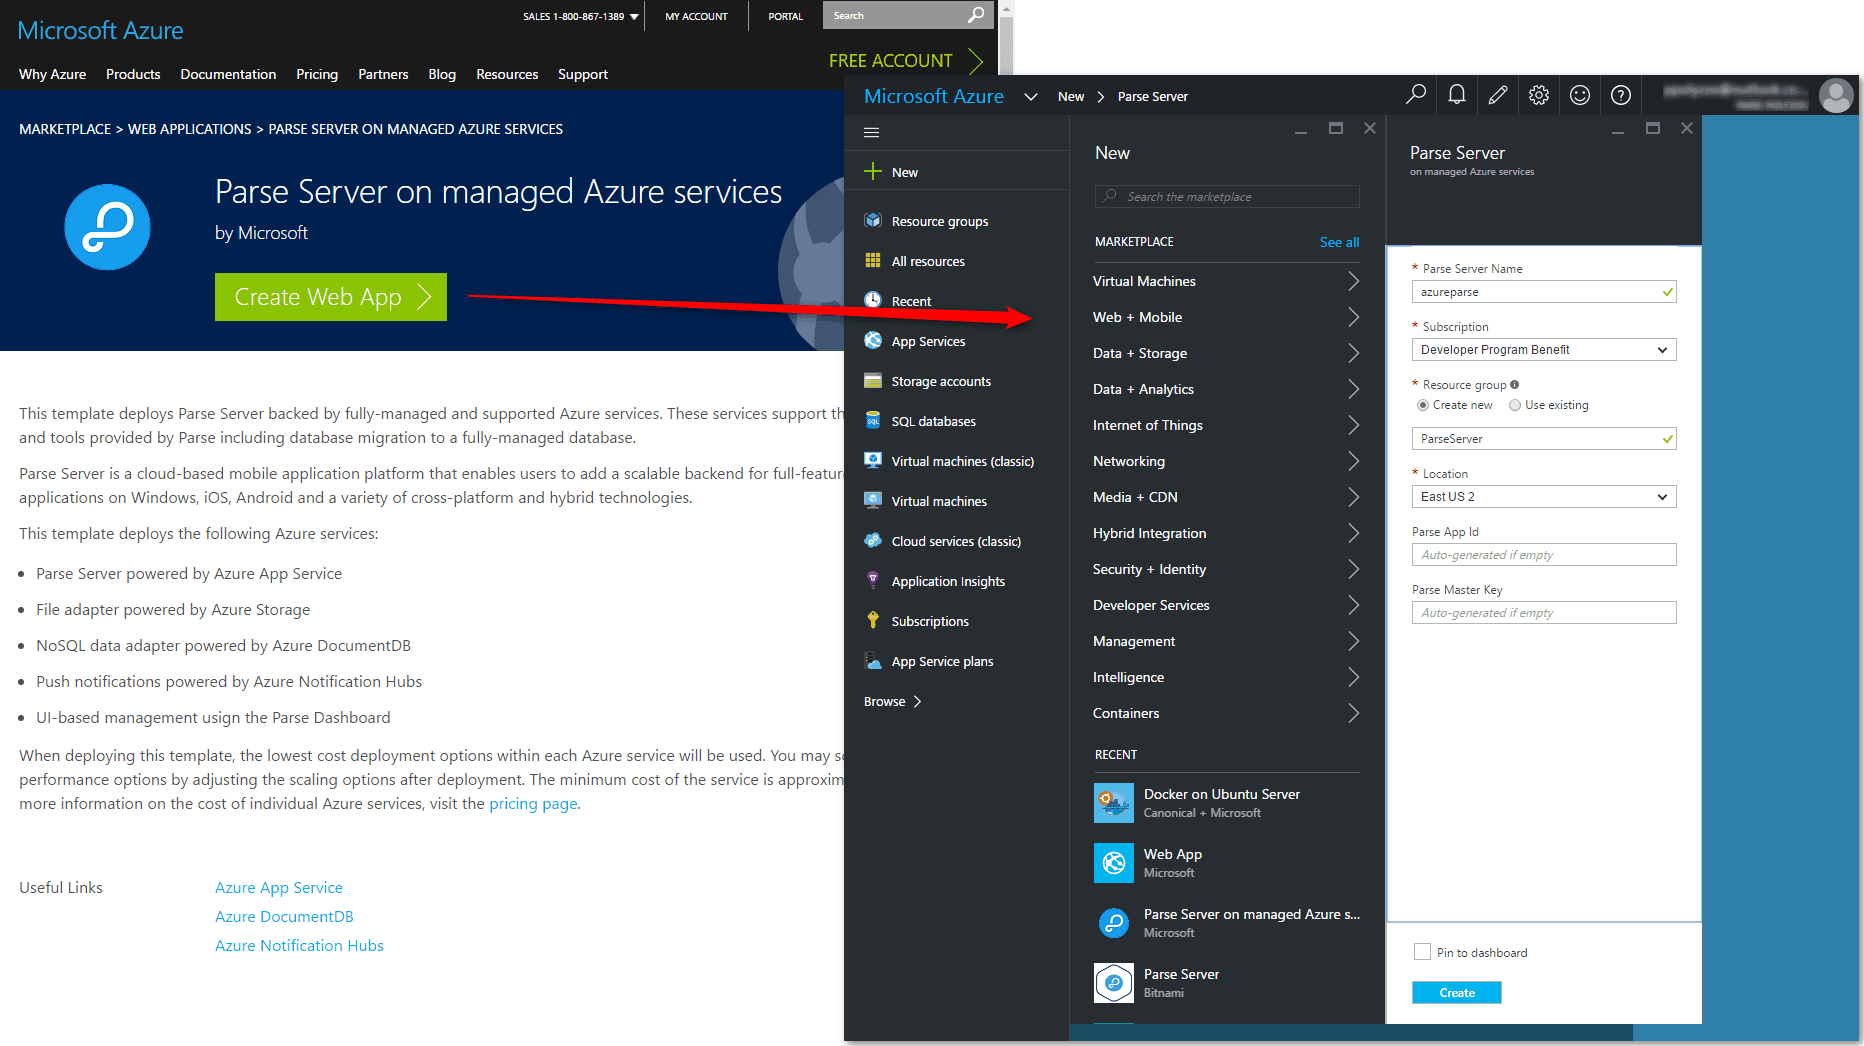
Configure the basics
- Give a name to your Parse Server
- Select the Resource Group that you will use;
Remember that, since the Resource Group is a collection of resources which share the same lifecycle, permissions and policies, it is a good idea to create a new one, to group all the resources related to your new Parse Server. - Specify the Location where your Parse Server Managed Services will be hosted
Upon drafting this post, the only option available is EAST US 2 - Define an App id and a Master key
If left empty, these options will be auto-generated - Click on Create button and wait a few minutes for your deployment to be completed.
Please note that occasionally this deployment might fail. To overcome this, it may be faster to delete the associated resource group and start over.
Successful Deployment
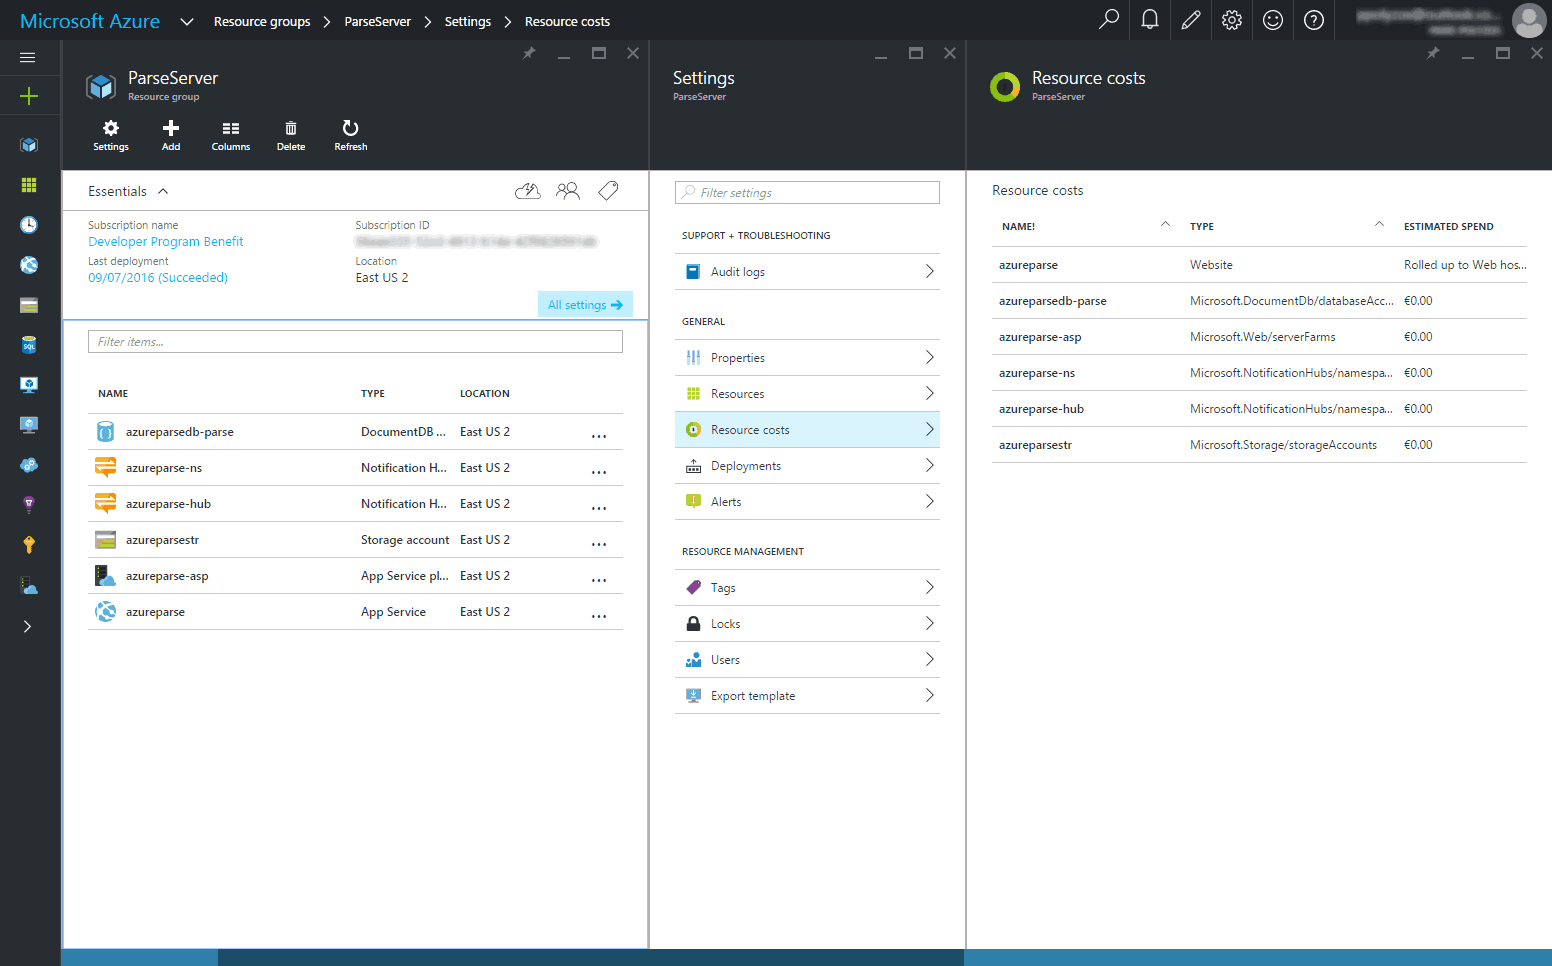
After your deployment has been successfully created, you may go to the `ParseServer` Resource Group and find out more details on all the linked services necessary for your Parse Server to work.
I also find it useful to always check the Resource Costs section, which provides an estimated cost breakdown for all the services in a Resource Group.
Info about your Parse Server
For your Parse Server to work a Web App has been deployed. Important thing to note is the URL which will be used to access the Parse Server and the Free pricing tier, as the lowest cost options are preferred during deployment.

Dashboard
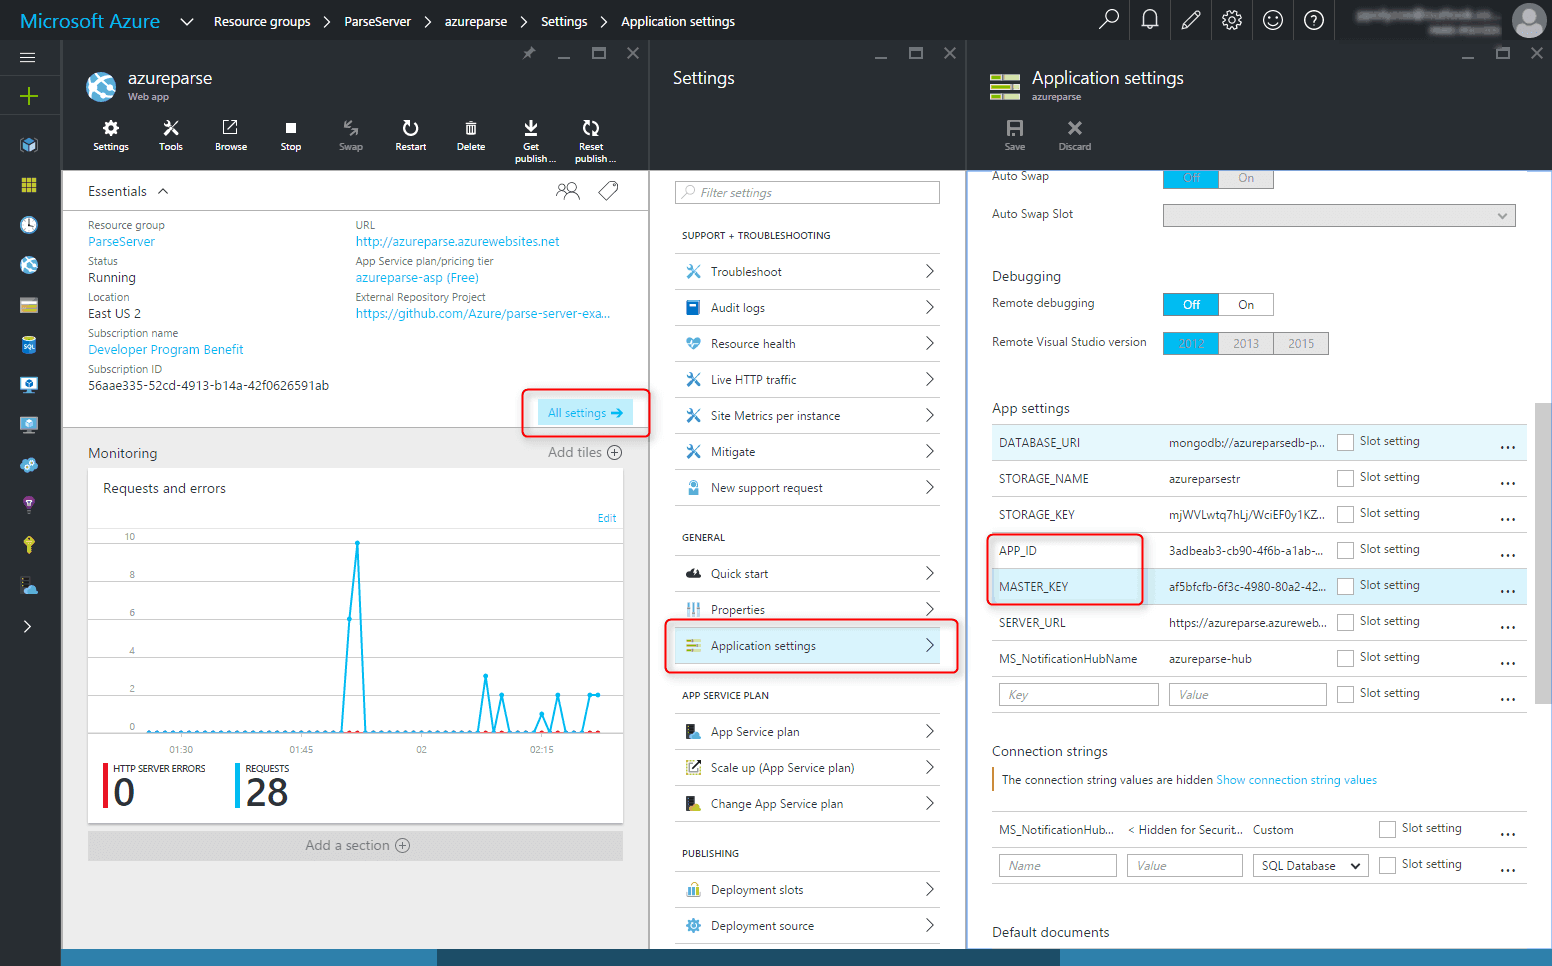
The Parse dashboard can be accessed at https://<appId>:<masterKey>@<site>.azurewebsites.net/parse-dashboard
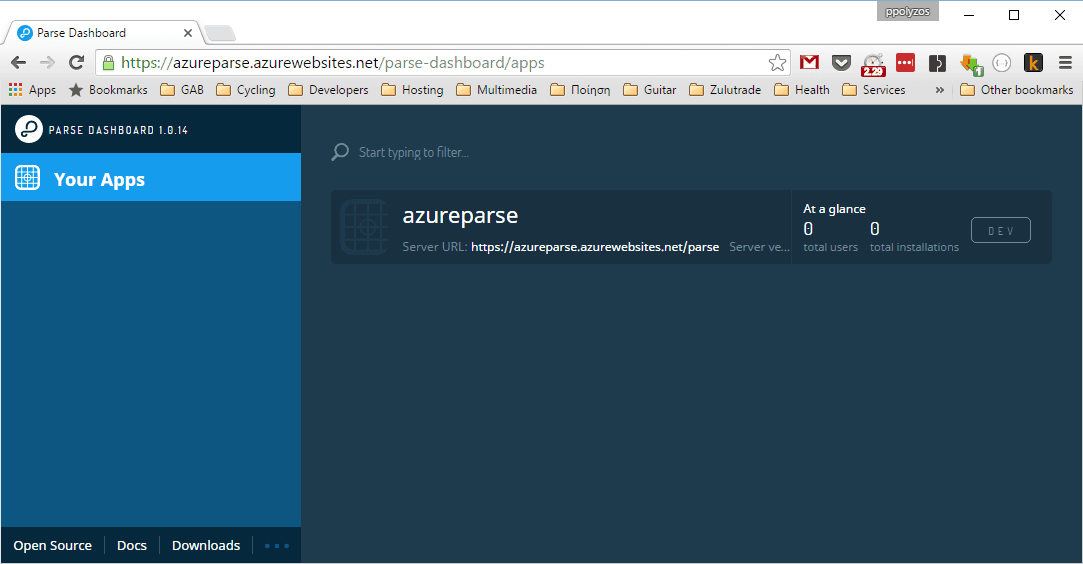
where AppId and Master Key can be found in Application Settings
Migrate your data to DocumentDB
DocumentDB databases can now be used as the data store for apps written for MongoDB. Using existing drivers for MongoDB, applications can easily and transparently communicate with DocumentDB, in many cases by simply changing a connection string.
In order to migrate your data from parse.com to your Parse Server, you need the DocumentDB’s connection string which can be found in Application Settings under DATABASE_URI key and looks like:
mongodb://azureparsedb-parse:{PASSWORD}@azureparsedb-parse.documents.azure.com:10250/parse?ssl=true
Once you have your DocumentDB connection string, you may use the Parse database migration tool to transfer your data (found in the Parse.com Dashboard under App Settings → General →Migrate to external database).
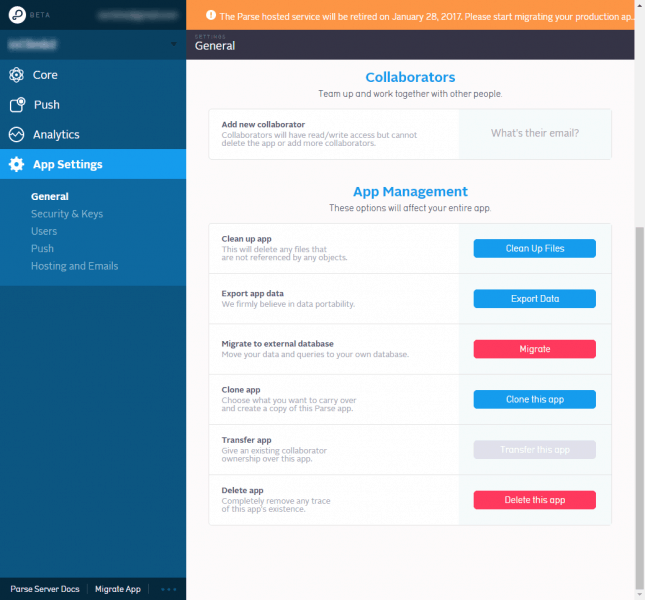
After the migration process starts, the following screen will appear.
Please note that when you Verify the migration, your app at parse.com will stop accepting reads and writes and all your request will be pointed to your new database.

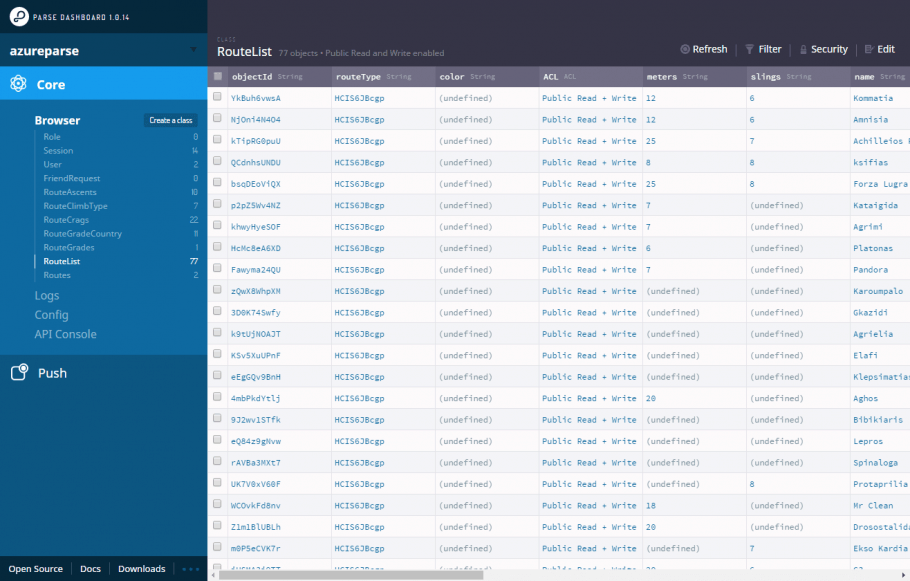
Check your Dashboard to see if your data has been successfully migrated
Following the completion of the migration, you will be able to view all your data in your new Parse Server through the dashboard at https://<appId>:<masterKey>@<site>.azurewebsites.net/parse-dashboard
Common Errors
The destination database was not empty
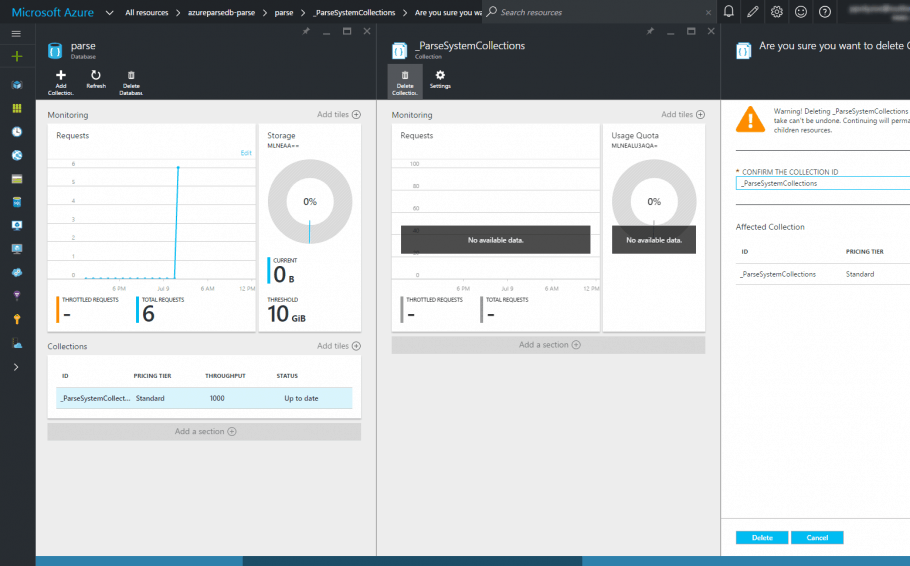
This error seems to appear when, during the migration, there is a non-empty collection in your database.
The easiest and fastest way to solve this error
DocumentDB Cost
While the Web Application hosting your Parse Server is in a free pricing tier, each collection in your database is billed hourly, based on the amount of data stored (in GBs) and the throughput reserved in units of 100 RUs/second.
When drafting this post:
[table colalign=”left|left”] Unit, PriceSSD Storage (per GB),€0.211 per GB / month
Reserved RUs /second (per 100 RUs),€0.007/hr (~€5/mo)
[/table]
For more information on pricing, please visit the Azure DocumentDB Pricing page
I don´t think Azure is the best environment to run Parse Server. The total time to deploy the APP together with Parse Server is very high and developers should look for Parse hosting solutions. Please check http://www.back4app.com and http://www.stamplay.com.
In my opinion, running Parse Server on Azure has its pros and cons.
I am using Azure extensively so I was happy that I had the option to run Parse server on the same ecosystem. In addition, I can combine a lot of services like Azure Storage to handle assets. Monitoring is also provided free. As far as the pricing, definitely does not come as cheap as the services you suggest.
Have you tried it? What were the things you didn’t like?