Sometimes you may want your Azure website to not be publicly available or to restrict the access to it quickly and easily, without having to perform any complex configuration or code changes. This actually can be achieved with a few clicks through Azure Websites Authentication/Authorization; a feature that allows users to quickly restrict access, using Azure Active Directory, with just a few clicks.
In this post, following the steps below, we are going to create and deploy a web application to Microsoft Azure and then restrict the access to selected users through Azure Active Directory.
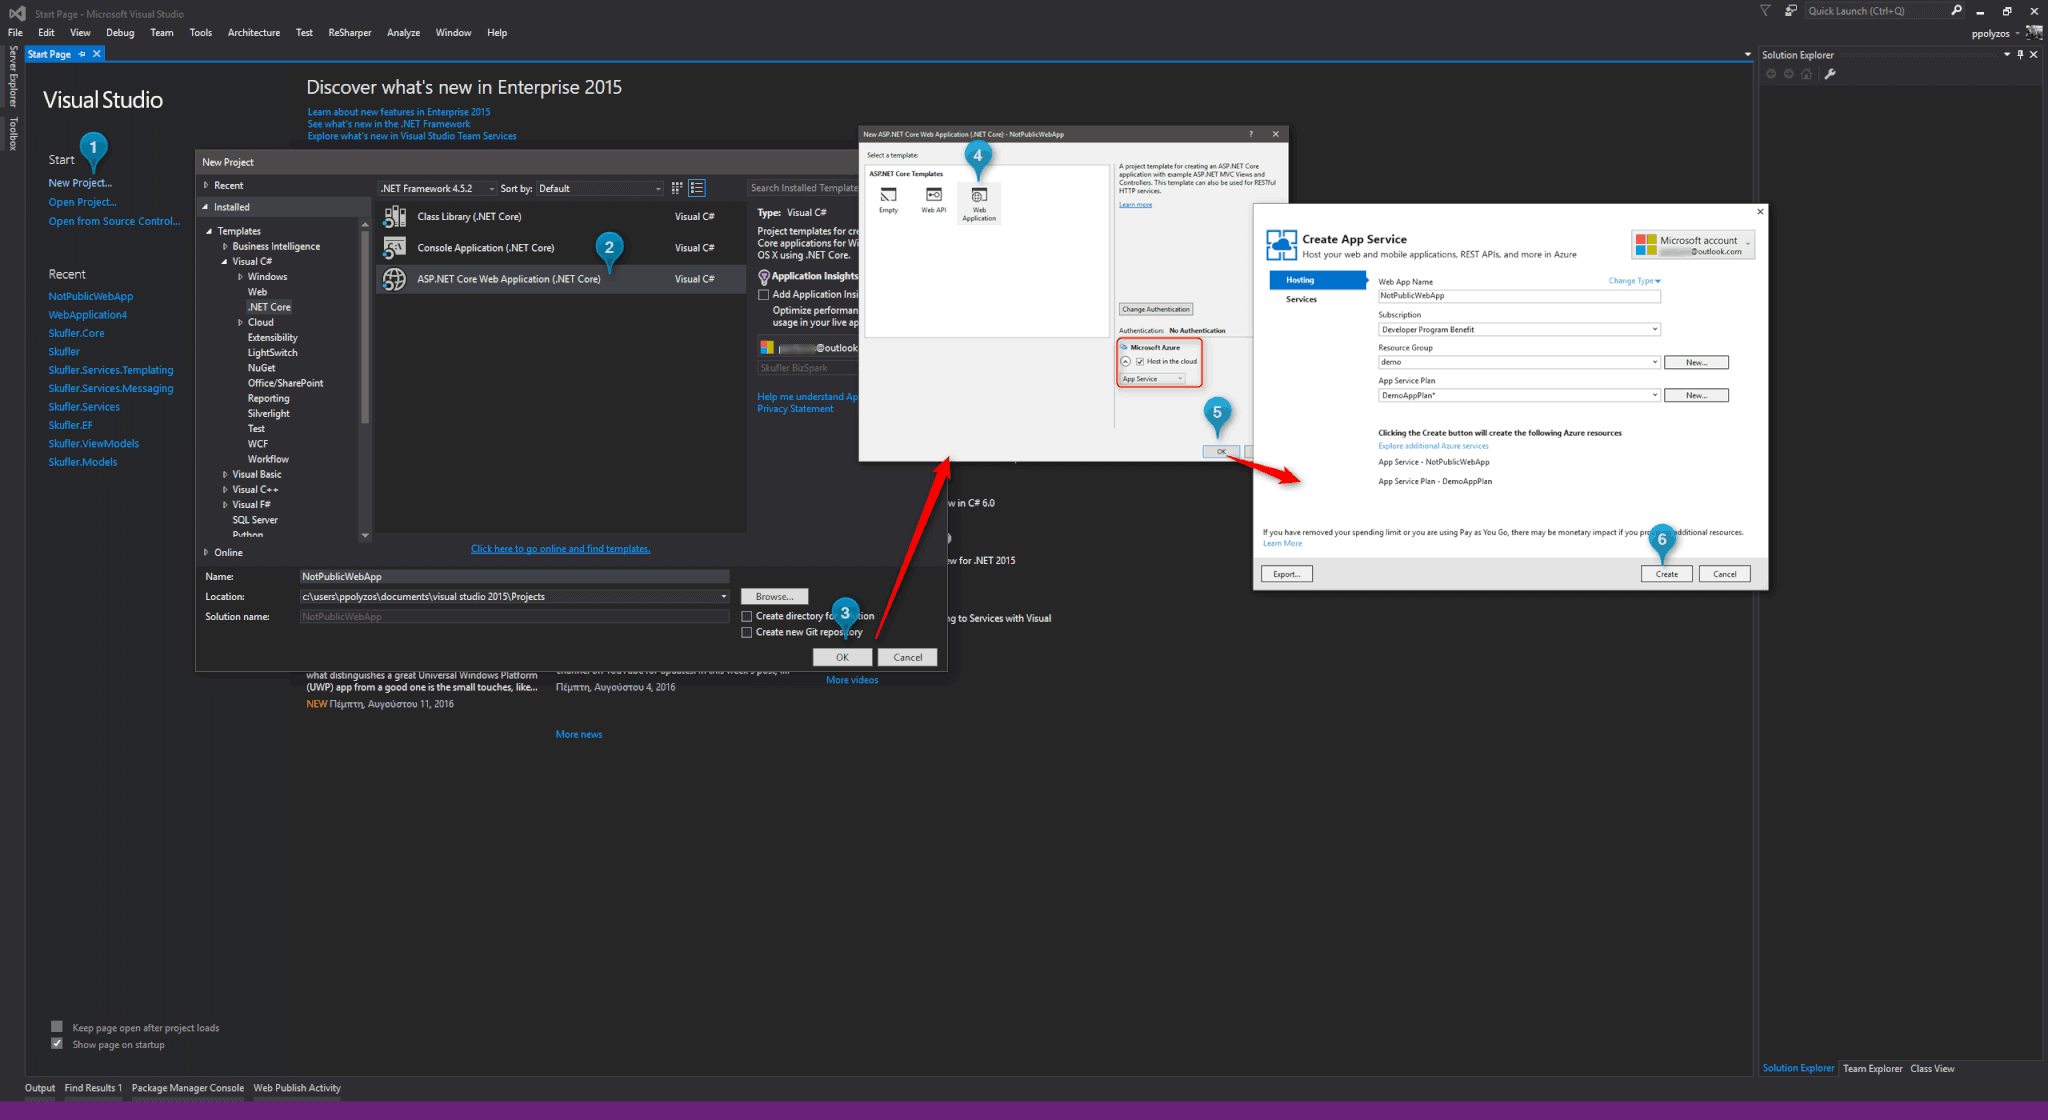
Step 1. Create a ASP.NET Core web app
In order to create a new Web App:
- Select New Project… from File > New > Project…
- In the popup window select ASP.NET Core web app or ASP.NET Web App
- Check Host in the cloud option to automatically configure Microsoft Azure App Service and press Create
After a few seconds the project will be created and a “ready to deploy to” App Service is created in Microsoft Azure.
Step 2. Publish your web application on Azure
To publish you web application on Microsoft Azure:
- right-click on the Project name,
- select Publish… and
- click on Publish in the popup window. In a few seconds your application will be hosted in the cloud.
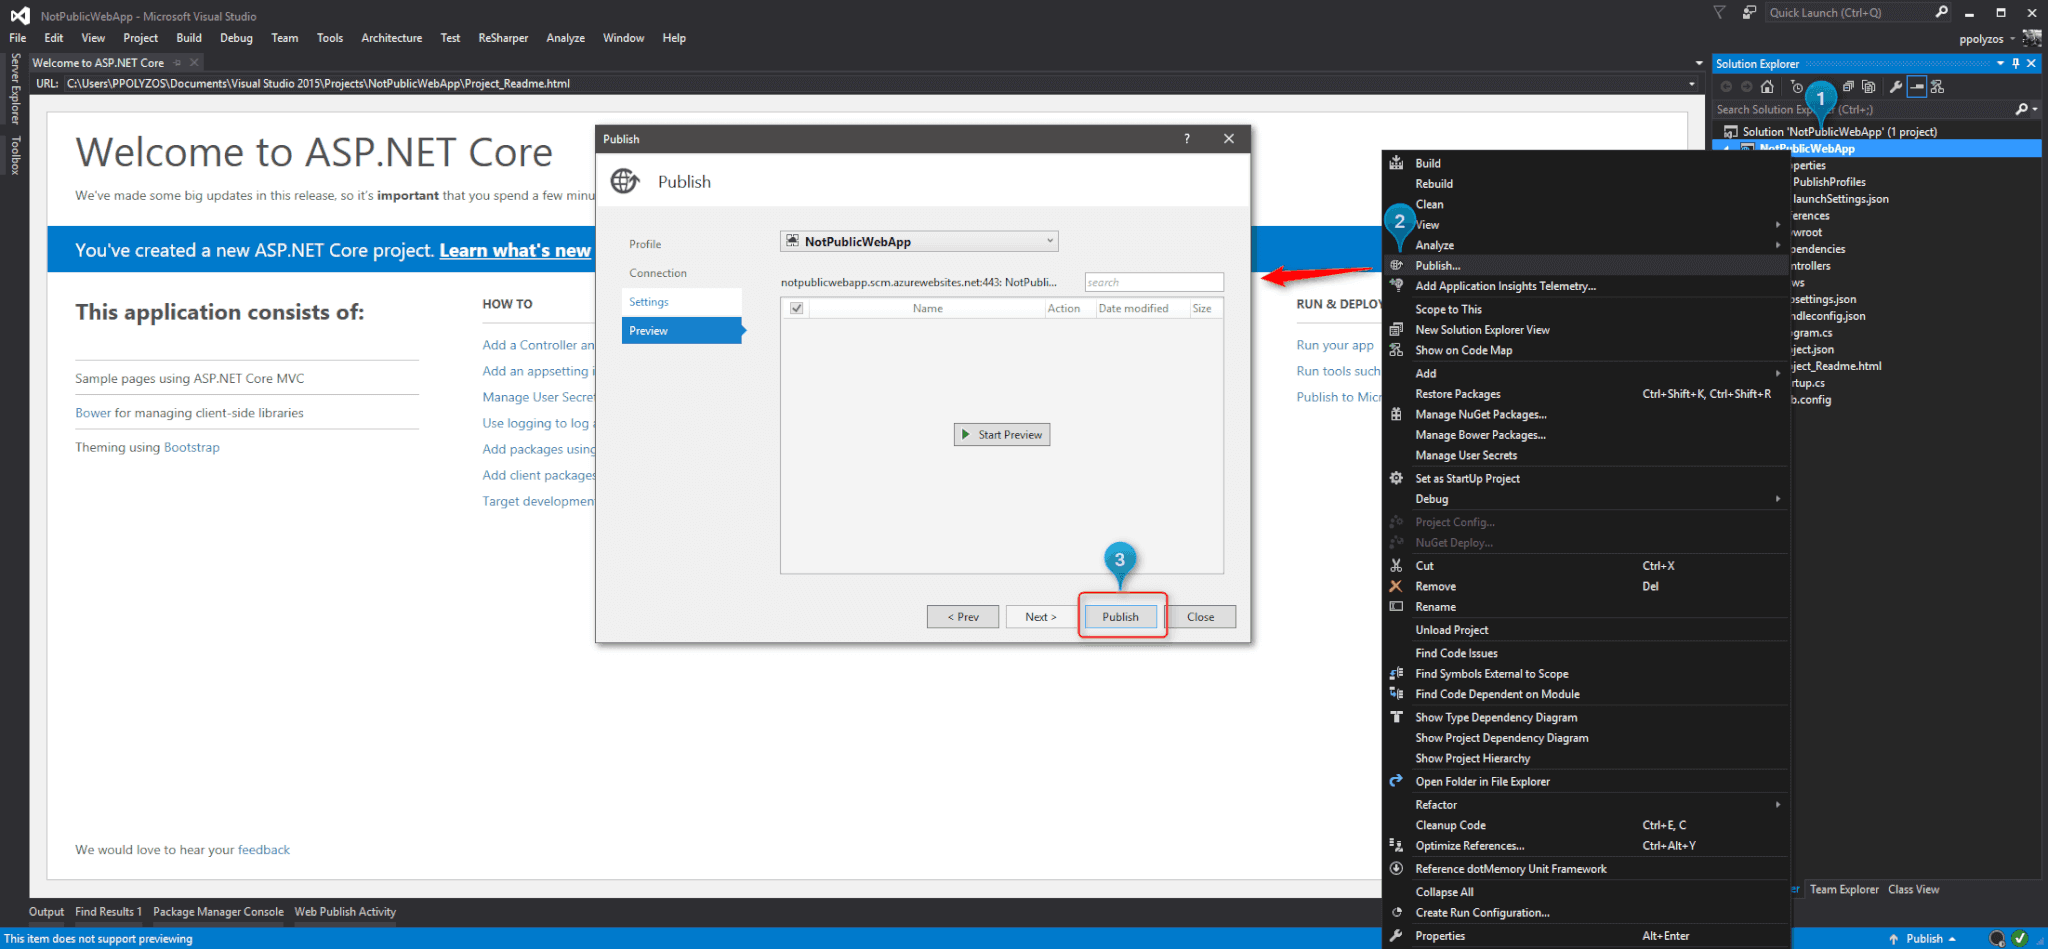
When Publish is completed you will be able to access your web app through http://notpublicwebapp.azurewebsites.net

Step 3. Restrict access through Authentication / Authorization
App Service Authentication / Authorization can be found in the Settings group of the new Azure Management Portal. After you flip the switch to On a new set of options will appear, where you can select:
- the Αction to take when request is not authenticated (3), and
- the Authentication Providers (4) to use
In our scenario we will select:
- Log in with Azure Active Directory as action to be taken when the request is not authenticated, and
- Azure Active Directory as authentication provider
On the Azure Active Directory Settings blade we will select Express Management Mode and we will create a new AD Application to configure who will be able to access our web app.

After you click on Save, try to access your web app through Incognito window (no session and cookies) and you will get redirected to sign-in form.

To access your app, you need to sign in with an account that has been declared in Azure Active Directory App “NotPublicWebApp“.
Step 4. Manage who can access your web app
To manage access permissions in your web app you need to click on Active Directory service that will redirect you to the old portal.
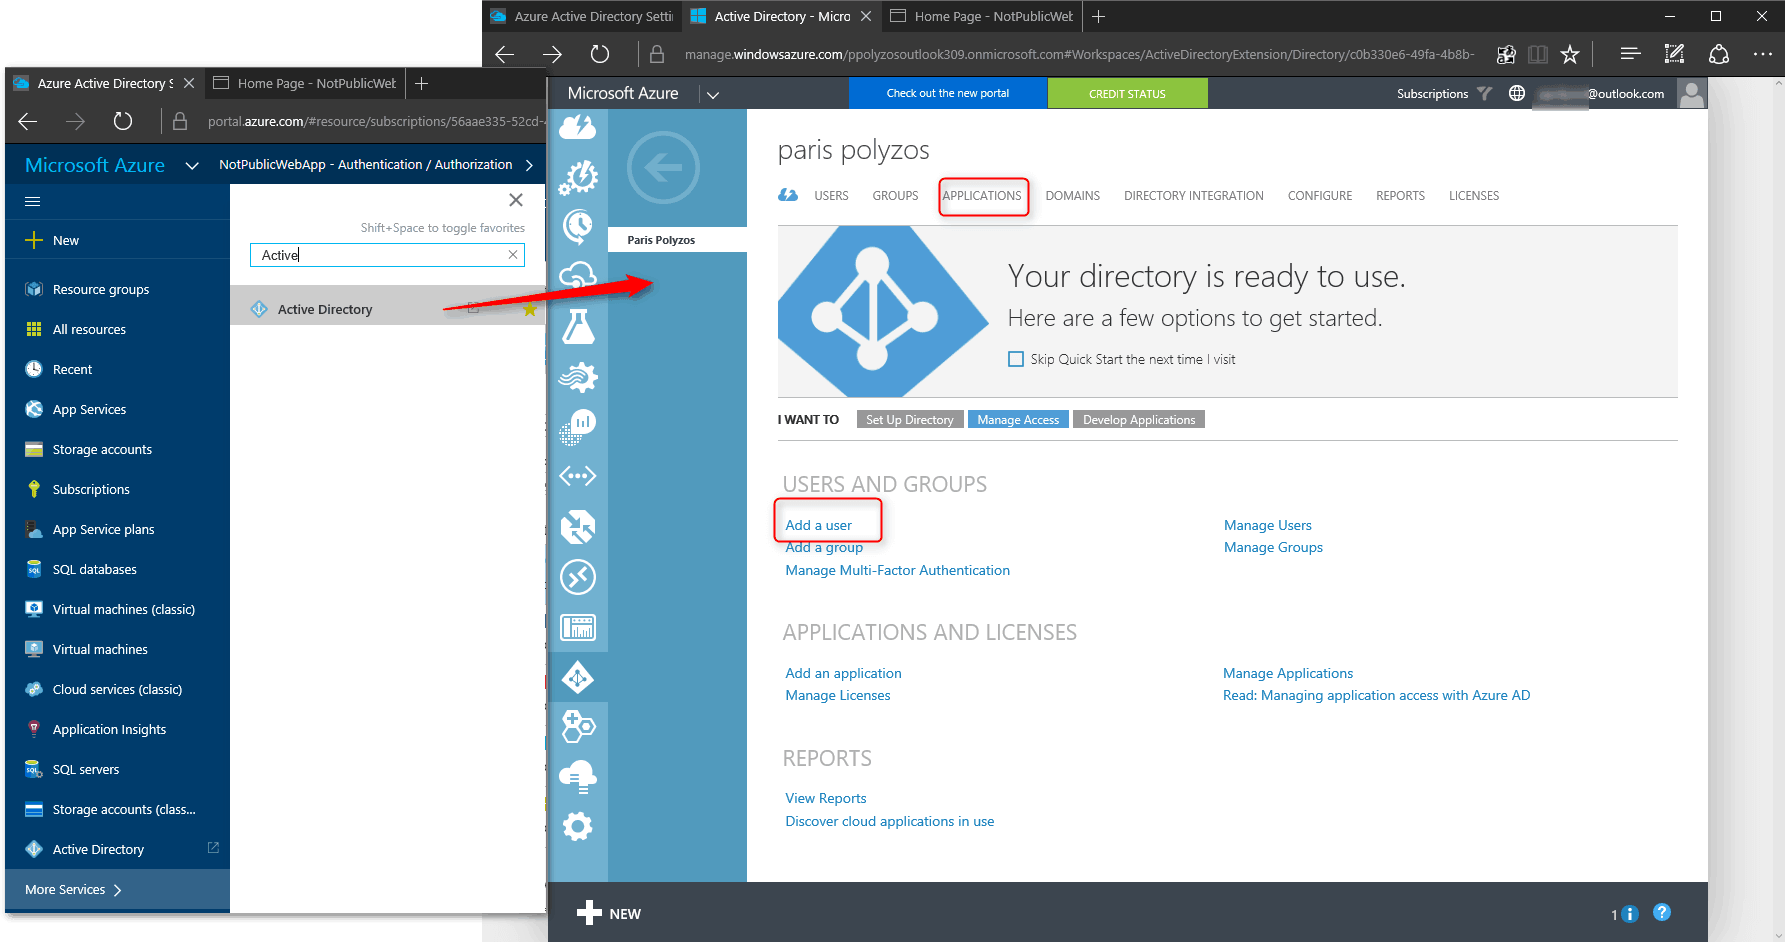
There you can add more Users to your Active Directory, while from the Application tab you can manage user access to your application.