In this post we are going to explore:
- how to simulate CPU-load hosted on an Azure web app;
- how you can set simple rules for automatic scaling; and
- how to setup alerts to get notified when your app is under pressure.
Let’s start by creating a very simple ASP.NET core web api application. The default web api template in Visual Studio is more than OK.
Create a simple Web Api application
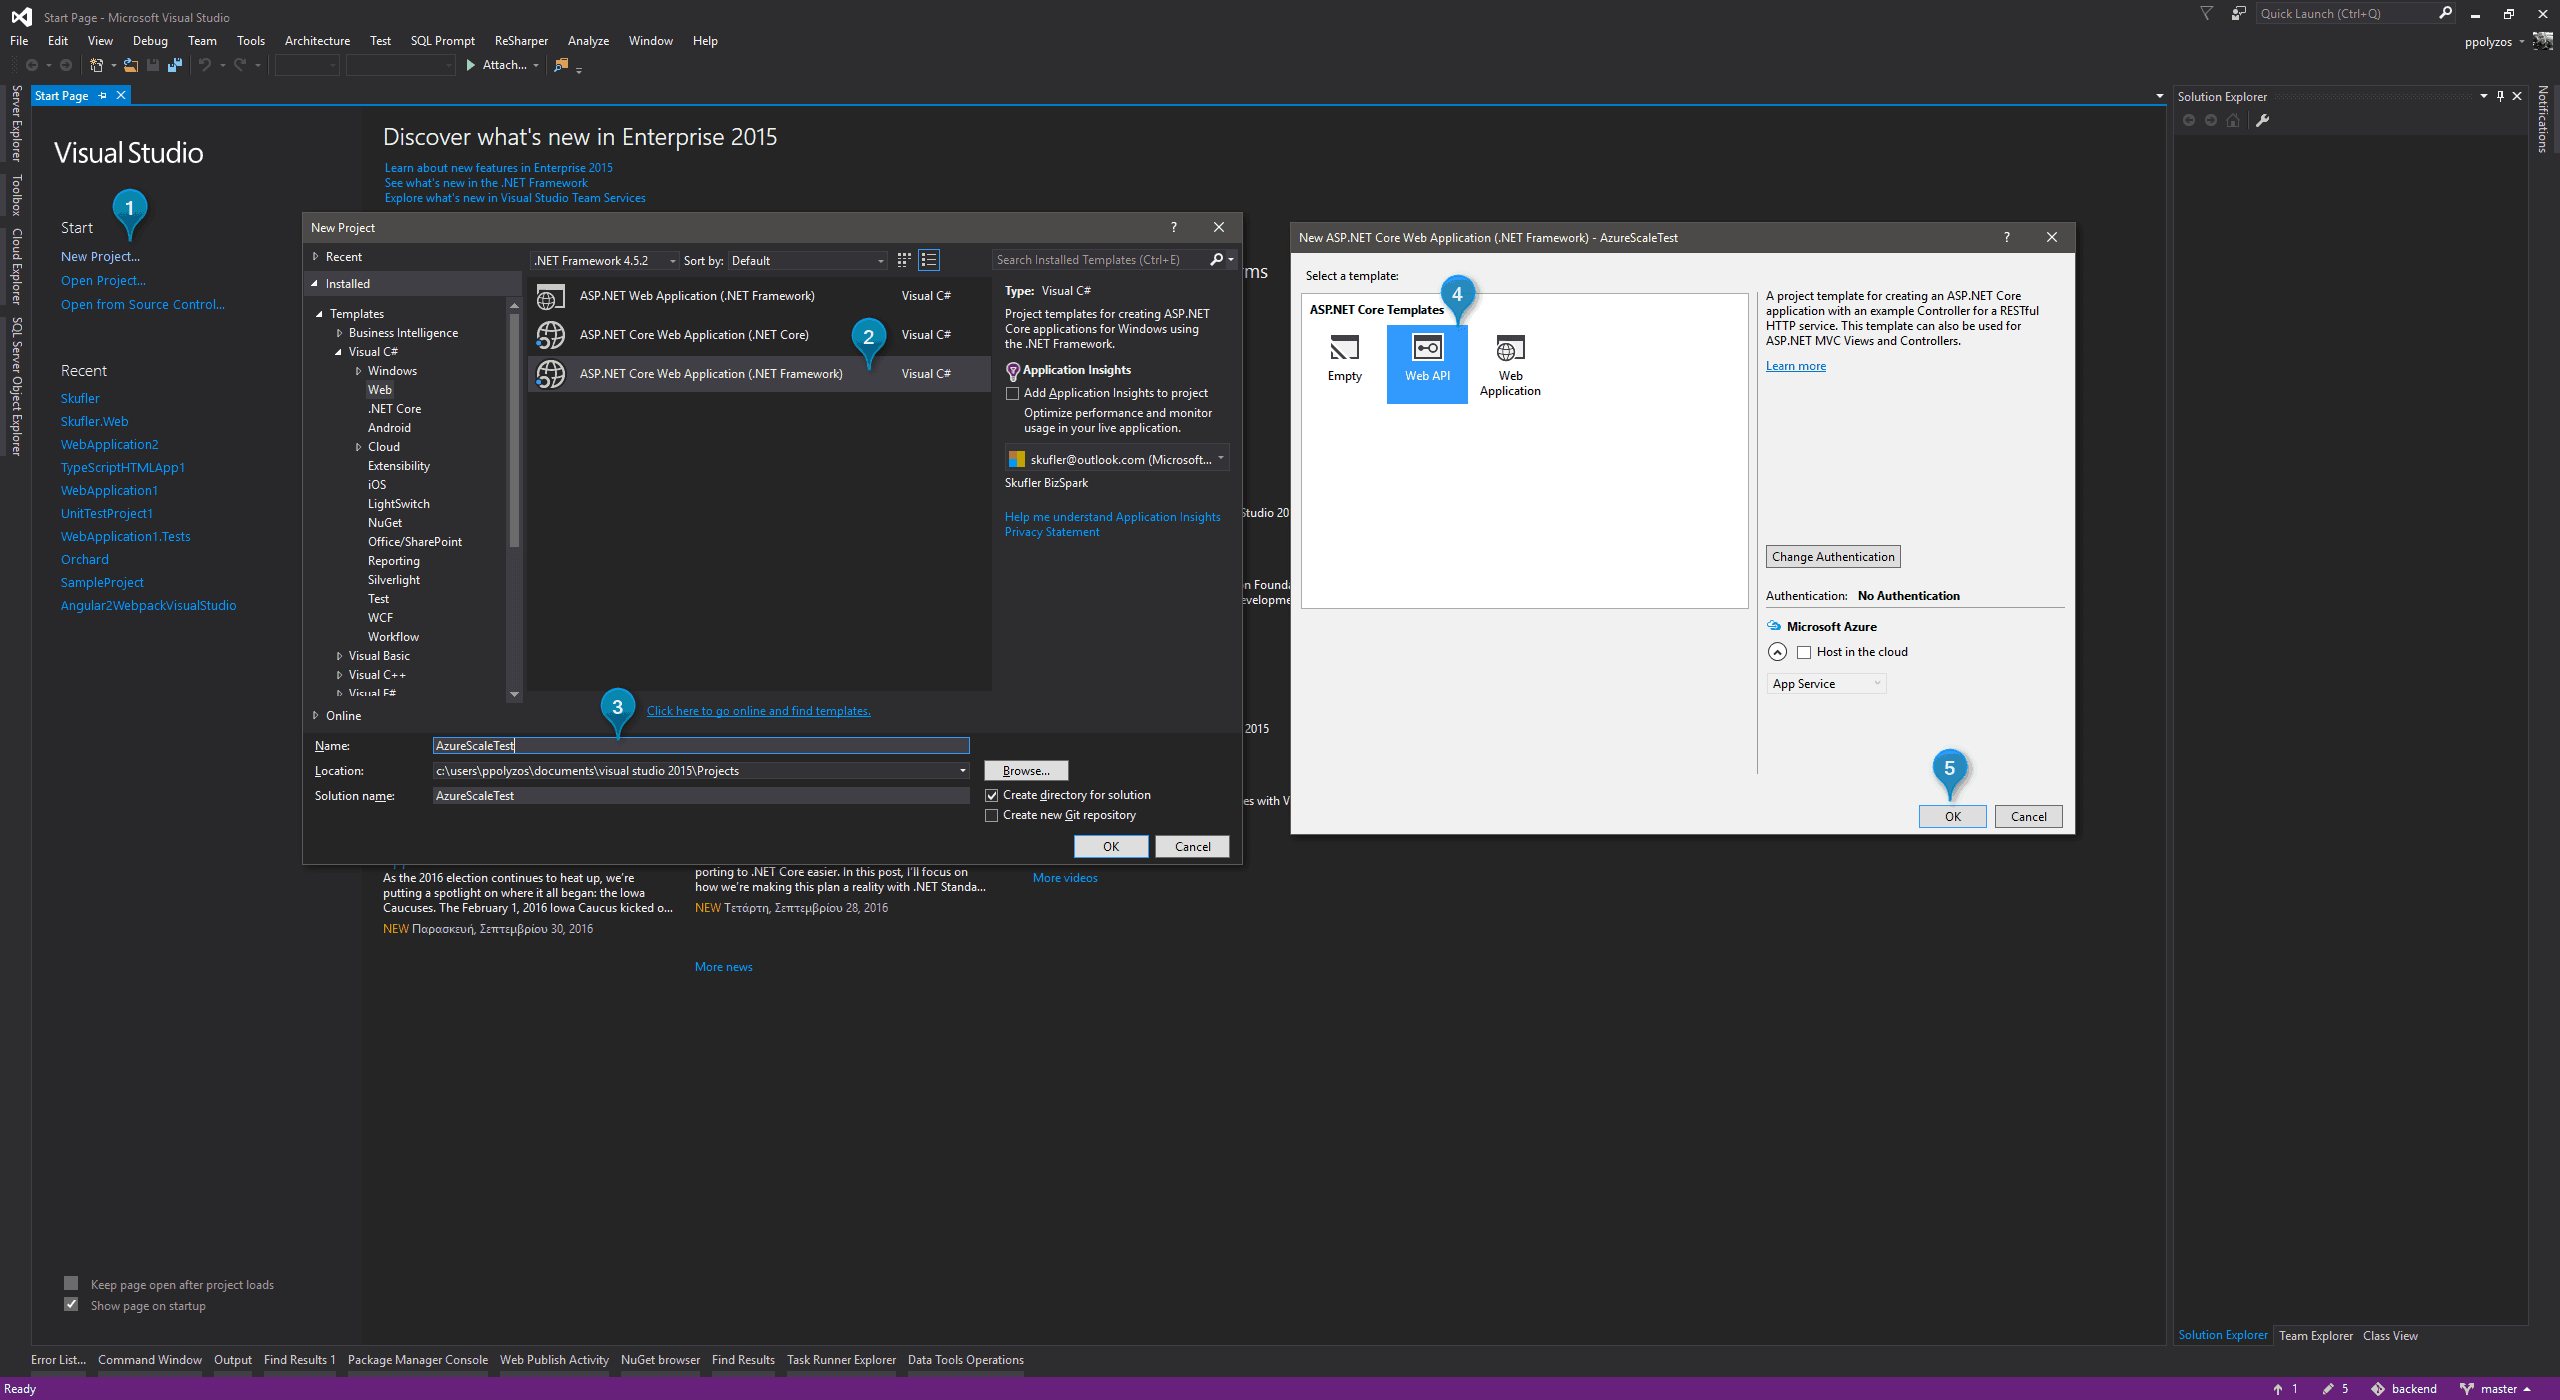
To create a new ASP.NET core web api application, simply click on New Project…, then select ASP.NET Core Web Application, specify a name and from the next popup window select Web Api application, and then press OK.
Simulate CPU-Load
To simulate CPU-load in your web app you need to create a simple controller, `FakeLoadController` with an action `cpu-load` that takes into account two parameters:
- how many seconds should the CPU-load last, and
- which percentage should the CPU-load reach.
Please note that this method works in single-core environments, but in multi-core environments is not that accurate. However, for our demo where we want to perform a simple scaling test, it can help us build some fake CPU-load pretty easily.
using System;
using System.Diagnostics;
using Microsoft.AspNetCore.Mvc;

namespace AzureScaleTest.Controllers
{
    public class FakeLoadController : Controller
    {
        [HttpGet, Route("api/cpu-load")]
        public IActionResult CpuLoad(int seconds, int percentage)
        {
            FakeWorkload(seconds, percentage);

            return Ok($"Fake load of {percentage}% for {seconds} seconds");
        }

        // Method to simulate cpu load for a period of time
        private void FakeWorkload(int seconds, int percentageCpu)
        {
            percentageCpu = Math.Max(100, percentageCpu);
            var end = DateTime.Now.AddSeconds(seconds);
            var percentage = percentageCpu;
            Stopwatch watch = new Stopwatch();
            watch.Start();
            while (DateTime.Now < end)
            {
                // Make the loop go on for "percentage" milliseconds then sleep the
                // remaining percentage milliseconds. So 40% utilization means work 40ms and sleep 60ms
                if (watch.ElapsedMilliseconds > percentage)
                {
                    System.Threading.Thread.Sleep(100 - percentage);
                    watch.Reset();
                    watch.Start();
                }
            }
        }
    }
}
Deploy to Azure
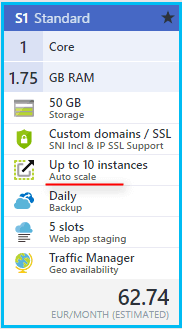
Before we start deploying this app to Azure, we need to find out which plan is suitable for this demo. From all the choices you have when you are about to choose an App Service Plan pricing tier, S1 (Standard) is the cheapest one that allows you to have the auto-scale feature, up to 10 instances, automatically.
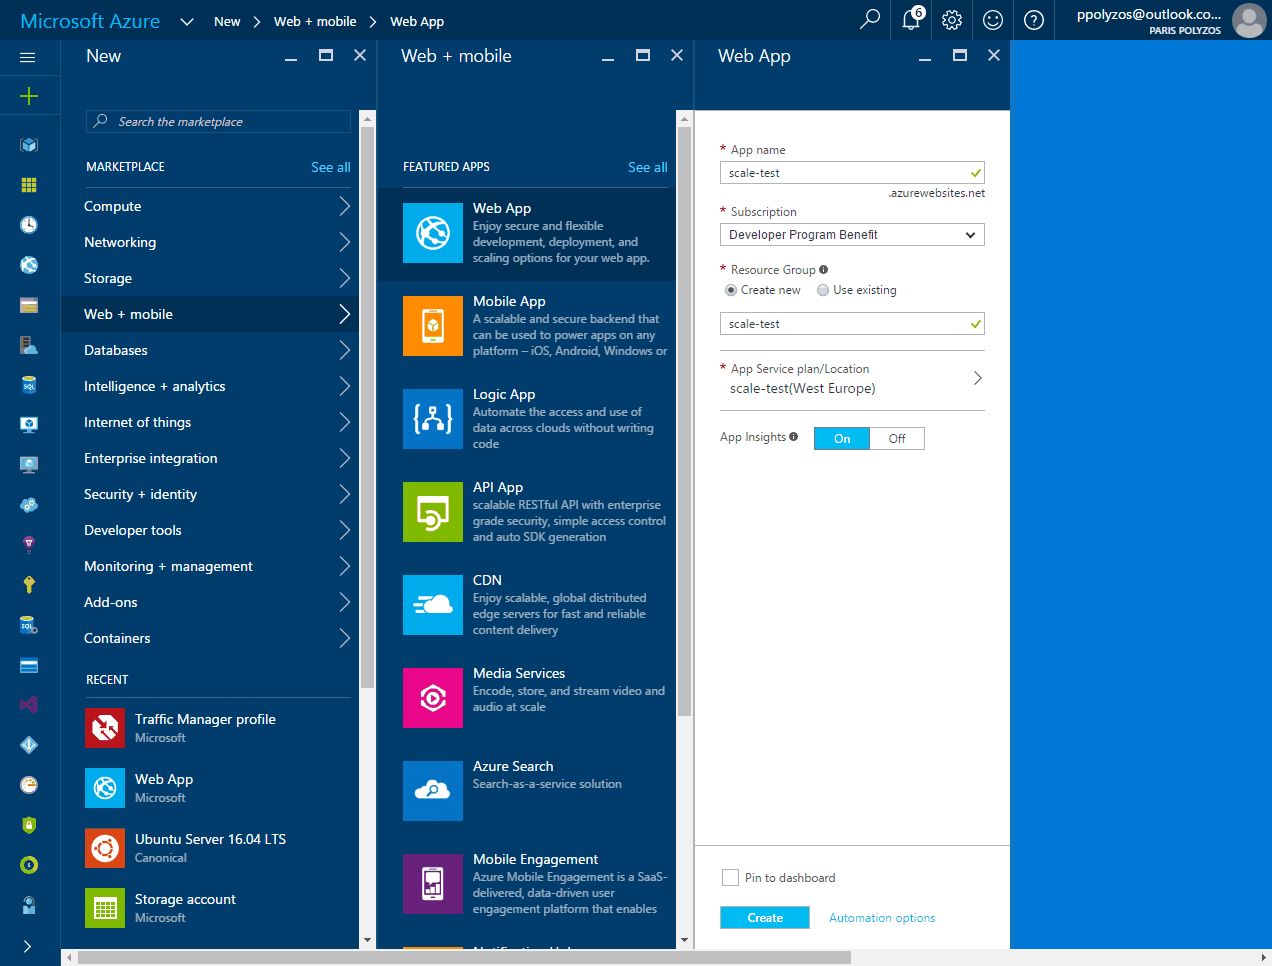
Firstly, you need to create a web app in Azure, by simply clicking on New -> Web + Mobile -> Web App and then:
- name your app, such as `scale-test`,
- specify a new resource group to keep things tidy,
- create an App Service plan of at least S1 pricing tier, and
- click on Create button
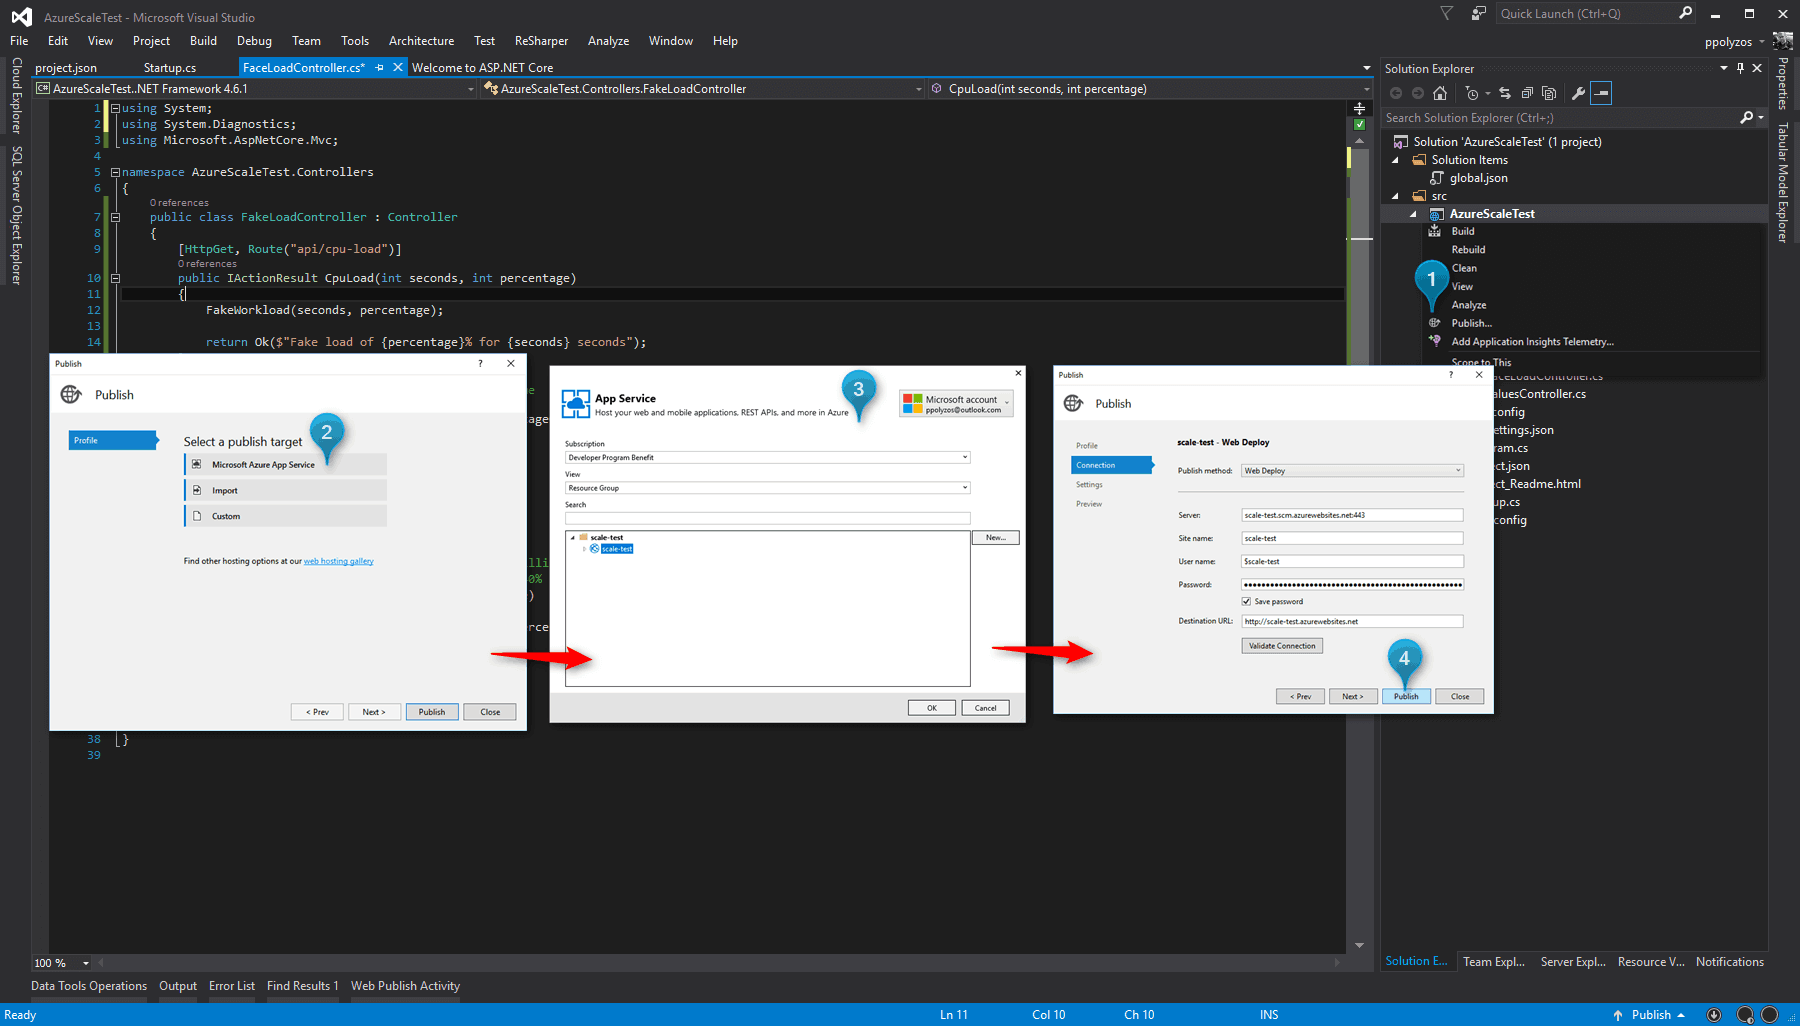
To deploy to Azure, go to Visual Studio, right-click on the web project and select Publish… and then follow the wizard steps as shown in the pictures below.
If your app gets published successfully, you will have a web application hosted on Azure, with two GET REST apis:
- `api/values` which returns an array of values
- `api/cpu-load?seconds={number_of_seconds}&percentage={cpu-load percentage}` to simulate CPU-load
Create rules and alerts for CPU-Load
In Azure web apps, setting a rule to autoscale your app in multiple instances is as easy as moving a slider. For argument’s sake, in Azure portal, head over to scale-test web app, and from the left sidebar click on Scale out (App Service Plan) option.
In the next blade there are two options:
- the method you want to scale by,
- and the number of instances you want your app to be scaled out
When you choose Scale by CPU Percentage, you are able to scale up or down based on CPU percentage, by dragging the sliders based on your app’s needs. In our demo we will select our app to be scaled out up to 3 instances when CPU is more than 80% and when the CPU-load drops under 60% the web app will scale down to 1 instance.
When a scale action happens, we can set to receive a notification either to an email or, by setting up a Webhook, to other apps like Slack.
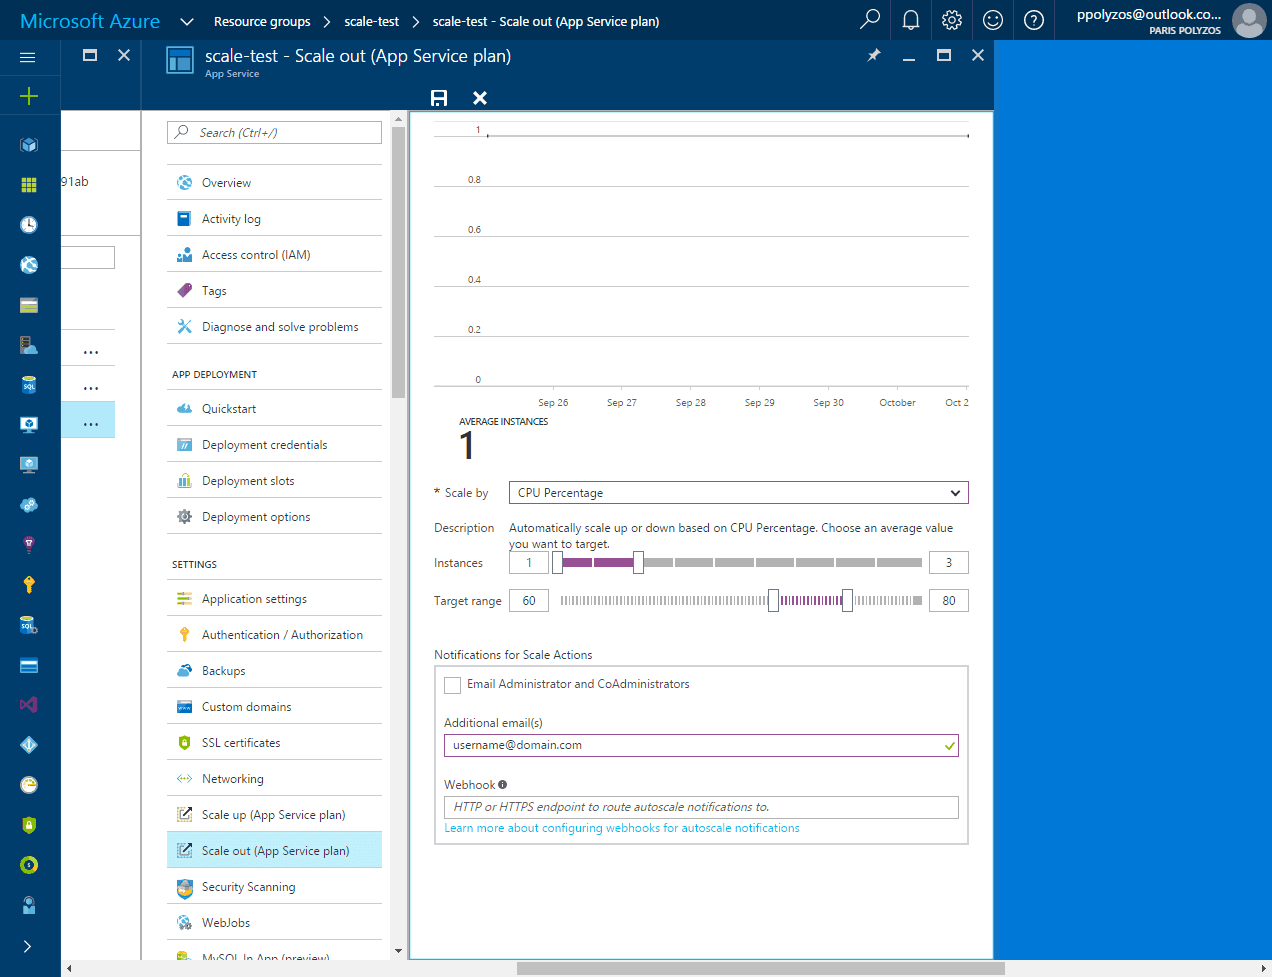
Note: Don’t forget to click on Save button at the top left corner of the blade
Test Azure web app scaling
In order to test Azure web app scaling you need a load testing tool like WebSurge, that allows you to create a session with some http requests and play them back under load.
Click on New Session, select HTTP method (GET) and set the url to hit:
http://scale-test.azurewebsites.net/api/cpu-load?seconds=20&percentage=10
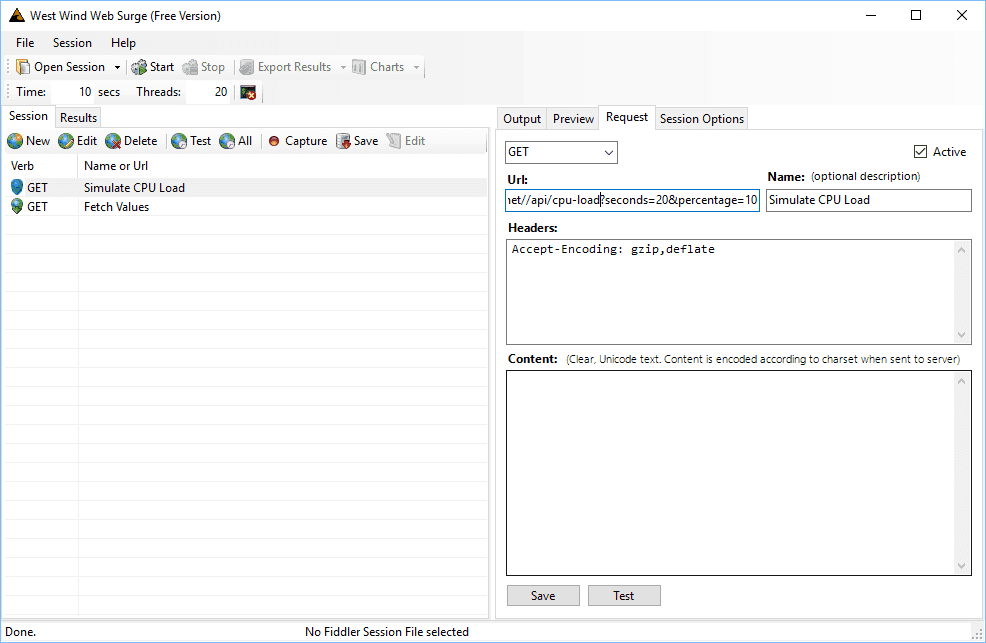
Then, set Time to 200 seconds and Threads to 20.
When you press Start, lot of CPU-load will be created in your web app and you will be able to see how your app scales up and down.
Monitor your App’s Performance
On the left sidebar, under Monitoring section, there is option Metrics per Instance (Apps). When you click on this option, you can get info about several metrics such as: %Processor Time, IO Read/Write bytes/sec, Requests/sec etc.
In this example, you can monitor % Processor Time while you load-test your app to check if your rules will be activated.

In this graph, the blue line describes %processor time for the initial web app and, in particular, for about 5 minutes the load is between 60% – 80%. After this period of time, based on our scale-up rule, a new process spawns to share the load and an orange line appears while the blue one falls down.
When your app has been successfully scaled out to a second instance, a new email notification will be sent to your inbox, namely:
