Azure App Service can be integrated with a plethora of services like BitBucket, GitHub, Dropbox, OneDrive, Visual Studio Team Services, local or any external git repository, while it enables a continuous deployment workflow, where Azure pulls in the most recent updates from a project published to one of these services.
One of the most common options is to configure continuous deployment through a git repository, either hosted in one of the big providers like BitBucket, GitHub, or in any other external cloud repository not listed in the Azure Portal, such as GitLab.
Continuous deployment is a feature currently available in all App Service plans, namely in the Free, Basic, Standard or Premium Tier one.
In this post we are going to enable continuous deployment for a web application hosted in Azure App Service and GitHub. In addition, we are going to give you a small tip on how to improve the speed of continuous deployment, by specifying the drive on which the build process will be carried out.
Create a new web application
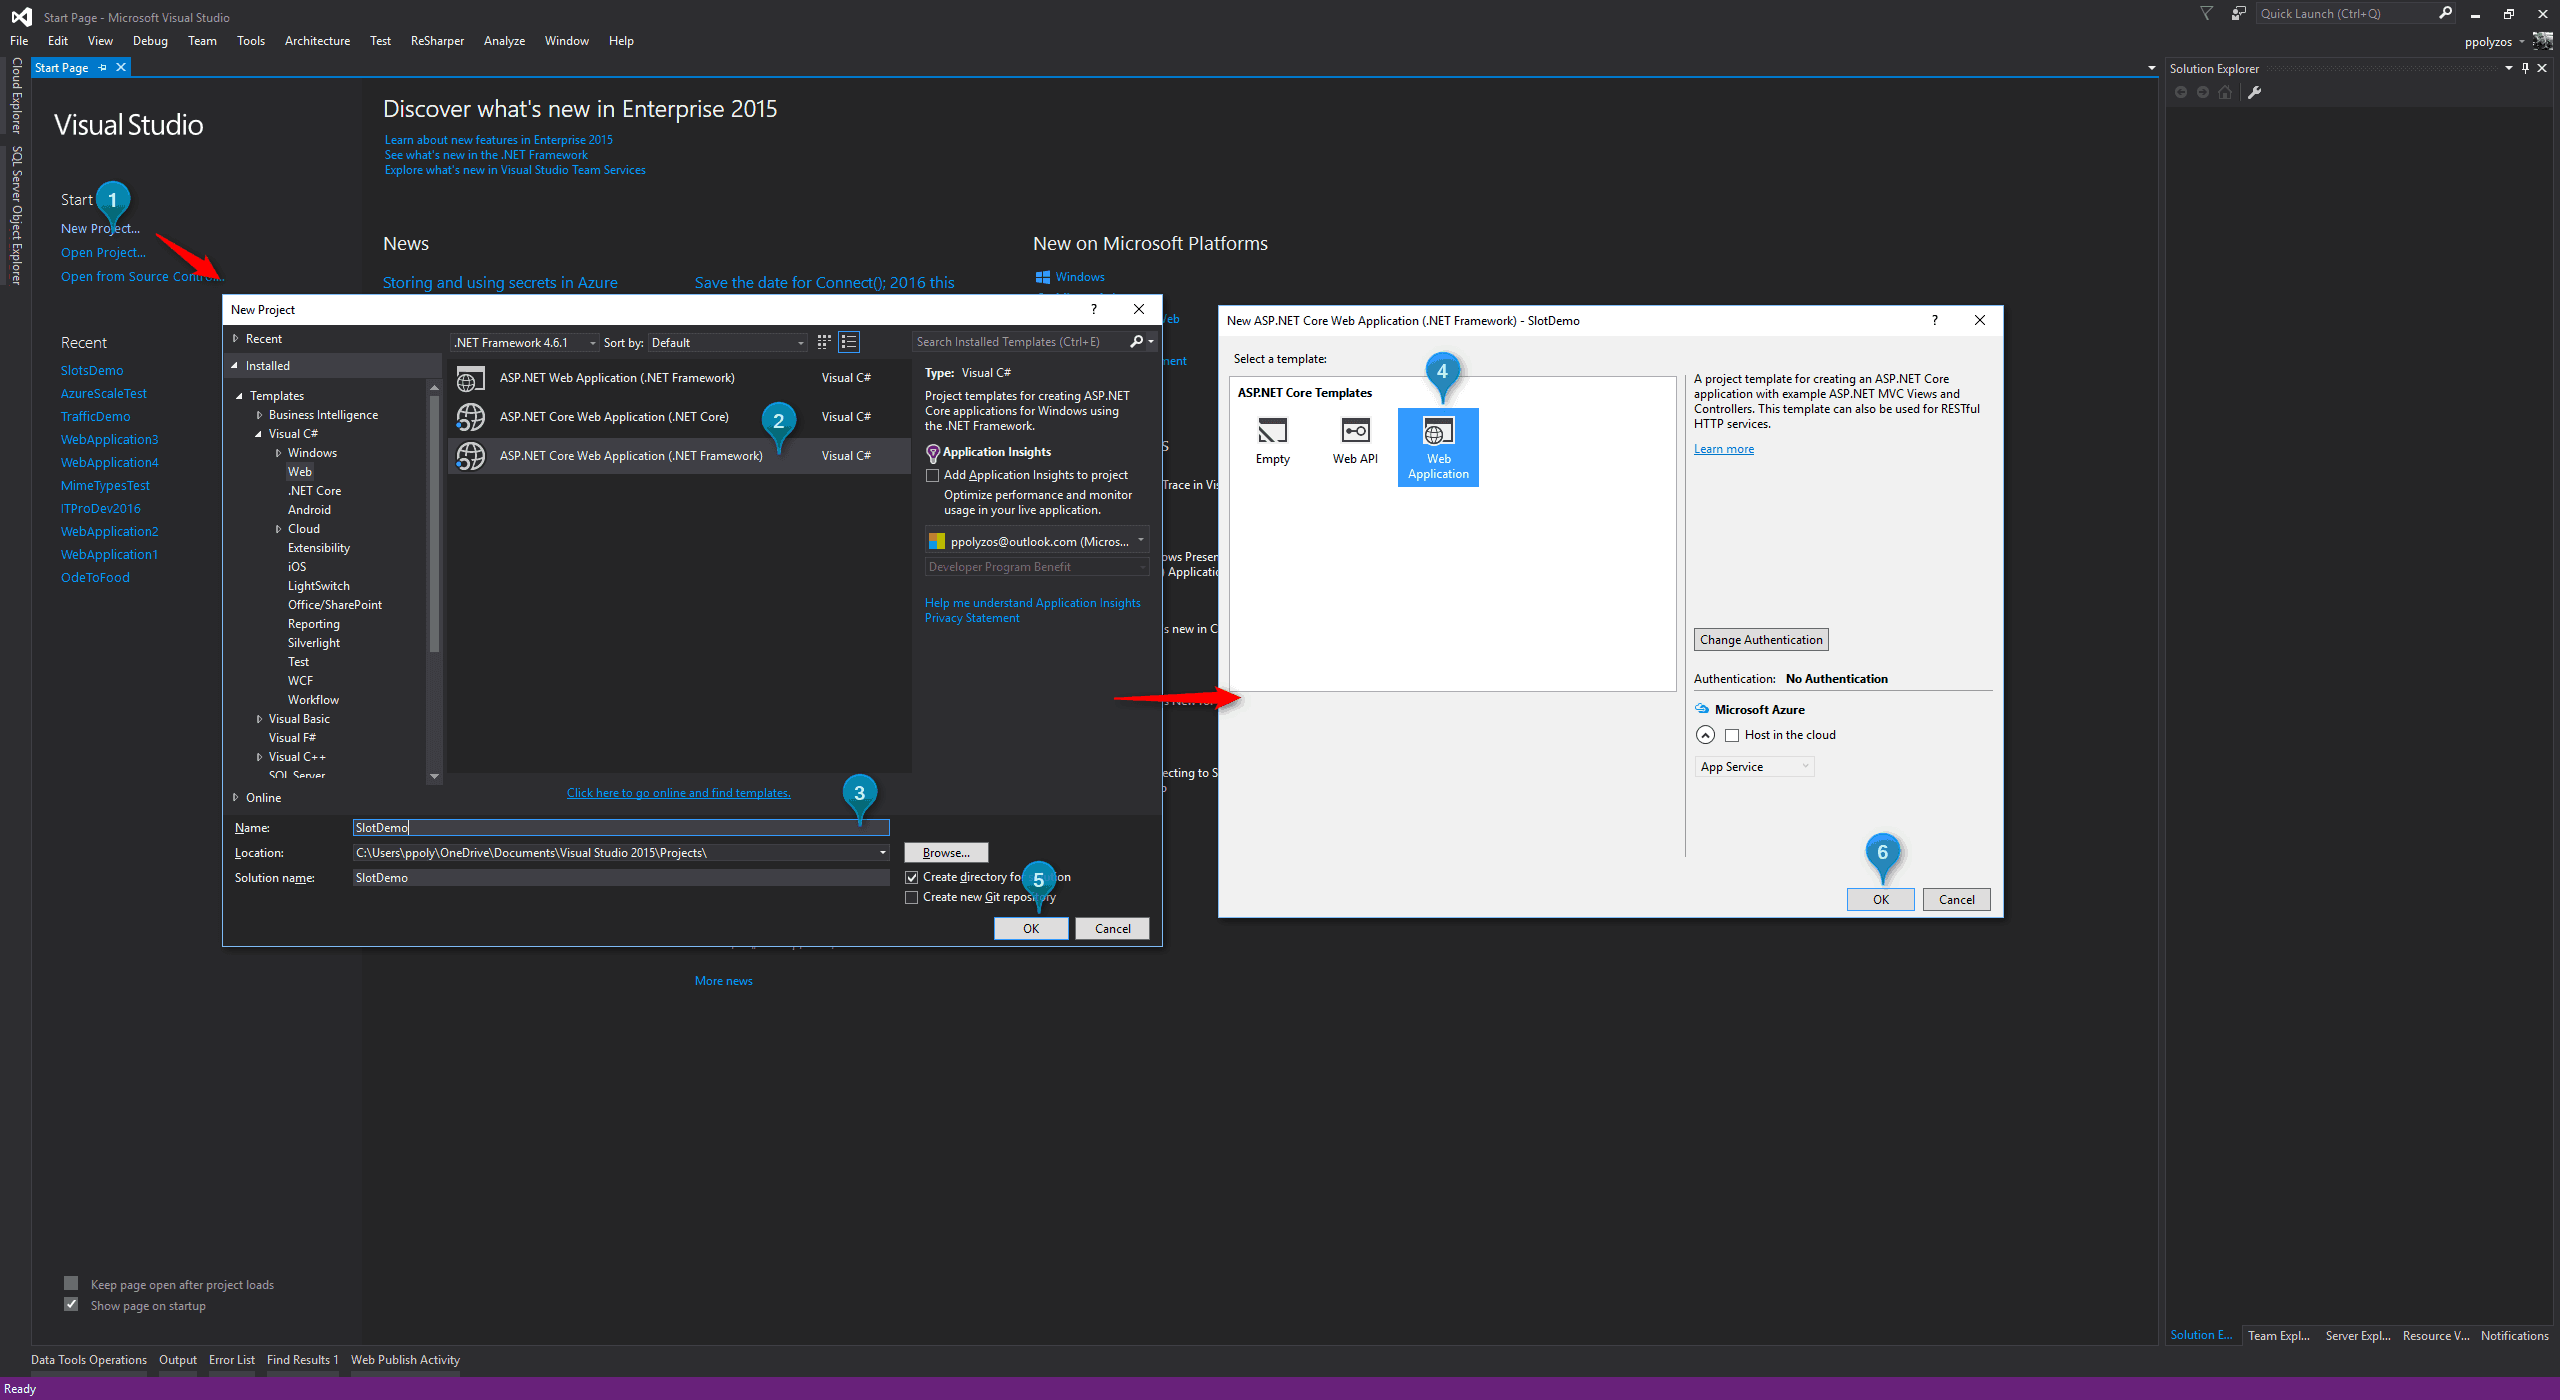
Let’s start by creating a simple ASP.NET Core MVC web app using Visual Studio.
- click on New Project…,
- select ASP.NET Core Web Application,
- specify a name and check on Add to Source Control,
- then Web Application, and
- click OK.
After a few seconds the template will be initialized and you will have a new web application.
Publish to GitHub
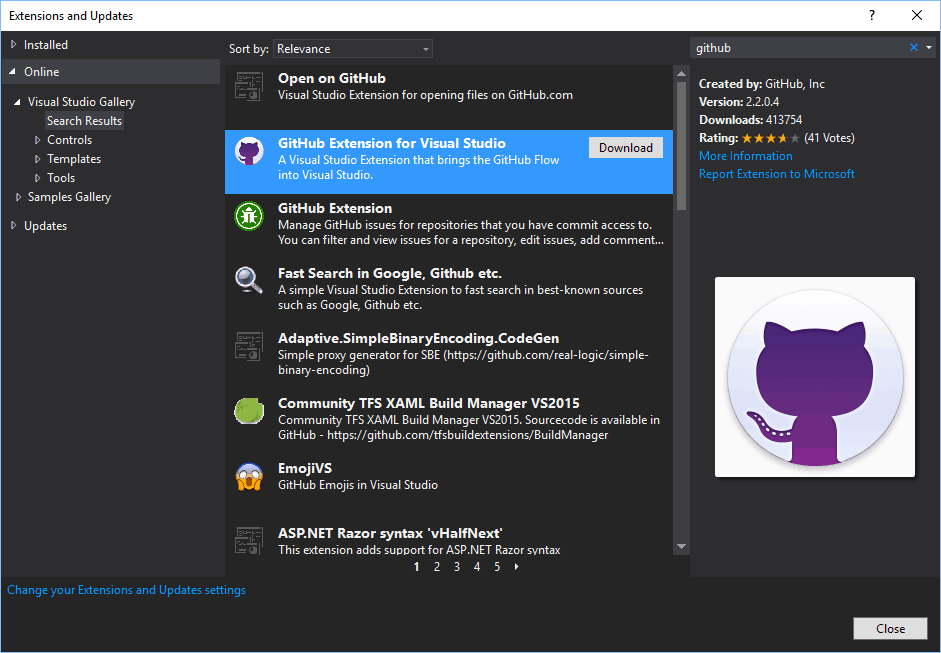
You may publish your source code to GitHub through Visual Studio, using GitHub extension for Visual Studio, which can be downloaded as an extension:
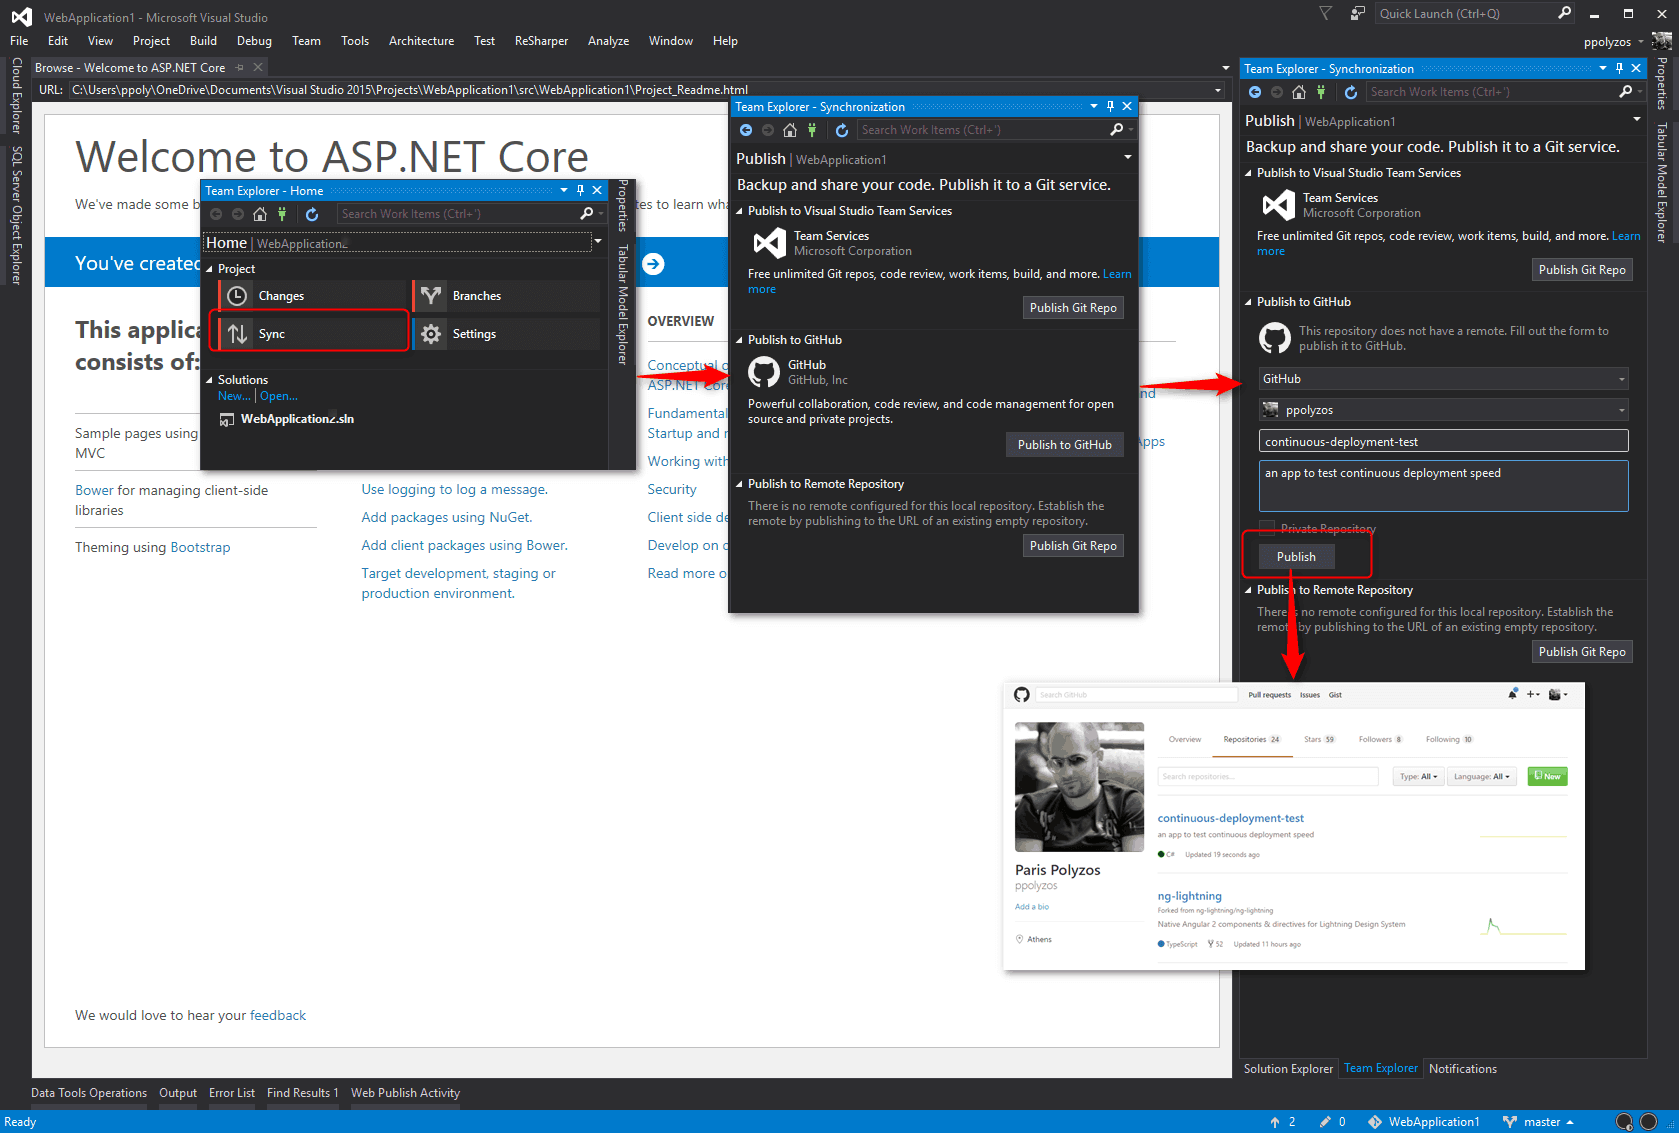
After installing the extension above, you may select Team Explorer window, and
- from Project section select Sync,
- click on Publish to GitHub,
- choose your account, specify name and description, and
- click Publish,
and after a few seconds, your code will be published to your GitHub account repository.
In the next steps, the source code from GitHub is going to be published to Azure App Service.
Create web app in Azure App Service
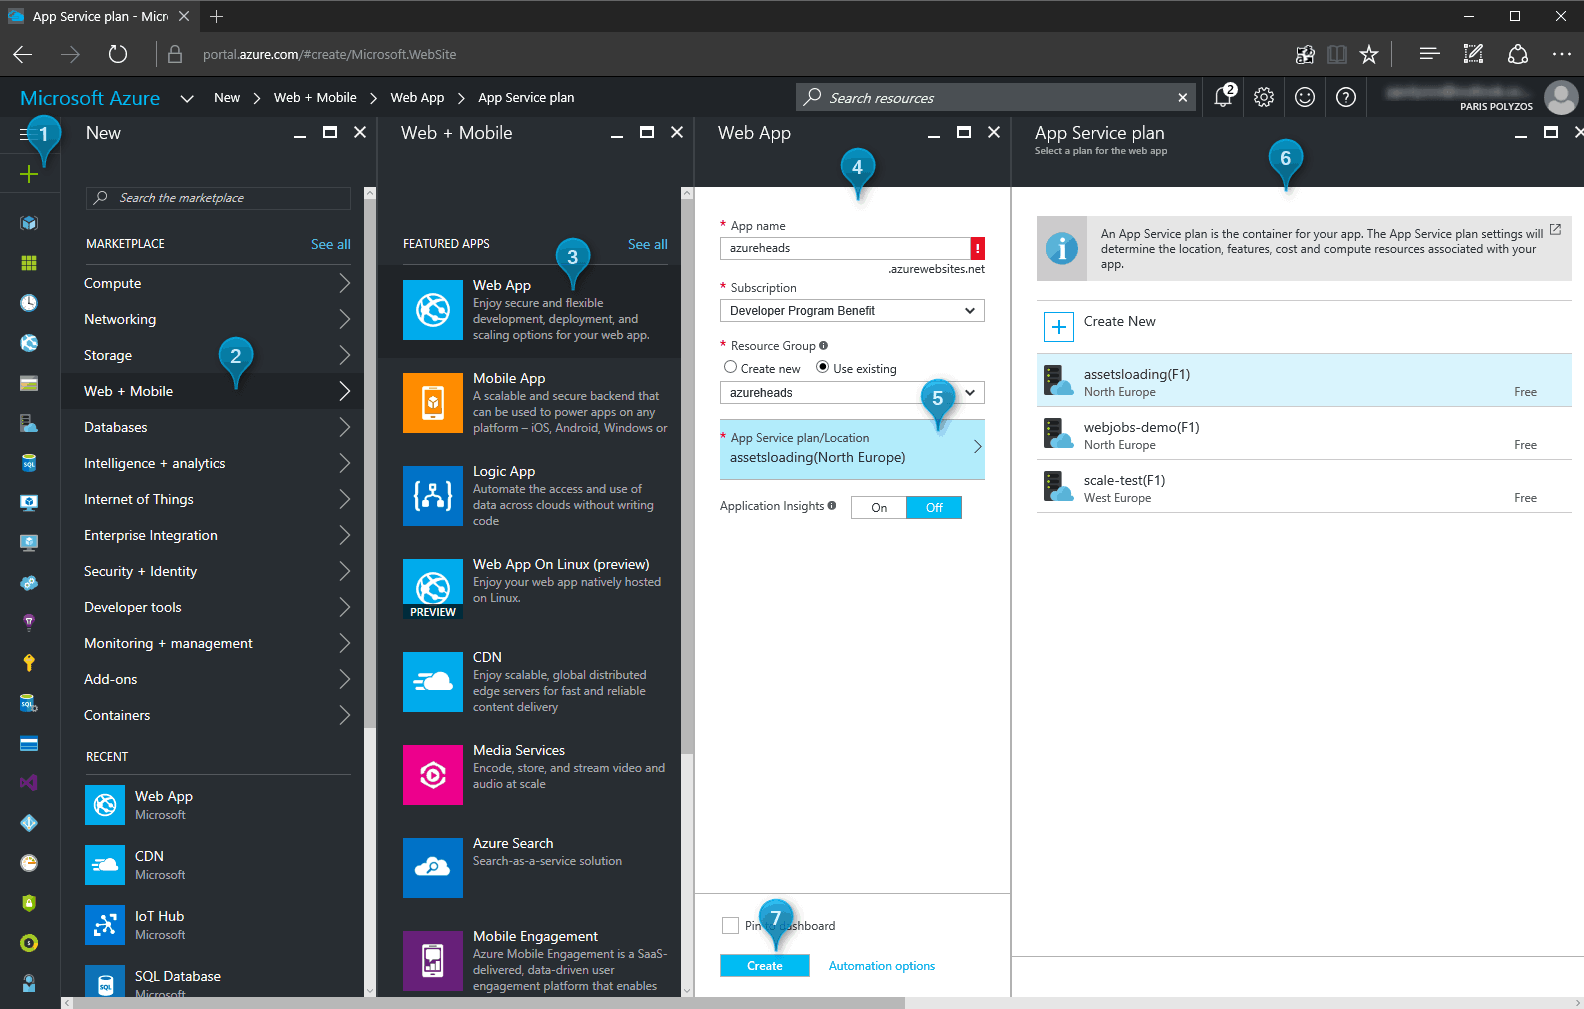
Firstly, you need to create a new web app, by clicking on New – Web + Mobile – WebApp, then choose a name for your app and select an App Service Plan (the free service plan also provides the option of continuous deployment):
Setup Continuous Deployment
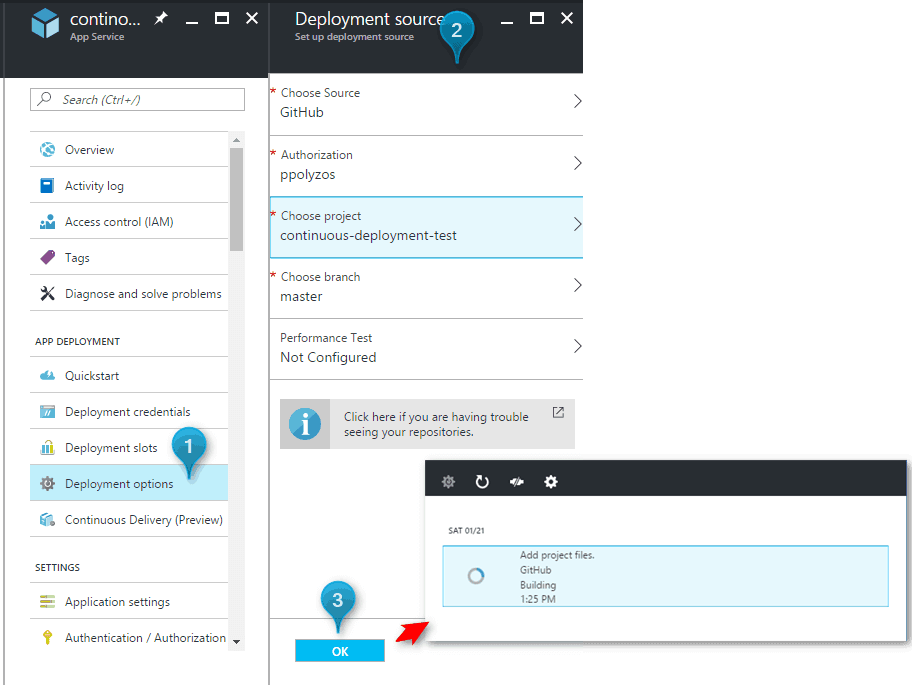
To enable continuous deployment, after the web app is created, from your web app’s sidebar, select Deployment Options, from Deployment Source select GitHub, authorize your account, select the project and branch to use, and click Ok.
Improve Continuous Deployment Speed
As your project grows, you may notice that the build process running on Azure App Service may become slow. One of the factors that plays a significant role in the build process speed, is that, by default, the build process uses a mapped drive that allows it to run a site across instances, without having to duplicate the code across other disks in the datacenter. Although this choice may seem clever, going through layers when building source code creates an overhead.
One tip to increase the speed of your build process is to use a locally mapped version of this drive, and to do so you simply need to add a key value pair in your Application Settings.
- Key:
SCM_REPOSITORY_PATH - Value:
D:\local\repository

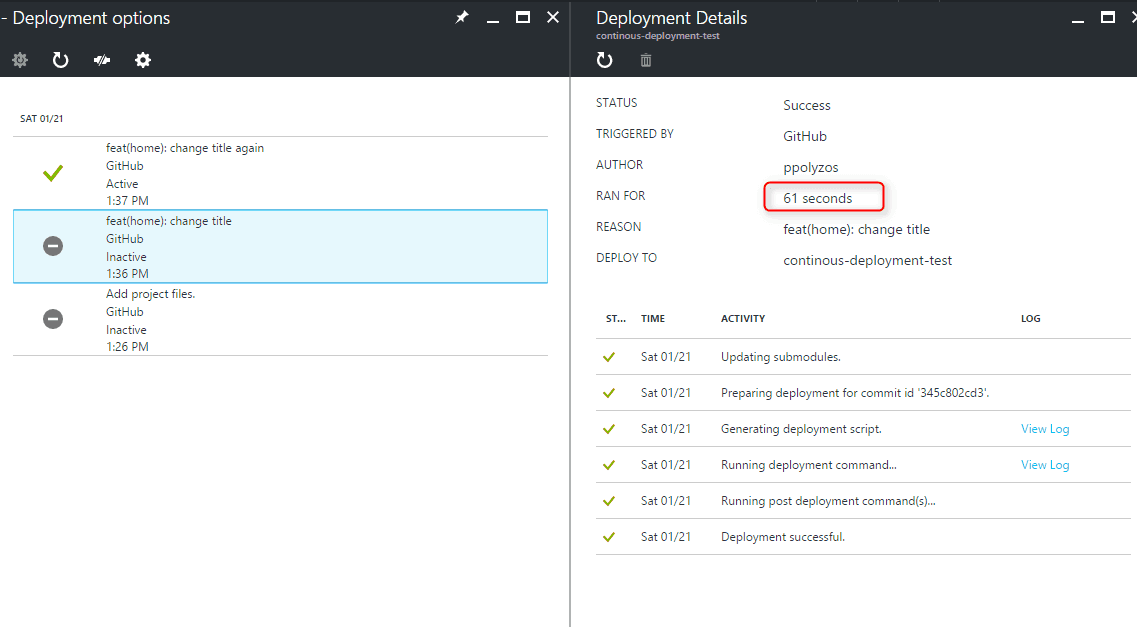
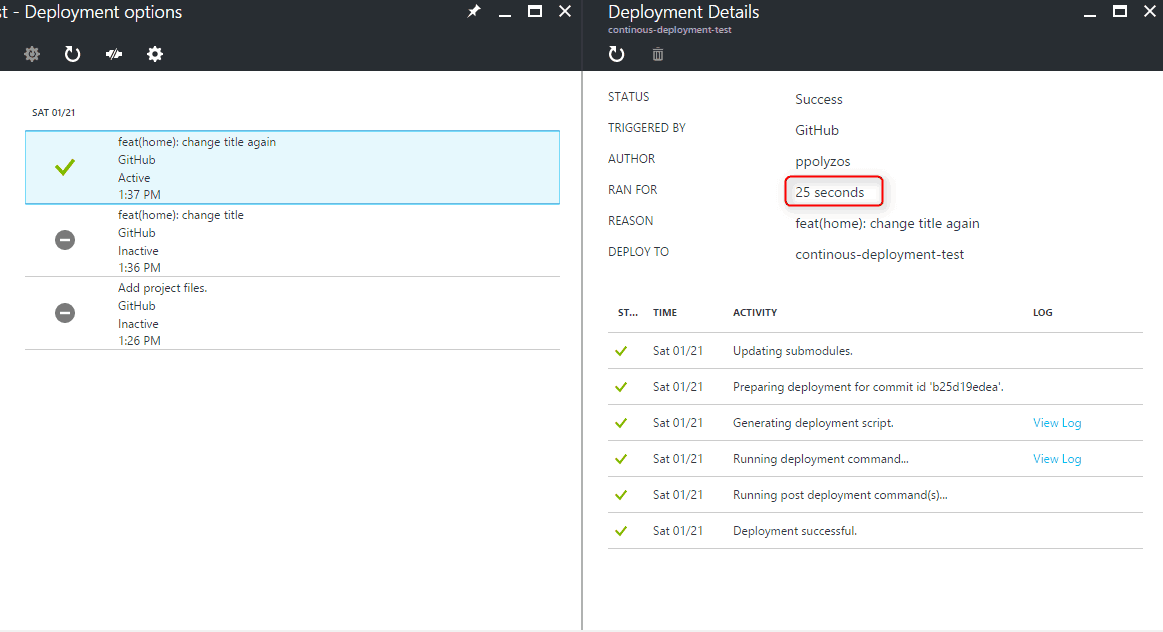
You can test the difference in deployment speed by performing two small commits to trigger continuous deployment process. In the first commit, the `SCM_REPOSITORY_PATH` is not set (uses default hard drive), while in the second commit the `SCM_REPOSITORY_PATH` to `D:\local\repository` is set.
SCM_REPOSITORY_PATH setting disabled
SCM_REPOSITORY_PATH setting enabled
If you are interested in learning more about this workaround, you may watch Damian Edwards talking about it in the following ASP.NET community stand-up video: