One of the great things in Cloud computing is the ability to use resources whenever you want them and pay only only for what you are using. In this post, we are going to explore how you may create a schedule to automatically shut down and start up a virtual machine running on Azure, using Azure Automation, based on a user defined schedule.
First of all, let’s start with some basics.
What is Azure Automation?
Microsoft Azure Automation provides a way for users to automate the manual, long-running, error-prone and frequently repeated tasks that are commonly performed in a cloud and enterprise environment. It saves time and increases the reliability of regular administrative tasks and even schedules them to be automatically performed at regular intervals. The processes you want to automate can be done through runbooks or automating configuration management using Desired State Configuration.
In this post we will use the Runbooks option.
What is a Runbook?
Simply put, a runbook is a set of tasks that perform some automated processes in Azure Automation. It can be a very simple process or a quite complex one by combining other runbooks to perform processes across multiple resources or even multiple clouds and on-premises environments.
For more details you can head to the official Azure Automation documentation.
Let’s start then.
Step 1. Create an Automation Account
Firstly, add an Azure Automation account in your Subscription and to do so:
- click on the + sign to “Create a new Service” and then from Monitoring + Management group select Automation,
- fill the details in the Add Automation Account blade (name, subscription, resource group and location), and
- in Create Azure Run As account option select Yes, in order to create a service principal account for the application in Azure AD, and assign the Contributor role for the account to your current subscription.

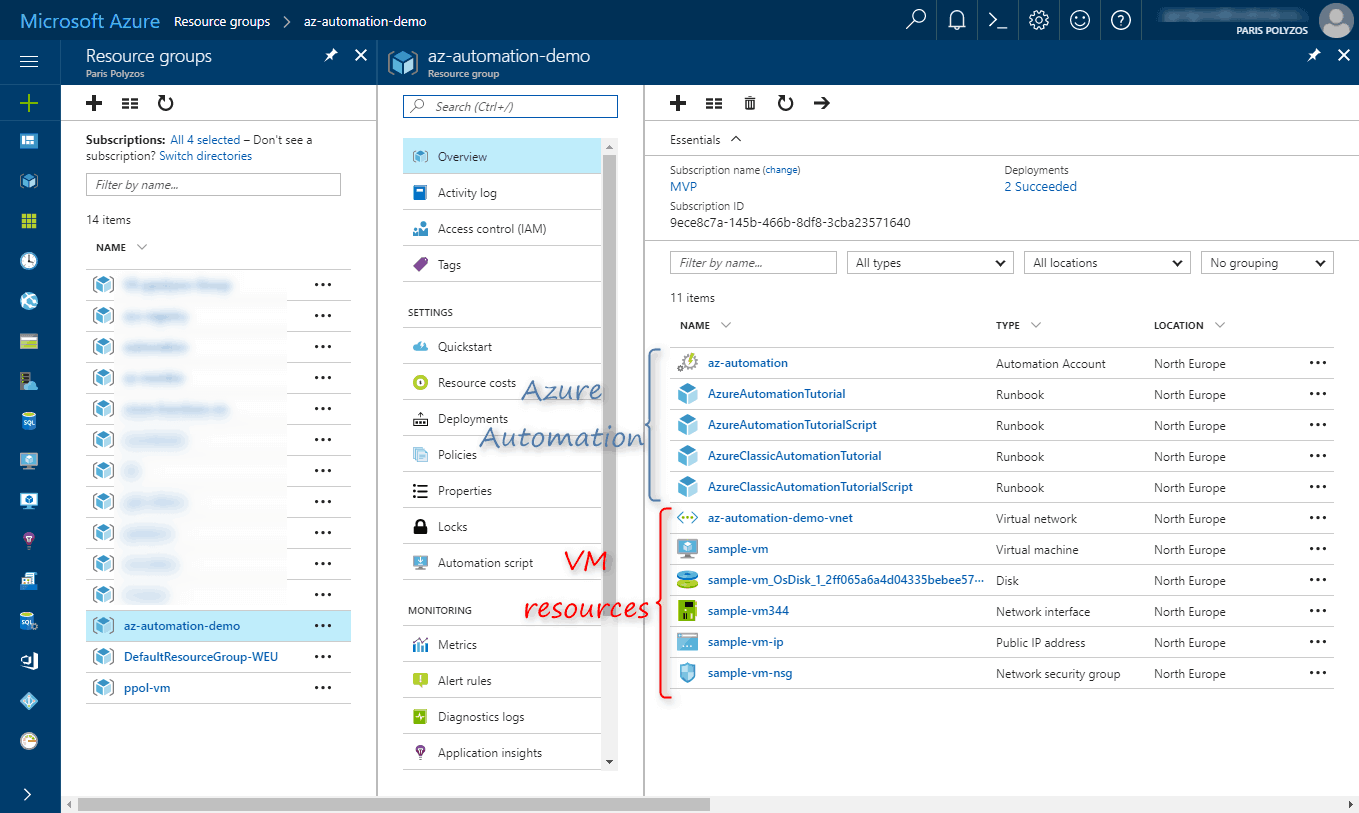
After a few minutes, a new Azure Automation account will be created and alongside you will see some sample Runbooks already created to help you get started.
Step 2. Create a new runbook
To create a new runbook, head over to your Automation Account and follow the next steps:
- click on Runbooks option from the left sidebar,
- from the list of your available runbooks click on the + sign at the toolbar,
- select Quick Create and in the new blade, fill in the necessary details (name, runbook type and description). In the Runbook Type option select Powershell which allows you to run scripts based on Windows Powershell, and
- click on the Create button.

After a few seconds, your new runbook will be created and it will be listed alongside your other runbooks, marked as New. Keep in mind that, in order to use it, you need to publish it first.
Step 3. Add functionality to Startup and Shutdown a Virtual Machine
Select your runbook and from the top bar click on the Edit icon.

A new editor inside the Azure portal appears which allows you to edit and test your Powershell script.

The code for the Powershell script to startup or shutdown a virtual machine is the following:
# Input Parameters for
# - VmName: name of the vm to perform action to
# - ResourceGroupName: resource group where the vm belongs to
# - VmAction:action to perform (startup or shutdown)
Param(
 [string]$VmName,
 [string]$ResourceGroupName,
 [ValidateSet("Startup", "Shutdown")]
 [string]$VmAction
)

# Authenticate with your Automation Account
$Conn = Get-AutomationConnection -Name AzureRunAsConnection
Add-AzureRMAccount -ServicePrincipal -Tenant $Conn.TenantID `
-ApplicationID $Conn.ApplicationID -CertificateThumbprint $Conn.CertificateThumbprint

# Startup VM
IF ($VmAction -eq "Startup") {
    Start-AzureRmVM -Name $VmName -ResourceGroupName $ResourceGroupName
}

# Shutdown VM
IF ($VmAction -eq "Shutdown") {
    Stop-AzureRmVM -Name $VmName -ResourceGroupName $ResourceGroupName -Force
}
Note the parameters at the top of the script that are used to set:
- the Name of the virtual machine,
- the Resource Group Name that the VM belongs to, and
- the action to perform on the VM either to start it up or shut it down.
Step 4. Test your runbook
While you develop your script, you always have the option to test your code and see how it works, by clicking on the Test Pane button found at the top bar.

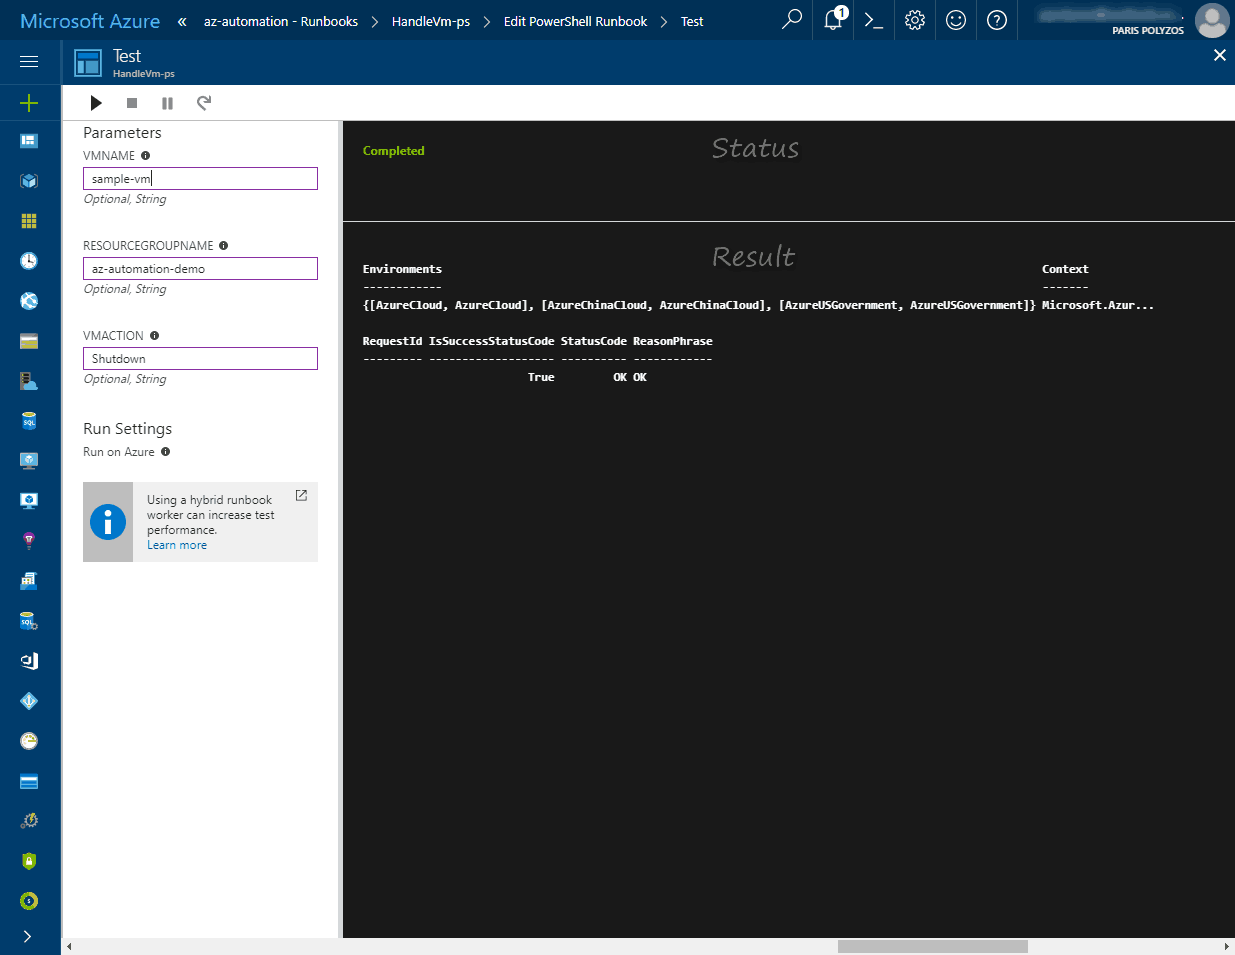
When you click on it, a new blade appears where:
- in the left section you can specify the parameters needed in your script,
- in the center area you can see the status of your runbook (Queued, Running, Completed, etc.).
Depending on the runbook’s result you may see the actual response or an error that has occurred during its execution
In the Test Pane you can run your script with different parameters, press the Start button and watch how your it behaves on different scenarios, all from within the Azure Portal.
Step 5. Publish your runbook
Now that you have written and tested your runbook, it is time to publish it. To do so you need to click on the globe icon found at the top bar of your runbook:
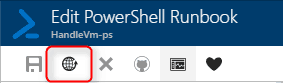
After publishing your runbook, more options are unlocked, like View, Export, Schedule or add a WebHook to call your runbook using an http call.

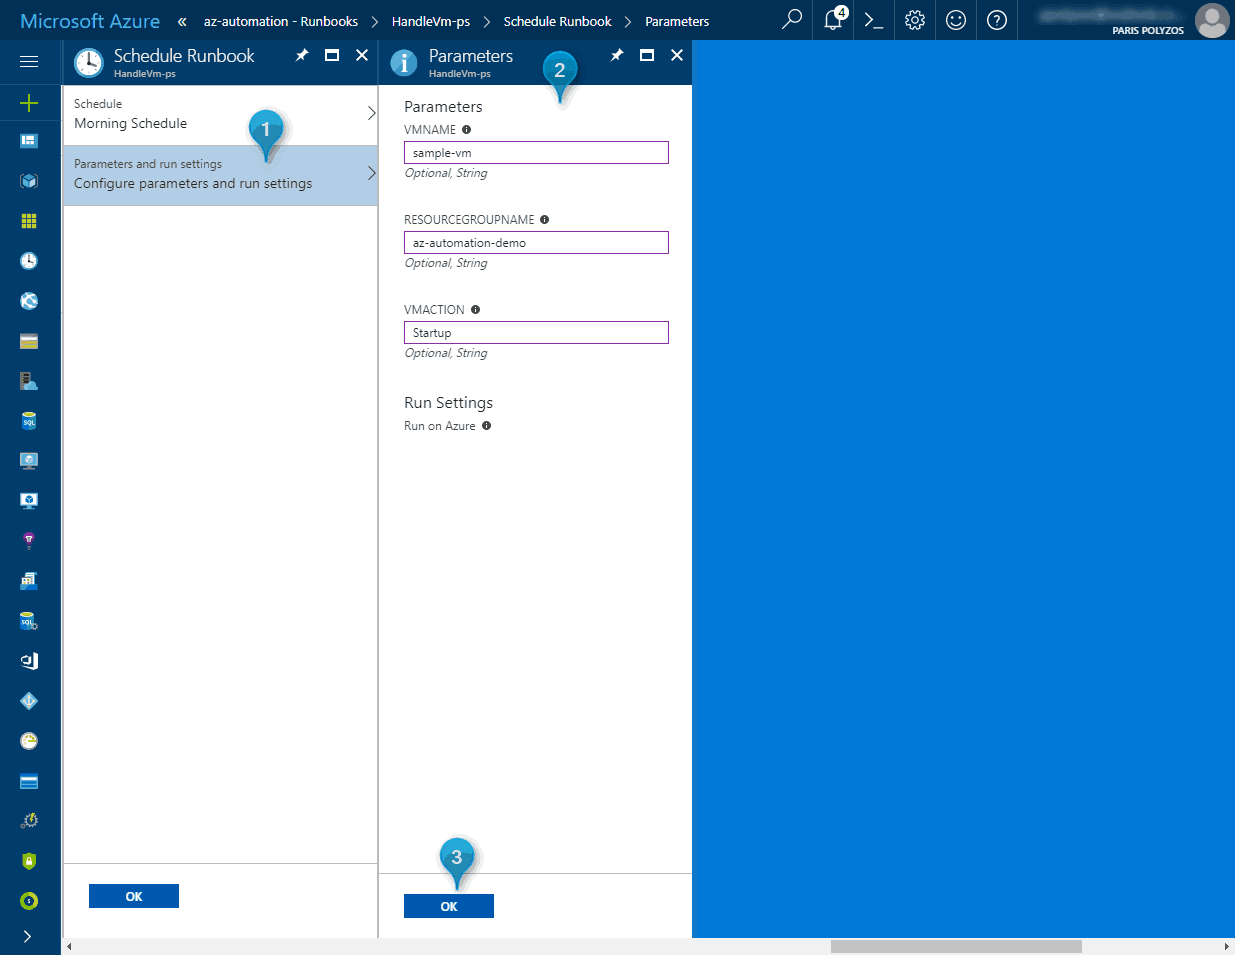
Step 6. Create a schedule to automatically startup or shutdown your Virtual Machine
Following the above, you may create a schedule to automatically startup a virtual machine in the morning and shut it down in the evening. To do so, click on the timer icon at the top bar.
Firstly, create a schedule:

and then set the input parameters for this schedule:
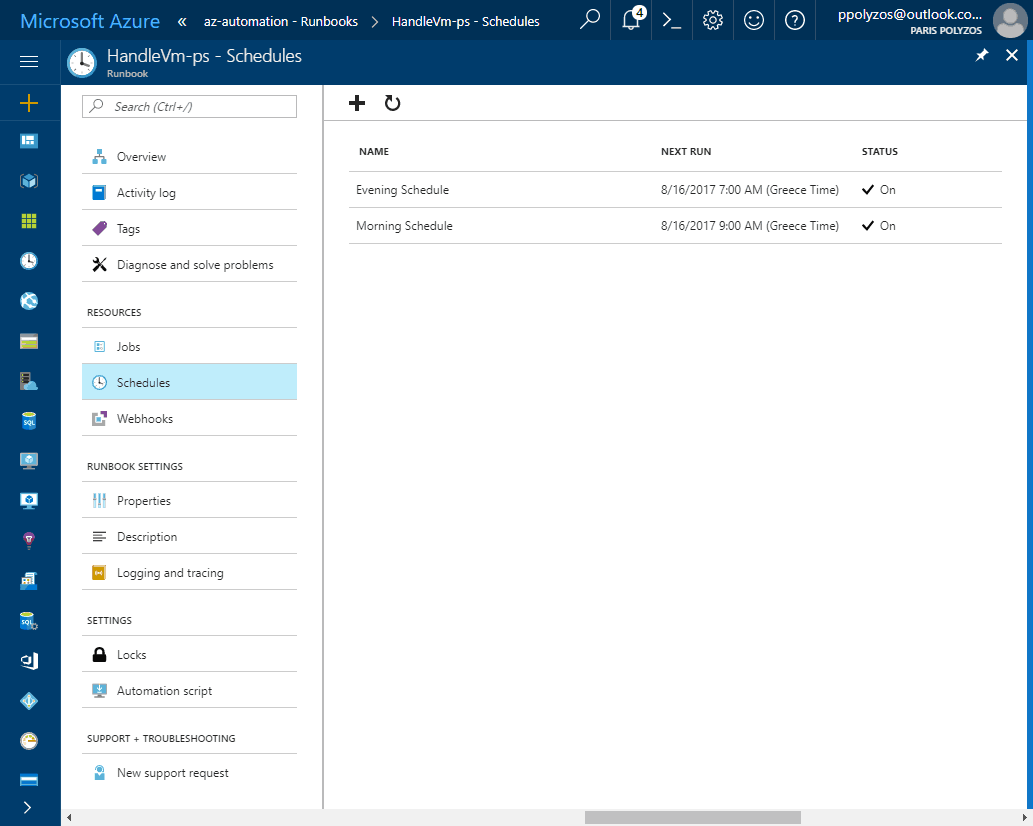
After you have finished with the schedules, all of them can be found by clicking on the Schedules option at the left sidebar:
Is it possible to schedule the application (download/install/restart OS) of windows updates on an Azure VM?
If you are using OMS, the Update Management solution allows you to manage operating system security updates for your Windows and Linux computers deployed in Azure. You can learn more here.
Helped a lot! Thanks!
Spot on! Great, thanks!
How can we put a list of VM’s rather then single VM
You can specify the VMs you want to start or stop using a comma separated string array, like ‘AzureVm1,AzureVM2’ and then perform a loop for each VmName.
So, you can do something like:
$vms = $VmName.split(',') foreach($vm in $vms) { Start-AzureRmVM -Name $vm -ResourceGroupName $ResourceGroupName }How do you properly replace the parameters for the variables?
Do I have to change [string]$VmName, with the name of my server like this [AzureVM-Srv1]$VmName or without brackets? or AzureVM-Srv1 = $VmName?
If I understand correctly your question, if you want to define your server name in VmName, you only to update VmName with AzureVM-Srv1 as shown in Step4.
What is inside the brackets is to add additional information about the variable, like `string` or validation like [ValidateSet(“Startup”, “Shutdown”)]. You can have a look also here to learn more about Powershell parameters.
hi Eli, you set the parameters when you create the schedule task. You dont need to change anything in the code.
You can set parameters in test panel also.
Hi: Instead of giving time to schedule it, can we say to run this if a new blob is added in a specific blob container.
Yes you can do, though it may require some modifications. Have a look at this section Reacting to Blob storage events.
Grate jobs thanks from bottom of my heart , As well i if you help me with few other parameters like i want to run same with multiple selected vm, where and how to add parameters.
You can add more parameters in `Param` section if `VmName` does not work for you, like `id` for example and here is the list of all available parameters that can be used with `Start-AzureRmVm` command (https://docs.microsoft.com/en-us/powershell/module/azurerm.compute/start-azurermvm?view=azurermps-6.13.0)
Thanks for the quick response. as i am not an expert in powershell, Could you please tell me where and how to make changes in current script as current script work for only one vm i want to use same for multiple vms i should have option to specifie or selcet the vm’s to start and stop.
I understand now what you want to achieve. Have list a list of VM names and with a single script start them or shut them down.
You can use a string array parameter, like: `param([string[]] $VmName……)` and then iterate on the $VmNames. Have a look as well here
Param(
  [string[]]$VmName,
  [string]$ResourceGroupName,
  [ValidateSet('Startup', 'Shutdown')]
  [string]$VmAction
)

# Authenticate with your Automation Account
$Conn = Get-AutomationConnection -Name AzureRunAsConnection
Add-AzureRMAccount $Conn.ApplicationID -CertificateThumbprint $Conn.CertificateThumbprint

$foreach($name in $VmName) {
  # Startup VM
  IF ($VmAction -eq "Startup") {
    Start-AzureRmVM -Name $name -ResourceGroupName $ResourceGroupName
  }

  # Shutdown VM
  IF ($VmAction -eq "Startup") {
    Stop-AzureRmVM -Name $name -ResourceGroupName $ResourceGroupName
  }
}
And for VMName you can pass multiple string comma separated like: `Vm1,Vm2,Vm3…`.
Be aware that I haven’t tested the script above but it should work or it may require some minor changes.
Thank you so much for the help .after making some changes it is working now…..i have one more question Sir. Suppose i have to automate vm creation at particular time. everyday vm should be created automatically using run book. is it possible ?
Yes, you can do that by using the `New-AzureRmVM` command. You can learn more info here https://docs.microsoft.com/en-us/powershell/module/azurerm.compute/new-azurermvm?view=azurermps-6.13.0
Hello Tyron, the code can be found at the end of step 3 or right before “Step 4. Test your runbook”.
Hi, Would you be so kind to post your code, i am battling to get it to work.
The individual VM shutdown as per the original is working like a charm, I have a few machines i would like to group into one runbook, the above.
Param(
  [string[]]$VmName,
  [string]$ResourceGroupName,
  [ValidateSet('Startup', 'Shutdown')]
  [string]$VmAction
)

# Authenticate with your Automation Account
$Conn = Get-AutomationConnection -Name AzureRunAsConnection
Add-AzureRMAccount $Conn.ApplicationID -CertificateThumbprint $Conn.CertificateThumbprint

$foreach($name in $VmName) {
  # Startup VM
  IF ($VmAction -eq "Startup") {
    Start-AzureRmVM -Name $name -ResourceGroupName $ResourceGroupName
  }

  # Shutdown VM
  IF ($VmAction -eq "Startup") {
    Stop-AzureRmVM -Name $name -ResourceGroupName $ResourceGroupName
  }
}
When I add the above i get the string cant, I believe it is missing the $name value somewhere, thanks again.
I think this script will help you https://docs.microsoft.com/en-us/azure/lab-services/start-machines-use-automation-runbooks. And also using `tags` will make your solution more scalable.
Is it any possible to make a PowerShell script to run automatic shutdown per resouce group in azure?
I am basically trying to make an auto shutdown to the entire resource group only if its on start mode.
If they are already offline so the script shouldn’t do anything.
And I want to manually start each one, so basically its only a shutdown script for the entire subscription I am searching.
You can perform a query for all available VMs in a resource group using Get-AzureRmVM (second function) and then a for loop for the VMs you can to act on. Get-AzVM will help you getting info about each VM, so you can have your script act accordingly based on your needs.
Hey, first of thanks a lot for the quick reply .
I am kind of new to powershell, is there any way you can write me a sample and I’ll fix it to my needs?
If it’s not too much of a trouble.
Appreciate any help, thanks again
For more info on how to collect details about your VMs I would suggest to try this tutorial. It has also a `Try It` link at the top right corner to get you up to speed quickly.
Now in regards to what you have to do, I would suggest to read this article, Simultaneously Start|Stop all Azure Resource Manager Virtual Machines in a Resource Group, and it will will help you a lot.
Another way to do this is by creating multiple jobs and have something a Job to start/stop all your VMs:
$VMList = Get-AzureRmVM -ResourceGroupName $resourceGroupName $JobList = @() foreach ($vm in $VMList) { $JobList += Start-AzureRmVm -ResourceGroupName $resourceGroupName -Name $vm -Force -AsJob | Add-Member -MemberType NoteProperty -Name VMName -Value $vm.Name -PassThru } # and if you want to wait for the jobs to finish: $JobList | Wait-Job | Receive-Job $JobList | Remove-JobThanks again for replying so quickly.
I would look into the articles right now, once again thanks for your help.