In this post, we will showcase the necessary steps to follow in order to de-associate your azure account from any subscription you have joined in the past and you no longer use.
Till recently, in order to do so, you had to ask the admin of the subscription to perform this task, however, now, you can do it all by yourself.
Step 1. View associated subscriptions
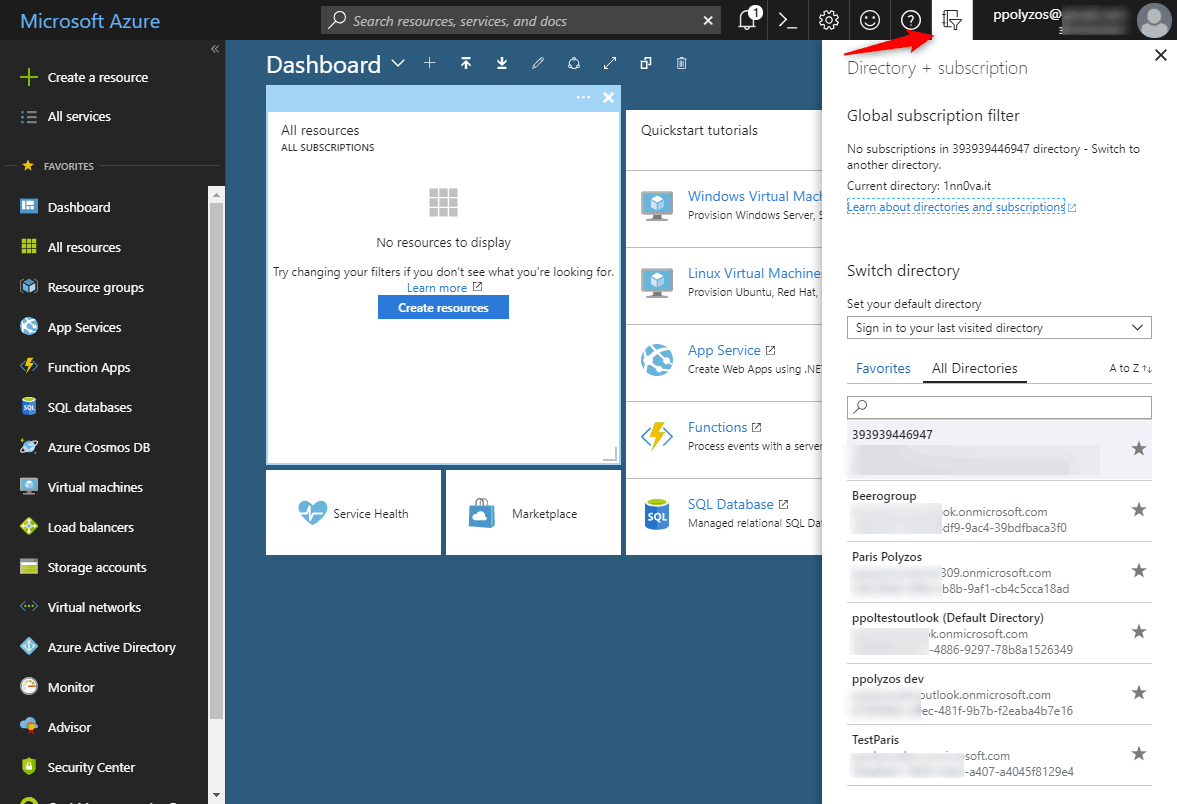
Let’s start by logging onto the Azure Portal, so as to discover all subscriptions your account is currently associated with.
To do so, you need to click on the Directory + Subscription Filter icon, located next to your account details in the upper right corner of the Azure Portal, and select the subscription you want to be de-associated from.
Step 2. Login to MyApps microsoft portal
Once the portal has been reloaded with details from the subscription you have selected in the previous step, open a new tab and login to the myapps.microsoft.com which will redirect you to the Access Panel Applications portal.
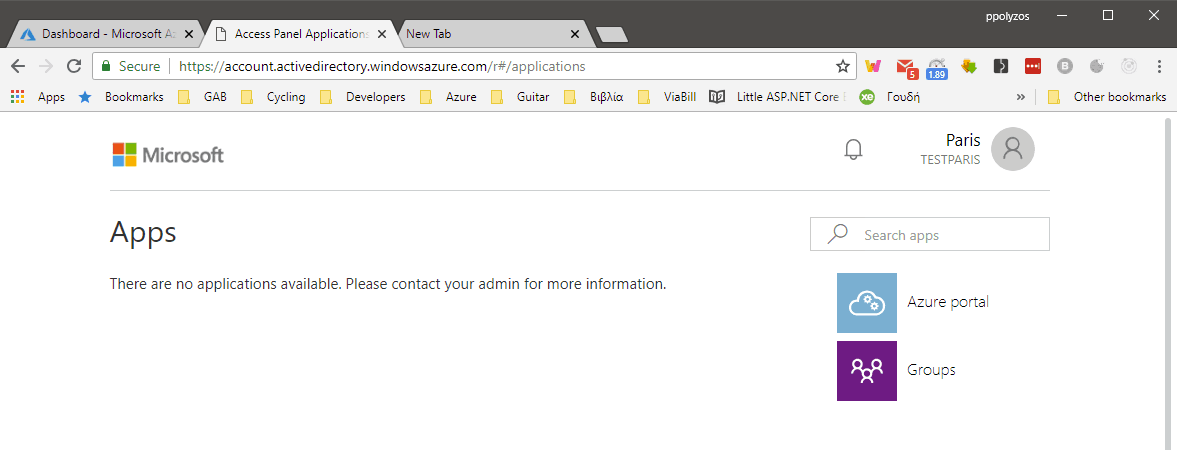
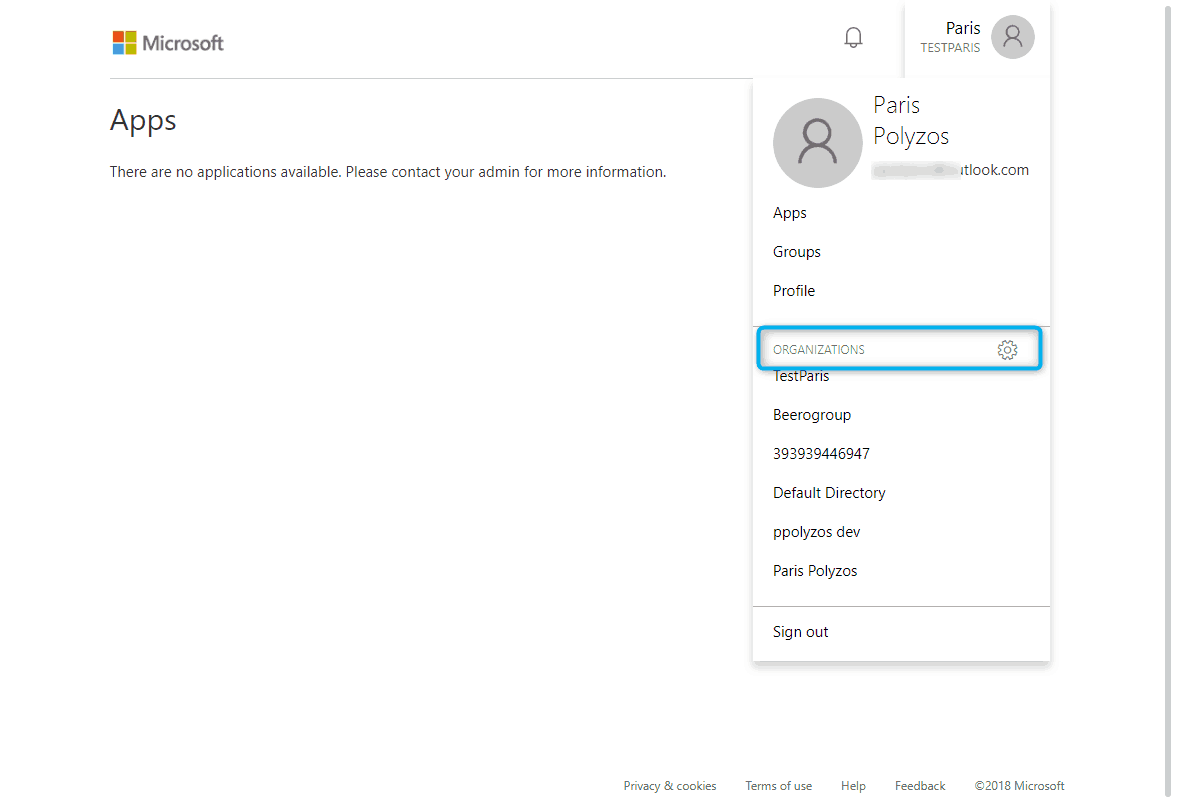
From your account profile in the upper right corner you can see all the organizations your account is currently associated with.
Click on the cog icon next to the Organizations section.
Step 3. Leave Organization
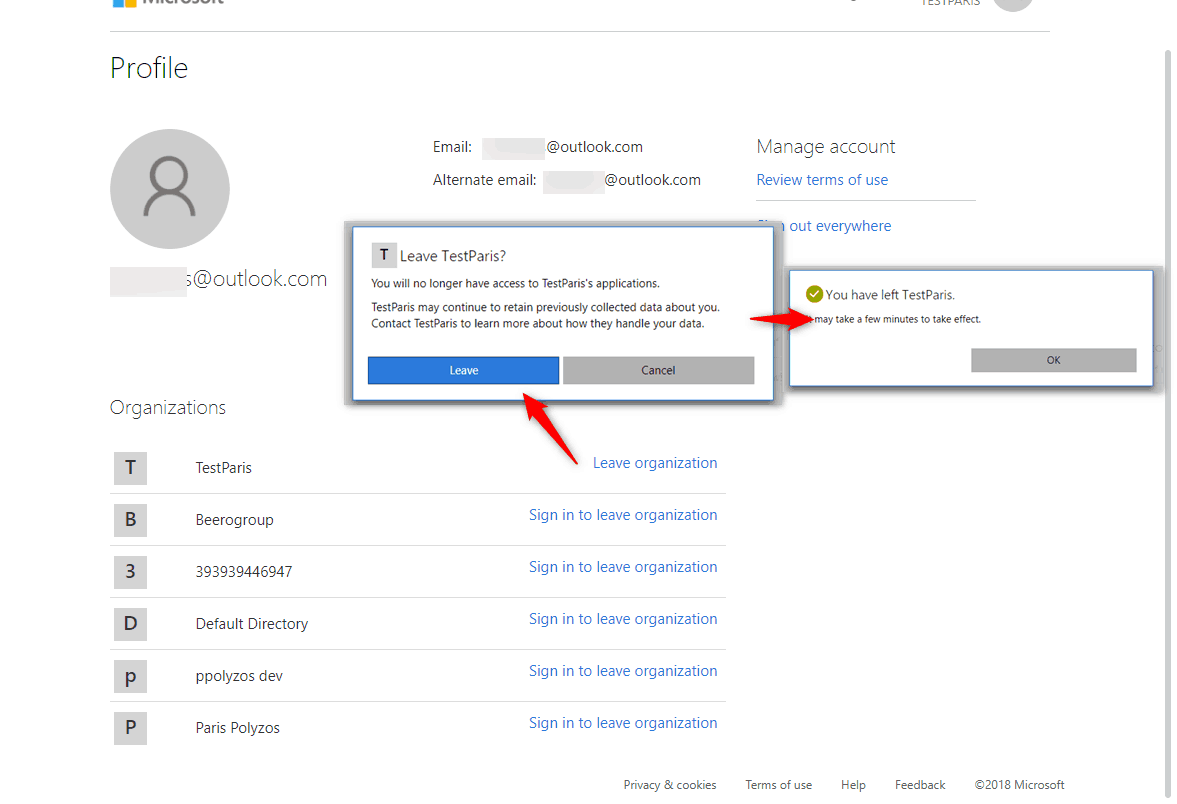
After you have clicked on the cog icon, you will be redirected to your profile page, where in the bottom sections you will find all the subscriptions you are related to.
For the subscription you have previously switched to in the Azure Portal, you have the option to leave by clicking on the Leave organization link.
Now, when you reload your Azure Portal you will see that in the Directory + Subscription Filter the organization/subscription you have previously left from is not available.
Many kudos to my friend Kostas Pantos who shared that tip with me!
wow thanks a lot