The information you send on the Internet is passed from computer to computer to get to the destination server. The least you can do
to provide privacy, critical security and data integrity for both your websites and your users’ personal information is to have your application secured under an SSL certificate.
SSL providers need to set up a trusted infrastructure and validate your app’s identity, so there is cost involved. However, Let’s encrypt is a free, automated and open Certificate Authority that provides a certificate for your website’s domain; in this post we will describe all the necessary steps needed to add an SSL certificate to your Azure Web Application.
Set your Azure App Service Plan at least to Basic
In order to get Let’s Encrypt running on Azure Web Apps or have any other SSL/TLS certificates, your Azure App Service plan should be scaled up to at least Basic, which allows SNI (Server Name Indication) and Custom Domains / SSL.

Step 1. Register your Azure Web App
First of all you need to register your application in the Azure Active Directory. To do so from Azure Active Directory, click on the App Registrations menu, then on New application registration and after you fill in the form with:
- Name: the name of our application, in our case “Let’s encrypt-picmin”
- Application type: Web app / API
- Sign-on URL: the URL that will be used by your users to sign in (http://picmin.com)
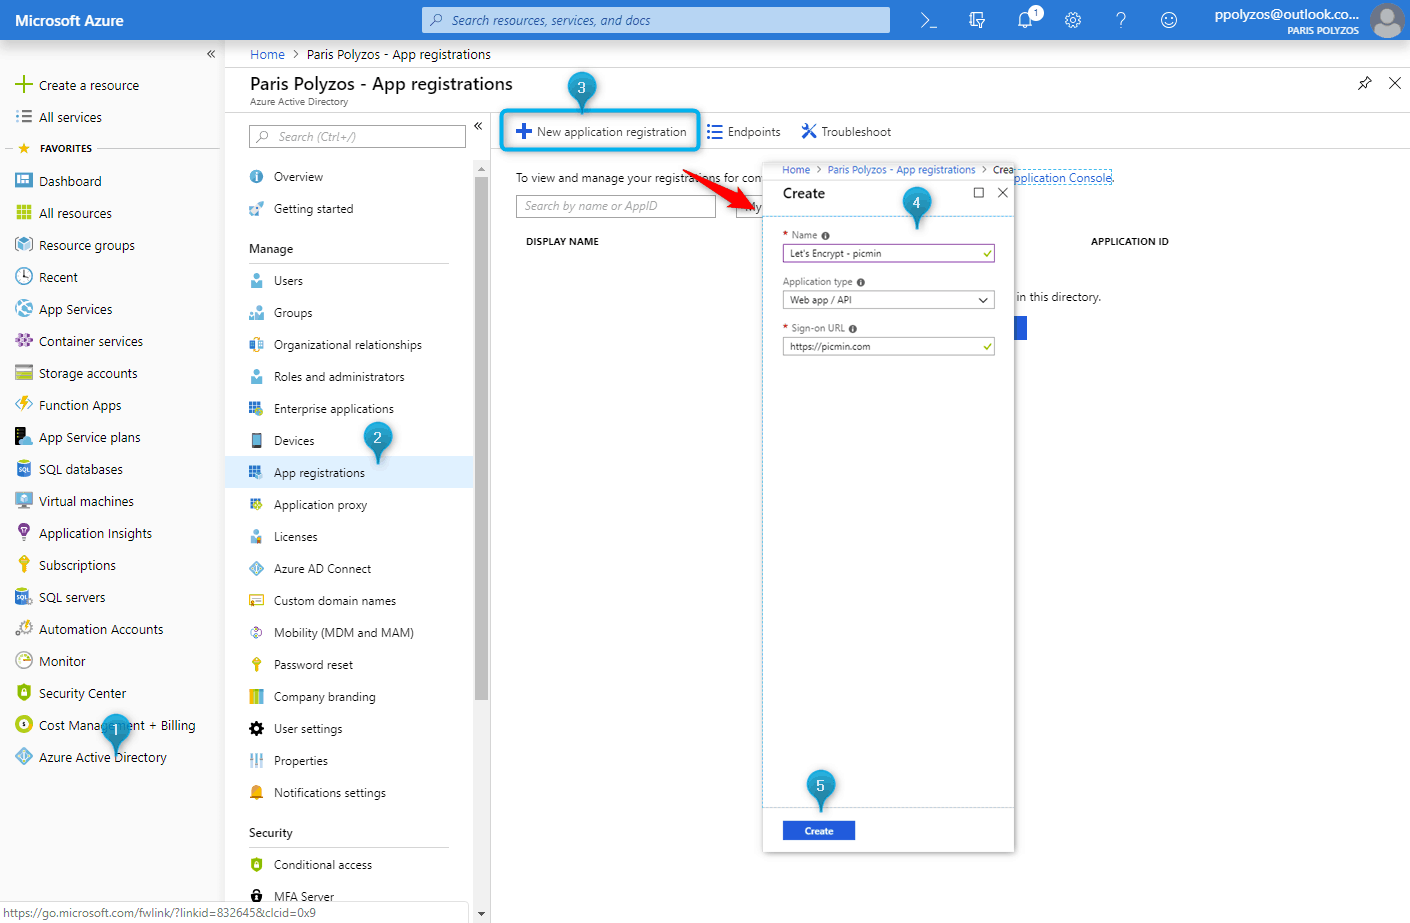
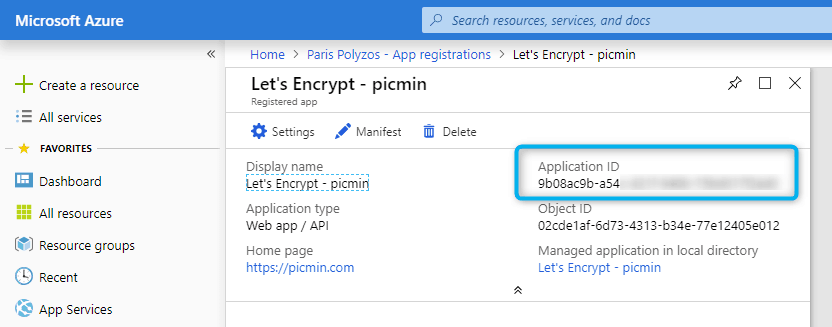
After clicking on the Create button, in a few seconds, an application is going to be registered; from the screen that is going to appear next, you need to keep the Application ID.
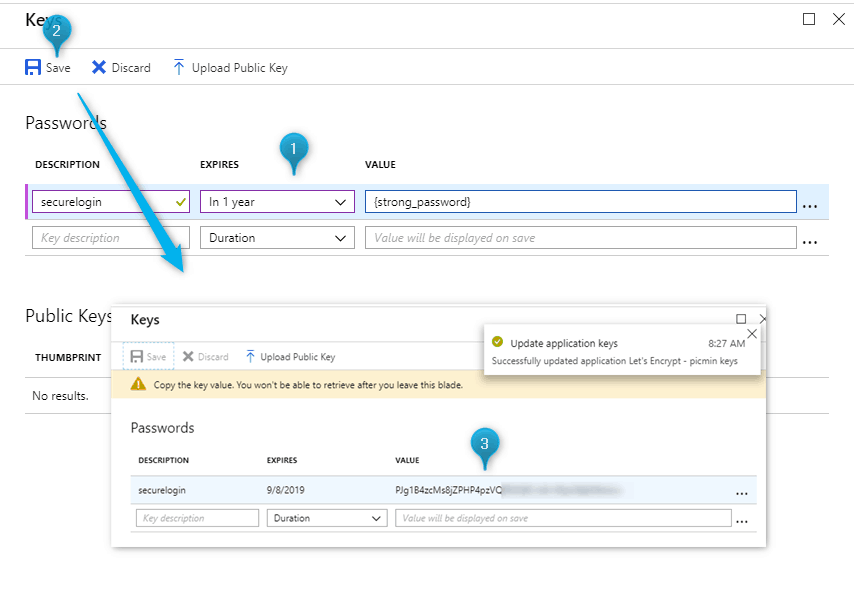
Keys & Passwords
Then, click on the Settings menu item and from the new blade select Keys and, in the Passwords table, add a new entry with “securelogin” as description, “1 year” as expiration date and a password as value.

After clicking on Save at the toolbar above, you will find a hashed value in your entry. As you may see in the relevant notification, you need to copy that value as you won’t be able to retrieve it after leaving that blade.
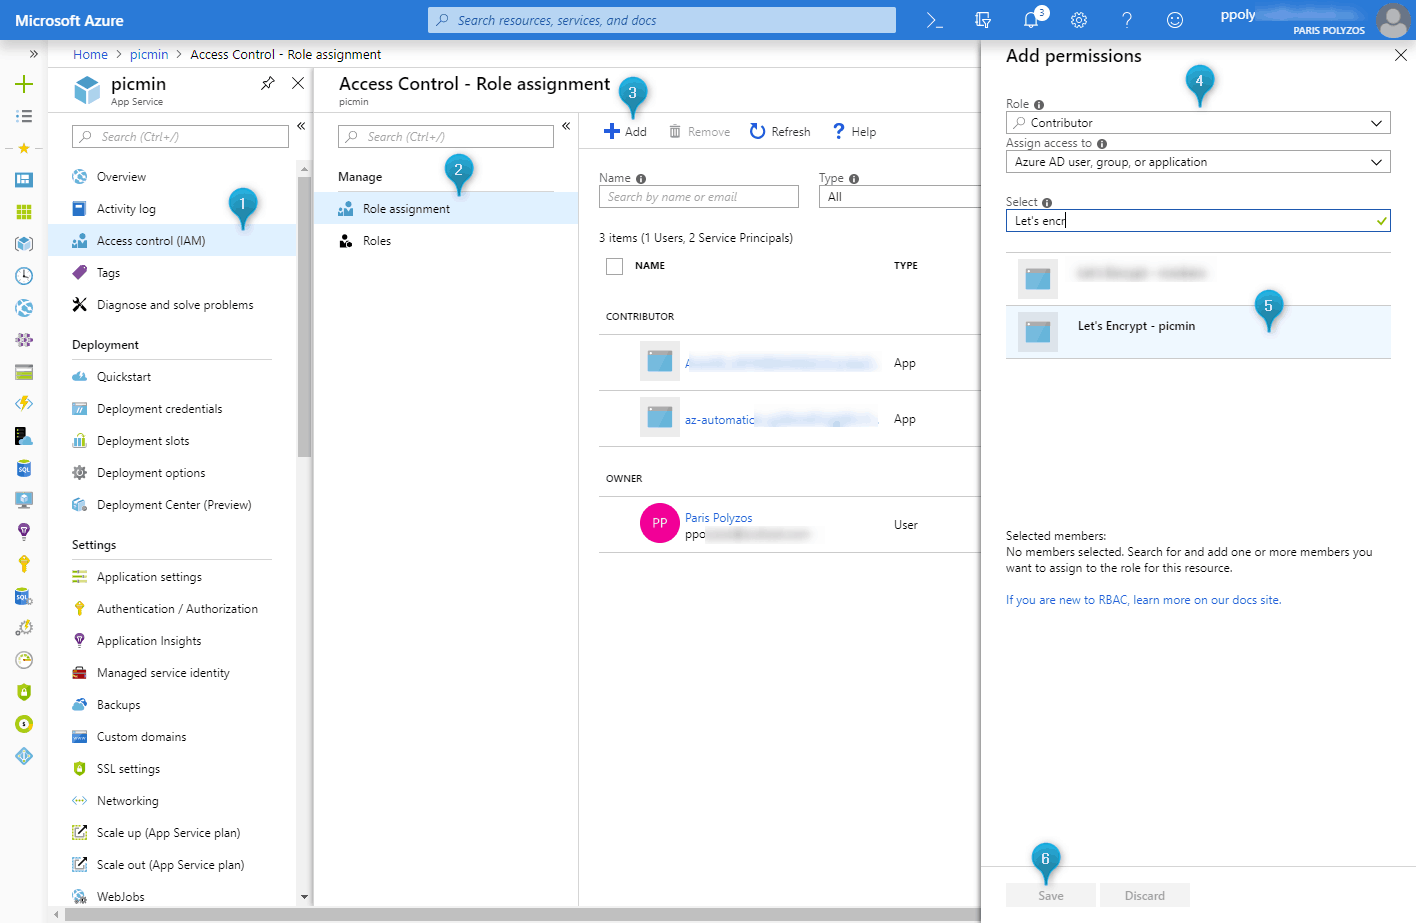
Step 2. Add permissions to your Azure Web App
Next, you need to go to your web application and select from the sidebar the Access control (IAM), then the Role assignment from the Access Control panel, then click on Add menu item and, from Add permissions panel, select Contributor as Role, leave assign access to Azure AD user, group, or application and select the name of the application you have previously registered in the Azure Active Directory. In our case it is Let’s encrypt – picmin; after that click Save.
Step 3. Extensions
In this step you need to assign the Let’s Encrypt Extension to your Azure web app and, to do so, scroll down your options on the left sidebar and pick Extensions from that list.
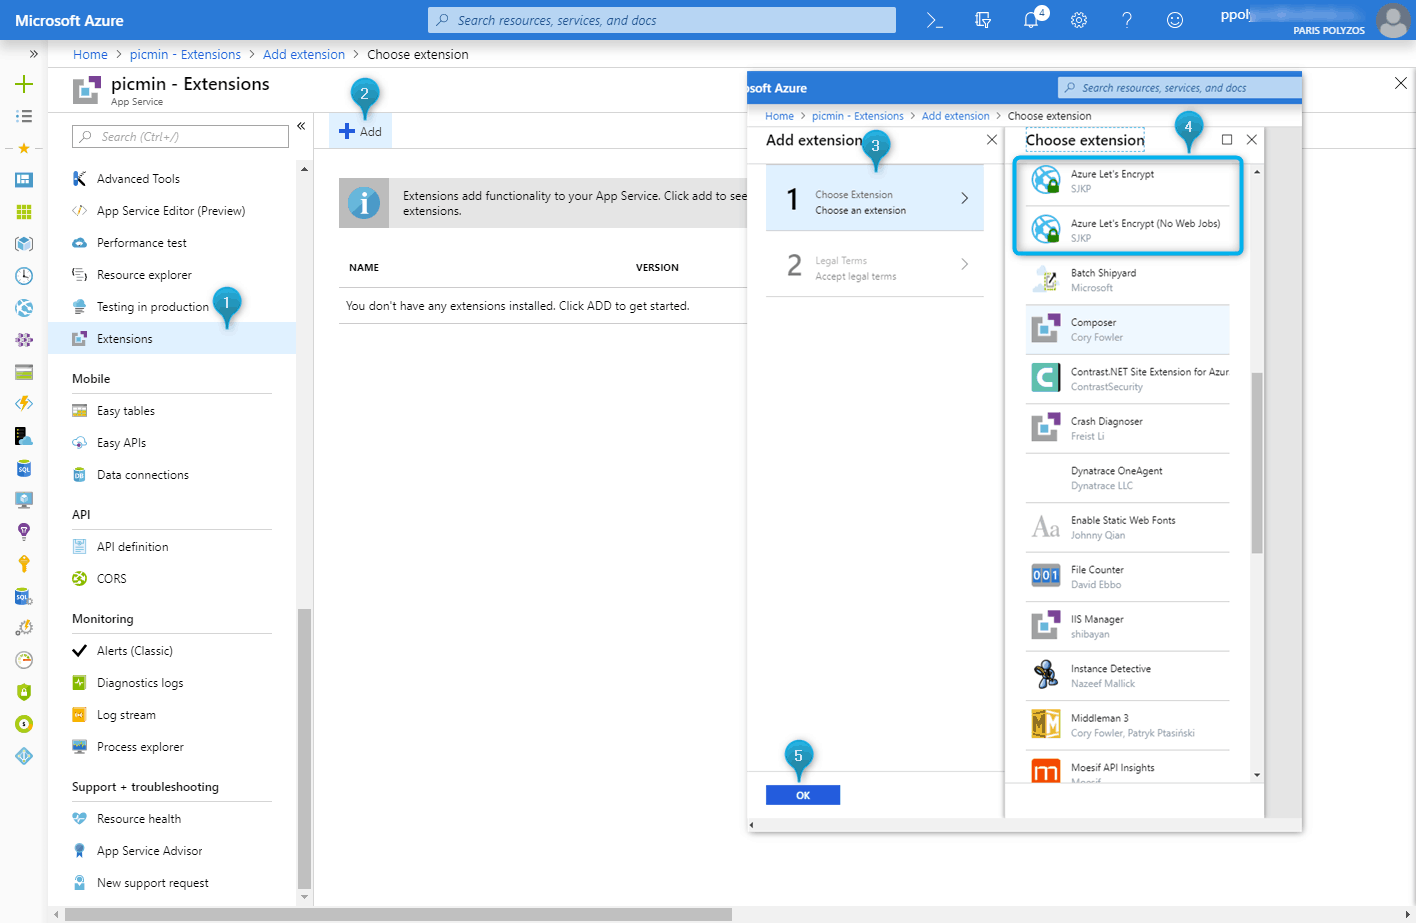
and, after accepting the legal terms, the extension will be setup to your web app.

Step 4. Restart Azure Web App
If you click on the extension name, a new page will be launched with url https://picmin.scm.azurewebsites.net/letsencrypt/ and you may end up with the following error:
“No route registered for ‘/letsencrypt/'”
This is because the application needs to be restarted for Let’s encrypt extension to be enabled.
Restart site using KUDU services
Please note the scm between your app’s name and azurewebsites. This is the KUDU services that provide a set of troubleshooting and analysis tools for your Azure web application.
So to restart your application, you can go to https://{app_name}.scm.azurewebsites.net/SiteExtensions/#installed and click on the Restart Site button at the top right corner.
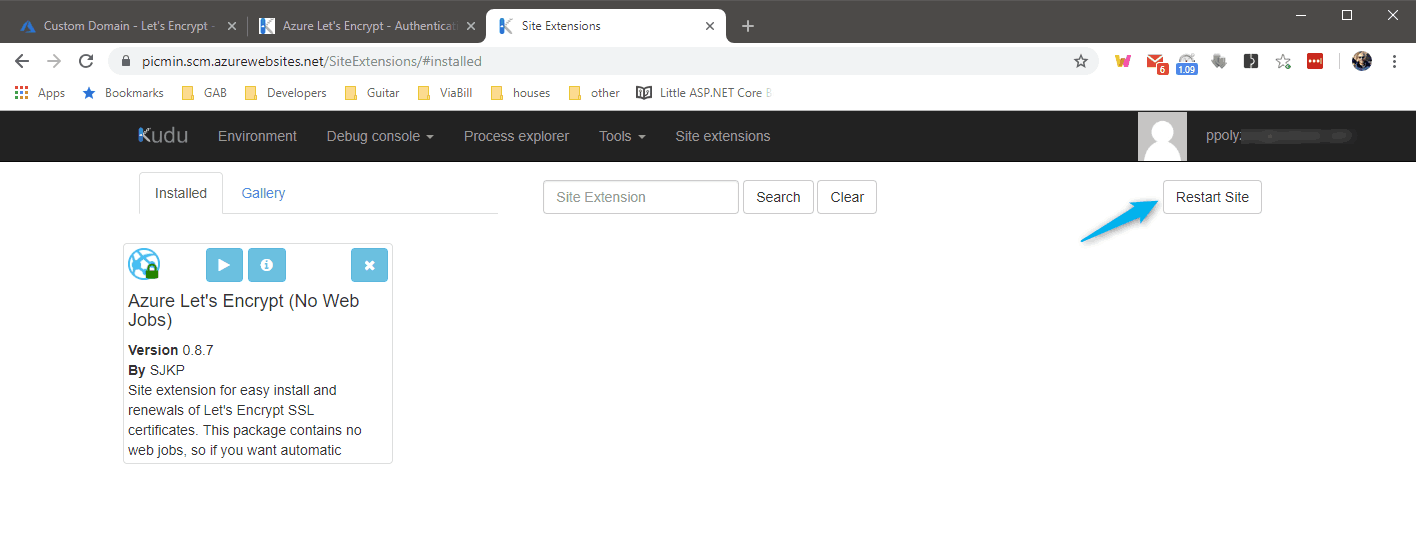
If you want to learn more about KUDU services you can read this post.
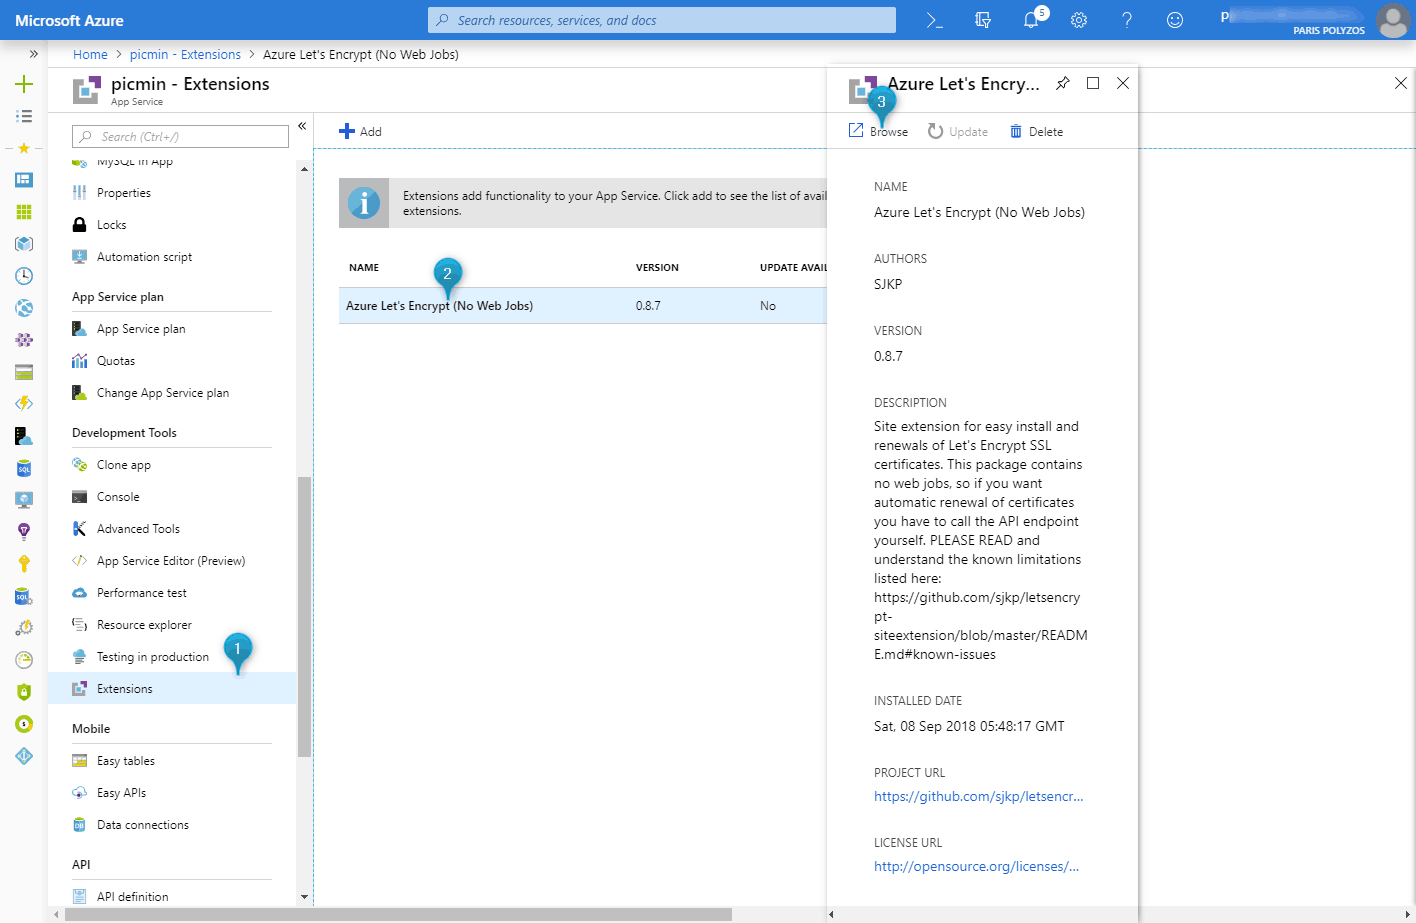
Step 4. Let’s Encrypt Authentication Settings
There are three ways to access Let’s Encrypt authentication settings, by navigating to url https://{app_name}.scm.azurewebsites.net/letsencrypt/,
by clicking the “Play” button in the KUDU site extensions page

or by clicking the name in Extensions panel and then clicking on the Browse link.
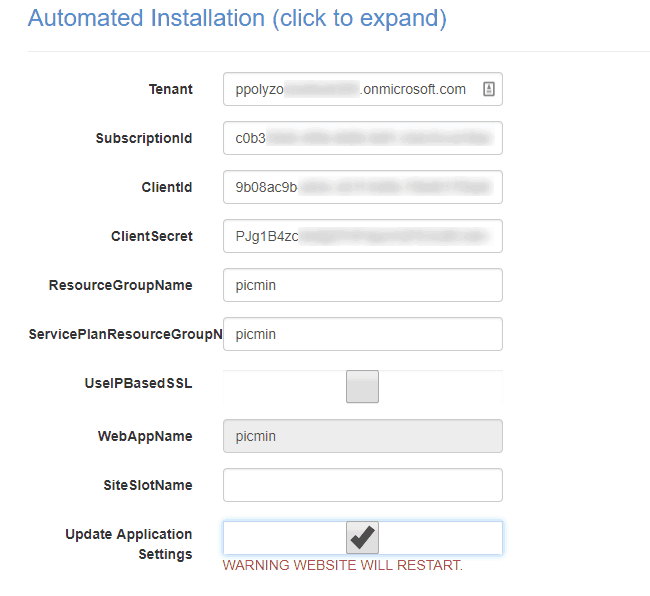
Once you are at the Let’s Encrypt authentication settings,you will have to fill in some information; let us see where you can find this info.
You can get letsencrypt:Tenant by clicking on the Directory and Subscription filter at the top toolbar of the Azure portal:

letsencrypt:ClientId is the value of the clientid of the service principal and can be found in the registered application dashboard, as shown in Step 1
and letsencrypt:ClientSecret is the secret for the service principal which is the value you copied earlier, when you created a new password for “securelogin” in thekeys section.
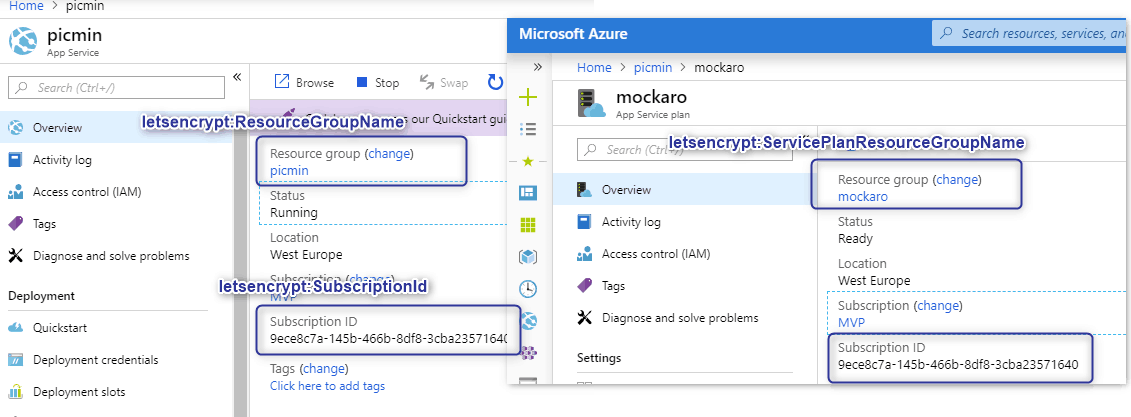
Finally, subscriptionId and resource groups can be found in the web app’s and the app service plan’s main dashboard:
So, Let’s Encrypt settings will look like this:
In the screen that will appear next you can see the custom domains that are associated with your Azure web app:
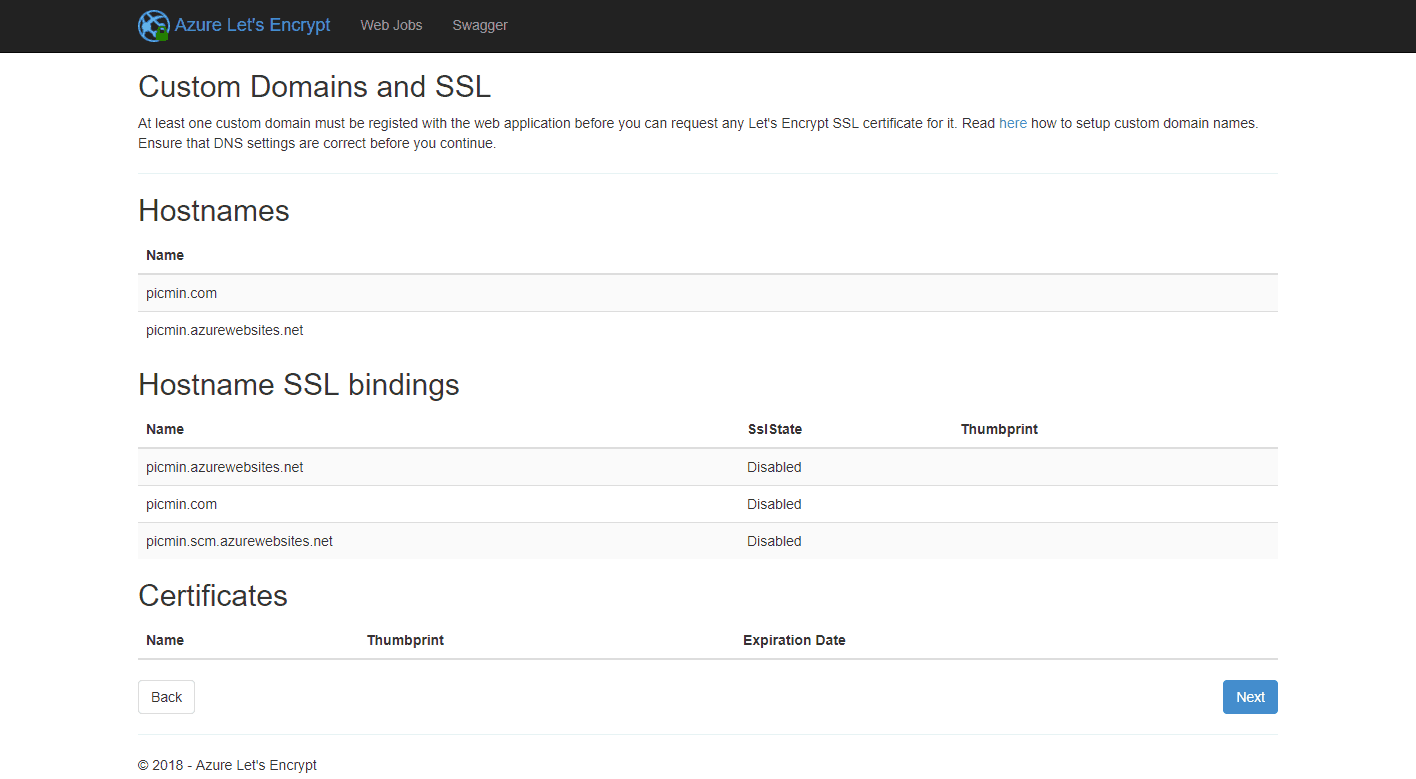
and in the final screen you will need to choose the domains to setup your certificate for

Step 5. Add SSL binding to your web app
Finally, you need to add an SSL binding for your domain and, to do so, you have to click on SSL Settings from the Azure web app options sidebar, set HTTPS Only to On, Minimum TLS Version to 1.2 and add the SSL binding as shown in the picture below:

Hi PPOLYZOS,
I have followed your tutorial step by step but, unfortunately, I have an error at the end of step 4 “Request and install certificate”.
The error is:
Server Error in ‘/letsencrypt’ Application.
Response status code does not indicate success: 403 (Forbidden).
I required a certificate for a second level domain like demo.foo.cloud
I faced the same error creating the certificate on my machine and trying to upload it on Azure.
Any suggestion?
With the first level domain like foo.cloud, I had no problem
Thanks in advance,
Diego
For subdomains you need to repeat the process and you will see the subdomain in the `hostnames` list, as shown in the last picture of step 4.
Sometimes, it takes some time between new domain assignments, however I am not sure if that’s the issue in your case.
Are you trying to add a slot in the same web app or are you creating a different web app?
I saw my subdomain in the hostnames list and I have used it to go ahead. I have tried again but same error occured.
My subdomain is hosted in a separated web app, I can’t use a slot to do a test because the first level domain is my production. Do you think using the same web app it can work? Why?
Thx
Nope, I don’t think that the problem..scm.azurewebsites.net/SiteExtensions/
Let’s try a few more things:
1. Can you do a restart from https://
2. Can you check that you have assigned permissions to the resource group?
Ok,
below my answers:
1 – Done. I have used that page to restart the app for the previous test
2 – Yes, I have owner permissions to the resource group
🙁
And I guess the app service plan is in the same resource group that you have given owner permissions.
And you have created the service principal with the same subscription that your app service and web app are using.
I would suggest to open a support ticket to further help you and check what exactly is happening in your case.
Yes, you are right, I have all the required permissions but, unfortunately,
it still not work.
Thanks a lot for your support, I’m going to open a support ticket.
Best regards,
Diego
Let’s hope for the best 🙂
need to set the application permission under the resource group and not in the app service
I completed the tutorial successfully, thanks for that!
So my certificate now expires in 2 months. So what are the steps to update it? Or will it be automatically updated?
Usually, it gets updated automatically. Otherwise, you ‘ll get an email warning you that your certificate is about to expire and you need to follow some very simple steps so to update it.